YOJ11-04 In Production Mode

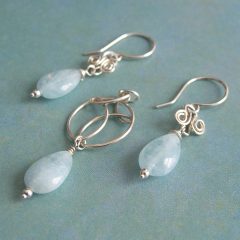
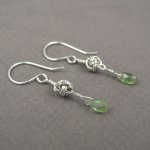
Aquamarine Bridal Set (2011)
Sterling silver, aquamarine
Formed, cold-joined, flameworked
Pendant: L 4.0 cm x W 1.5 cm
Earrings: L 3.8 cm x W 0.7 cm

I had such high hopes this week for getting a lot done.  I did get a lot done, but very little of it related to what I wanted to be doing, which was making jewelry for restocking galleries and for an upcoming studio tour.  Oh well.  As we said when I was a kid:  C’est la vie, c’est la guerre, c’est la pomme de terre…

I’m in production mode and working on things that can be quickly made.  These earrings and pendant are part of a “Something Blue” casual/bridal line.  The stone is aquamarine – a strand I picked up last fall at the GMCS show.  I’m still on a buying moratorium but the icy opaqueness of the stone is part of what appealed to me.  I have very little blue in my stone inventory, because most of the time, blue stones can’t withstand the punishment of tumbling.

I’m actively working through my stash of stones, so pendants and bracelets are also on their way!

YOJ11-03 The Peanut Experiment

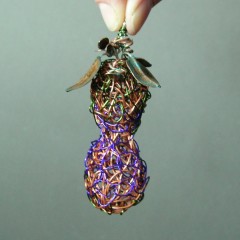
The Peanut Experiment (2011)
Copper, polymer-coated copper, sterling silver
Formed, fold-formed, cold-joined, fused, patinated
W 2.5 cm x H 8.5 cm

.

This week’s entry is actually the end of a several week long process where I experimented with a different method for forming.

This is an idea I’ve been wanting to try ever since seeing a website by a British artist who made life size human figures out of wire.  His name is regretfully forgotten, and the link to his website lost.  What I remember the most – besides the wonderful realism of his figures – was that he built them over a solid core, which was later burned out.

Cores are often used with metal clay for making hollow forms such as boxes or beads.  After some research, I bought some cork clay, and then promptly got too busy to go any further.

Cork clay is usually burned out in a kiln.  Since I’m not interested in making a substantial investment for something I may not stick with, I started researching low-tech alternatives.  I remembered a thread on Ganoksin about using a flower pot kiln for burning out wax.  The Ganoksin archives, while vast and wide-ranging, are frustrating to search, and didn’t provide anything really helpful.  Evenually, I found some basic information elsewhere online for building a flower pot kiln and went about collecting the materials to build one.

I wasn’t sure if the kiln would get hot enough to burn out the cork clay, so I made my first core out of bread dough.  Since it was just an experiment, I opted to do a freeform winding of copper wire around the core.

Finding an unglazed clay pot of an appropriate size in January in Canada is a challenge.  However, I did find one – and only one – at Home Depot.

Once back at home, I lined the pot with tin foil, set up the hotplate on my back deck, put a modified coffee can on the element, added the piece to be fired, covered it, and turned it on.

It smoked a lot, and stunk to high heaven, but considering it was in -12°C and blowing gusts, it worked very well!  The core-free wire looks a bit like a peanut.

Because with the YOJP, a finished piece is supposed to be submitted each week, I decided to also try my hand at making some leaves with fold forming, which were then patinated using salt & ammonia.  They were attached to the peanut and presto! a finished piece.

It’s not pretty, but it wasn’t intended to be.    My next step will be to try again with the cork clay.

Process photos:


YOJ11-02 Peacock Feather Earrings

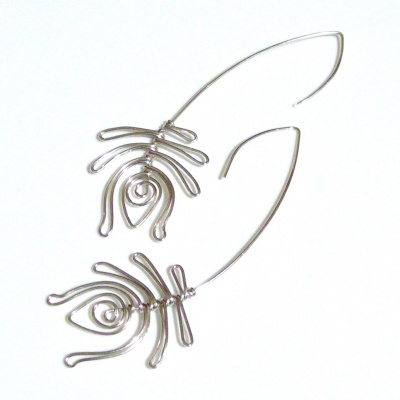
Peacock Feather Earrings (2011)
Sterling silver
Formed
L 8.5 cm x W 2.9 cm

.

I devoted a lot of this week to experimentation, and specifically to working with forming wire over a solid core.  Although my experiment went well, I didn’t finish the project to the point where I can post it.  More about this next week.

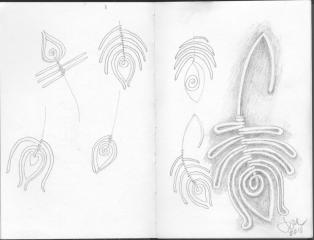
So… it being Saturday, and due date for my next YOJ posting, I went back into my sketchbook and pulled out a design from last summer.

Because of the price of metals, I’ve taken to working out some of my ideas on paper before attempting them in wire.  This is challenging for me because I’ve never been particularly good at translating things from two dimensions into three.

I love sketching, and for a few of the pieces I worked on this summer, I did a more elaborate drawing.  But, I know very well that just because I can draw something doesn’t mean I can build it.

However, I’m getting better at it, and this was one of the projects that worked well on paper and in 3D.

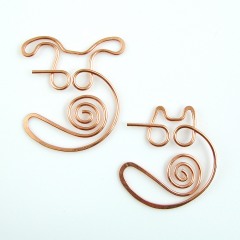
YOJ11-01 Bookmarks for Pet Lovers

Bookmarks for Pet Lovers (2011)
Page Puppy (left), Kitty Klip (right)
Limited Edition of 100 each
Copper, formed, hammered
W 2.2 cm x H 2.5 cm (approx.)

I kick off the new YOJ with some bookmarks for pet lovers!

Page Puppy and Kitty Klip are loyal companions to help you find your place!  They’ll slide onto your page, then curl up for a nap until you’re ready to come back.

Years ago when I was still working on Bay St., I got a package one day with a wonderfully forged spiral paperclip.  I can’t remember anymore what it came attached to, but I thought it was such a subtle and wonderfully creative touch.   Ever since, I’ve wanted to create something similar.  My intention is to use them as promo gifts for my jewellery clients.

These were actually inspired by a game on Facebook called SPP Pets.  It’s like a 21st century tamagachi – you “adopt” a pet, and then feed, tickle, clean and play with it, and decorate its “habitat”.  My kids think it’s fun and are always keen to see what my pet is doing.  The game is a mindless time-waster – perfect for when I need a couple of minutes break – and the communities of “pet owners” are very friendly.  So, the bookmarks are a little tip of the pliers to the Kitty Cat Lovers Club : )

YOJ11-01 Bookmarks YOJ11-01 Bookmarks

yoj, year of jewelry, 2011, dianne karg baron, copper, bookmark, kitty, puppy

The Year of Jewelry Project 2011

The Creative Wire Jewelry Forum is once again hosting The Year of Jewelry Project.  This year the invitation went out on social media as well as the forum, and the response has been tremendous!

The basic concept of the project is “one piece, per week, for a year”.  The participants, who range from newbies to seasoned professionals, set their own goals in terms of what they want to produce and what techniques they want to focus on, but they commit to producing one piece of jewelry each week.

I have participated in this project on and off since its inception in 2004.  Last year, I ended up dropping out after the first quarter because I became overwhelmed by other commitments.  This year, given that I’m doing a studio tour at the end of April, I have added incentive to stay focused.

To find out more and to view the weekly submissions, visit The Year of Jewelry Project 2011 website.

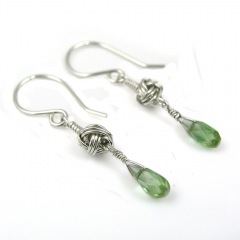
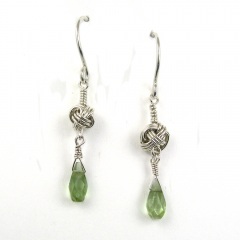
YOJ10-15 Knotted Earrings 3

Knotted Earrings 3 (2010)
Sterling silver, fine silver, tourmaline
Constructed, cold-joined
L 3.7 cm x W 0.5 cm (W 1.45″ x L 0.2″)

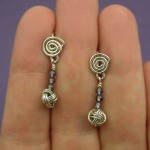
Continuing on from last week, since I made several of the Monkey’s Fist knots, I made another pair of earrings!

I’ve been doing some experimenting with photography lately, putting my pieces on a white background instead of the medium gray.  I’m looking for ways to make the images “pop” more – in my recent work I’ve been using a lot of stones that have the same value as the background, and it makes the jewellery look dull.  “Value” in colour terms refers to how light or dark it is.  (To see check the value of your stone, stare at the photo with squinted eyes – if the stone disappears it has the same value as the background.)  In order for a photo to have visual interest, it has to be either lighter or darker than the background, otherwise the eyes see what’s there, but the brain registers “ho hum”.

It’s a bit more work to deal with a white background – inevitably, and even though I have a white balance setting on my camera – the raw photo comes out slightly grey.  Photoshop can adjust the balance it easily, but then I usually still have to do some extra clean up.  It’s a bit tricky to lighten the background enough to get rid of “noise” but not so much that the jewellery bleaches out.

From a print perspective, (putting on my editor hat for a moment), getting photos with white background is a godsend for layout.  I can plunk them down anywhere on a page and build text around them.  Or I can crop and put several images close together – something that isn’t possible when the jewellery is shot on a grey or staged background.   There are no distractions – you look at the jewellery and nothing else.

While they work for print and web, white backgrounds do *not* work well for jury photos.  I had the opportunity to sit in on a jury for a show recently (something I highly recommend BTW, it’s very educational), and I noticed that the photos with white backgrounds were always very jarring.  Backgrounds with a value of medium to dark (but not black) and *absolutely no props* worked best for jury photos.  Prop shots work well for Etsy, but are distracting in jury.

More photos:
YOJ10-14 Knotted Earrings 2

Knotted Earrings 2 (2010)
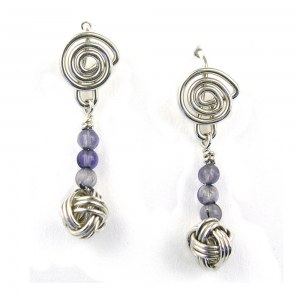
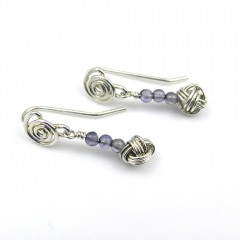
Sterling silver, iolite
Constructed, cold-joined
L 2.5 cm x W 0.7 cm (L 0.98″ x W 0.275″)

My life is all about choices:  if I choose to focus on one area of my life, another area gets sacrificed.  For the past few weeks, I’ve had to focus on some group endeavours, and so my work on YOJ projects ground to a halt.  I’m working towards finding balance, but haven’t found it just yet.

For this week’s project, my focus was on making bridal jewellery.  My thoughts were on “something blue” and “tying knots”.

The Monkey’s Fist is a classic macramé knot, usually used as a weight or ornament on the end of a rope.  Tying them in rope is relatively easy.  When I learned it as a child, it was just a matter of sticking a marble between two fingers, and wrapping the rope around the marble and fingers, then around the marble through fingers and then through the loops created by the fingers.  Then the loops were pulled tight.

In wire, the stiffness of the metal, and its tendency to kink makes tying challenging.  There is also the issue of trying to get the proportions right:  thinner gauge wire is more flexible to tie, but the knot becomes very small and fiddly.  I found it impossible to tie wire around a bead without it slipping all over the place.  Pulling the loops tight at the end was also a non-starter, so I had to make the initial wraps as close to round as possible – challenging since without a bead in the centre, the tendency is to wrap ovals.  I ended up creating an invent-a-tool to help.

It took a bit of practice to get consistent results (doesn’t everything?), but I did end up with a satisfying “knot”. To get the “blue” part of the earrings, I decided on adding some pale 2 mm iolites. I would love to try these in a larger gauge of wire, but I think that would really only be possible with fine silver.  Sterling just gets too stiff too fast.

More photos:
YOJ10-13 Ancient Whispers Earrings

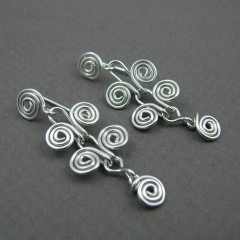
Ancient Whispers Earrings (2010)
Sterling silver
Constructed, cold-joined
L 4.3 cm x W 1.3 cm

It’s been another productive week here in the studio, with two new ring designs (destined for tutorials), some bridal jewelry and this pair of earrings made.

The earrings are the product of some work I’ve been doing on a proposal for a one-day course.  The idea is to teach ancient techniques.  This pattern is assumed to be ancient Egyptian.  It was all but lost to time before being reintroduced in the 1840s by the House of Castellani.   The Castellanis were greatly influenced by jewelry found in excavations of ancient Etruscan sites.  As fervent nationalists, they studied the pieces coming out of the sites, and painstakingly reproduced the jewelry, in what became known as the Italian Archeological Style.  The Museo Nazionale Etrusco di Villa Giulia in Rome has in its collection a “Prehistoric” bracelet, manufactured by Castellani, which today’s wire artists would recognize as a variant of the Egyptian scroll.

The Etruscans had trading relationships with the Syrians, Phoenicians and Greeks, who all traded with the Egyptians, so it’s conceivable that the design traveled from the Nile Basin to Ancient Italy.

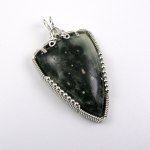
YOJ10-12 Ocean Jasper Pendant

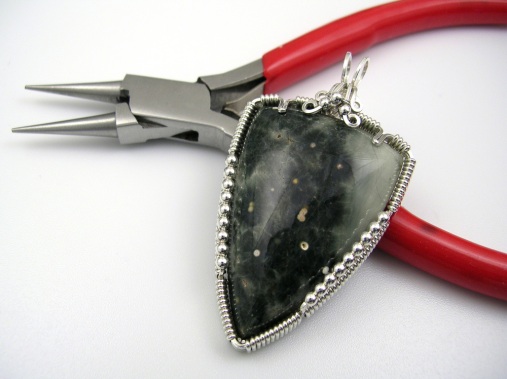
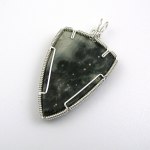
Ocean Jasper Pendant (2010)
Sterling silver, fine silver, ocean jasper
Constructed, cold-joined
L 5.4 cm x W 3.0

I’m in production mode, building up some stock, and that means digging through my stash of stones.  I came across this ocean jasper, which I bought last year from a fellow member of the International Guild of Wire Jewelry Artists.

I’m not normally an ocean jasper fan, but every time I look at this cab, I see celestial clouds and galaxies.  It draws me in, and I can imagine that I’m looking into the vastness of outer space. This is a really special stone.

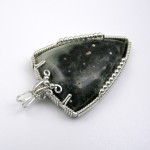
Generally, my preference when setting is to leave as much of the surface exposed as possible. I also tend to favour the more substantial, heavier bezels achieved by doing binding wrapping all around the stone.  It would have been easiest with a straight prong setting, but I wanted to add the beads to create some visual interest.  They are structural in that they act almost like prongs, holding the stone, but they also add beautiful decoration.

Corners are challenging to get tight, and I’m happy to have managed a secure fit around these.  I don’t have a lot of experience setting stones with points – most of the time the stones I deal with are round, oval or teardrop shaped.

I’m undecided if I should hang this on a viking knit chain, or on a strand of ocean jasper beads. Thoughts anyone?

All in all, I’m very pleased with how this turned out.  Even my husband, who has a decided bias towards using a torch, likes the setting – very high praise indeed!

More photos:
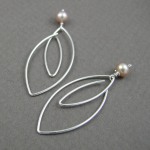
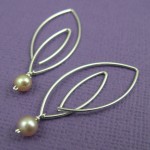
YOJ10-11 Marquise Series: Bridal Earrings

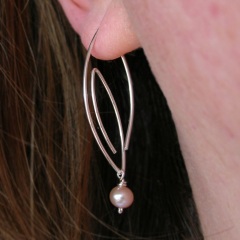
Marquise Series:  Bridal Earrings (Interchangeable) (2010)
Sterling silver, pearl
Constructed, cold-joined
L 4.0 cm x W 1.6 cm (L 1.57″ x W .55″)

I was sitting at my computer on Tuesday night, minding my own business,  when inspiration struck!  It was one of those “bolt out of the blue” ideas that forced me to get up right then, get my pliers & wire and start bending.

*Contented sigh*

I love it when that happens.

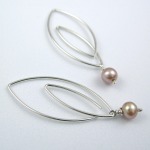
This design fulfills a long-standing desire of mine to create a pair of earrings with interchangeable bits.  The pearl drops can be removed and replaced by other drops, or can be left off altogether.  The result is a very versatile earring that can be worn with everything – from dressy to casual.

The sleek styling makes this an elegant earring for a wedding:  With the pearl, it can be worn by the bride, or without, by her bridesmaids.

These earrings are available from my Etsy Shop.

More photos:
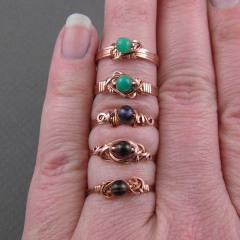
YOJ10-10 Ring Week at the Studio

Copper Single Bead Rings (2010)
Copper, iolite, smoky quartz, amazonite
Constructed, cold-joined
Various sizes

It’s ring week here at the studio!

For a long time, I’ve been wanting to develop an original method for constructing a single bead ring, so this week I spent some time playing around with a couple of ideas.  The one I teach in my course at George Brown College is Mavis Llewellyn’s One Bead Ring (published in The Wire Artist Jeweller, September 1999).  According to her daughter Susan, Mavis developed the design back in the late 70s-early 80s as a quick-to-make-project to sell at shows.

Other single bead ring patterns are easier to make (i.e. 3-minute ring), but the shanks (to my eye) are sloppy looking.  In square wire, they often look tortured. If you’re looking for something quick and dirty to sell for $8 and you work “organically”, then Bob’s Your Uncle…

The thing I like most about Mavis’ design is how elegant it looks, especially the shank.  The ones I produced this week haven’t achieved anything resembling elegance or consistency yet, but I’m happy to have made progress.

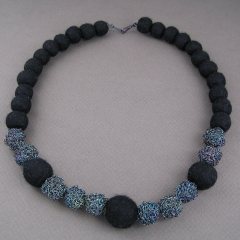
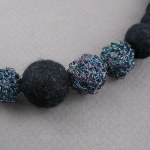
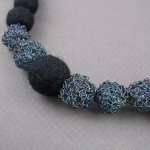
YOJ10-09 Felt & Crochet Bead Necklace

Felt & Crochet Bead Necklace (2010)
Fine silver, merino wool, Beadalon stringing material, crimp beads
Crochet, felted, assembled
L 47.31 cm x 17 mm (largest bead)

I mentioned in my Week 6 post that I was making felted beads, and now I can share the results of that effort.  Initially I was going to pair the felted beads with the crochet beads just as I’d made them, in fine silver white.  Then it occurred to me that over time, the silver is going to tarnish, and the necklace will be difficult to clean without taking it apart.

The solution was to add LOS to the silver.

Liver of sulphur stinks to high heaven, but it creates such interesting effects, especially when a bit of salt is added into the solution!  I love how the colours change, and in this case, how they became mottled in the purple-blue range.

A friend of mine asked me to produce a bunch of pieces for her to use in the fall for a fashion show, so this is going to be one of the things I send her.  It’s not my typical style, but it will work well with the clothing being shown.

More photos: