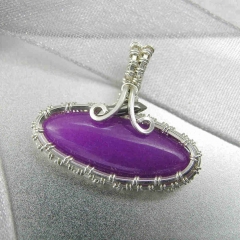
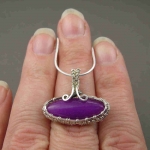
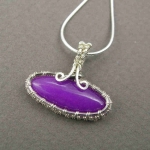
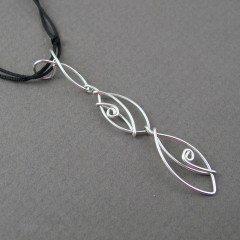
YOJ09-46 Marquise Series: Pendant 1

Marquise Series:  Pendant 1
Sterling silver, fine silver, cord
Constructed, cold-joined
L 6.1 cm x W 1.0 cm

One of the jewelry groups on Facebook is currently running a design contest to “overcome the economic crisis”.  The idea is to use cheaper materials to reduce the price point of the finished piece.  The problem I see with the contest is that the value of the physical effort involved is completely discounted.  The cost of the labour stays the same regardless of the materials used.

The only way reduce the cost of the labour is to simplify the designs so that they take less time to make.

There are two challenges to making simple designs:  one is to make them well, because the simpler the design, the more important the finishing becomes; the other is coming up with an original concept, something that will appeal to the customer without looking like the same old same old that someone else has produced.

I think the latter is the harder of the two to overcome.

This was the background I was thinking about while making this pendant.  The goal was to produce a nice, quick-to-make design, that could become part of my bread-and-butter line for next year.  As much as I like making the complex one-of-a-kind pieces, most of my sales fall in the in $20-$150 price range.

Without the neck rope, the pendant on its own would fall easily in the lower end of that range.

It’s been my experience that chains are uneconomic for me to make from scratch, and that was proven true again with this piece.  The labour involved in making the neck rope bumps the price up substantially, and the change to the cheaper material (polymer cord) has a huge impact on the perceived value.  I end up with a piece that is not sellable at the price I need to sell it at to recoup my costs and actually pay myself.

It’s perverse.  It’s also why I don’t generally use “cheap” materials.  I want you to feel good about what you’re buying from me, so I make high quality jewellery, with high quality materials.  It’s worth every cent.

YOJ09-45 Marquise Series: Bracelet 2

Marquise Series:  Bracelet 2
Sterling silver, fine silver
Constructed, cold-joined
L 19.5 cm x W 1.4 cm

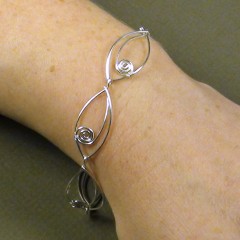
The next step in developing the Marquise Series was to add some form of embellishment, like a spiral.  To give this bracelet a bit of visual interest, I decided to alternate the links in mirror image.  They remind me of fish, and a bit like the stylized birds from the Partridge Family tv show.

I debated about using solder to join the spiral to the frame, and then decided that I wouldn’t save enough time doing that to make any difference in price of the finished piece.

YOJ09-44 Marquise Series: Earrings 1

Marquise Series:  Earrings 1
Sterling silver
Constructed, cold-joined
L 5.4 cm x W 1.4 cm

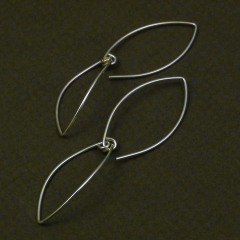
The next logical step from the Bracelet I did for YOJ09-43 was to make a pair of earrings.  I liked the idea of making the earwire in the same shape as the link – it gives the earring a chain-like look.

YOJ09-43 Marquise Series: Bracelet 1

Marquise Series:  Bracelet 1
Sterling silver
Constructed, cold-joined
L 19.5 cm x W 1.4 cm

I’m doing a serious push to get caught up on my YOJ projects before the end of the year.  It’s sort of cheating, because I’m working on a bunch of things all at once, and posting it all in a very short time frame, but so be it.

The other week I was working on my Secret Santa project for this year, and it inspired me to explore some other ideas.  (I can’t post the SS photo until after Christmas, so it will be a few days yet.)

This week, I started working on what has become a new series of pieces,  all using a marquise shape as the starting point.

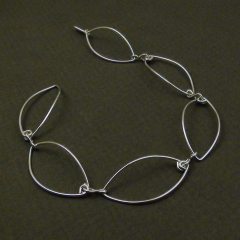
This is the first bracelet from the series, which is just a simple marquise link.  This is such a basic shape to make that I can’t imagine it not having been done elsewhere.  It’s a good start point to develop other designs though.

I have no shame, we all start somewhere…

As a follow-up to my rant, I thought I should post a photo of some of my earliest work.  When I’m teaching raw beginners, I always suggest that they should keep their first pieces, so that years from now they’ll be able to see how far they’ve come.  I have a box full of my early pieces.  Most are completely unsellable, and some are butt ugly, but I remember being so proud of them when they were first made.

DianneEarlyJewellery

Some years later, I was dating a accountant who collected Inuit and Native art, and had a taste for the finer things in life:  Cuban cigars, $50/shot whiskey and Angus beef.  He had a very discerning eye, and was very willing to tell me when the work I produced did not show “The Spark of Divine Madness”, as he called it.  His criticisms, though sometimes really hard to hear, helped me to gain an understanding of where I needed to improve.

Outside of a formalized education environment, there are very few opportunites to get truly constructive feedback.  It’s frustrating to submit your work to a show or a publication and have it rejected without any explanation.  It shakes the ego, and it’s hard not to question every aspect of what you do as a result.  Is my work no good, did I not take good photos, was my artist statement crap? What??

The International Guild of Wire Jewelry Artists recognized the need for this type of mentoring, and set up a special section on their message board specifically for honest critique.  It’s sometimes a challenge to suspend attachment to the piece being critiqued; it helps to know that the observations are made with open hearts in the true spirit of helping each other improve.  I’ve used it myself and gotten immensely valuable commentary.

Alot of the energy behind my rant stemmed from knowing the impact on newbies when they learn the proper foundation skills.  The ability to create quality workmanship results in a corresponding increase in confidence and self-esteem.

Because wirework is perceived as being easy to do, special attention needs to be given to helping the public and the makers understand the importance of learning the right skills the right way.  As the full-time students who took my class found out, working with wire can require a high degree of dexterity, even for “simple” projects.  Many of them found it much more challenging than they expected.

Several people who responded to the discussion on one of the forums asked for further information about wire control.  I’m in the process of working something up and will publish it when it’s ready.

Almost 15 years ago, I started with these bits.  They are my reminder that we all start somewhere. Where we end up depends on a combination of our own drive and the support of those around us.

(Thanks to George, wherever he is, and to Karen and Jennifer.  And special thanks to Jacqueline, who at age 5, crawled up on my lap, and while fiddling with the pendant on the leather cord above, said “Y’know, I knew I was going to like you the moment I met you.”  When asked why, she said quietly:  “Because you make great jewellery!”)

A Rant about Quality & Best Practices

Bang Head Here

For at least a decade now there has been a very concerted effort to bring wirework into the mainstream consciousness.  Many people have dedicated a lot of time and effort to raising the profile of wire – and specifically solderless wire – as a legitimate medium for fine craft.

Thanks to the efforts of these people, and the influence of the Internet, wire artists have been able to show their work, and to connect with each other to share their passion for this form of metalworking.

In recent months I’ve noticed a change in attitude even amongst seasoned metalsmiths.  Where previously wirework was written off as not worthy of consideration, I’m seeing it given more prominence.  For example, The Metal Arts Guild of Canada – the Canadian equivalent of SNAG – is currently featuring the work of Sarah Williamson on the front page of its website*.  Sarah incorporates a lot of Rainbow Wrapping into her pieces.  In MAGC’s recent exhibition, not only my work, but also the wirework of Tamara Kronis, Lissa Brunet and Gillian Batcher figured prominently.

I see genuine interest light up in the eyes of people who ask me what I do, instead of watching them turning away and copping an attitude of “Oh… you don’t make “real” jewellery.”

Unlike 10 years ago, information on making wire jewellery is easy to find.

All of these developments are very positive.

Anyone who has followed this blog for any length of time knows that I am committed to producing quality work.  Anyone who has taken a class with me, or who has bought one of my tutorials knows that my commitment to quality also extends to my teaching.  One of the most treasured compliments I’ve ever gotten came from a Professor at George Brown College who taught the full-time jewellery program’s first year courses.  She greeted me one day while I was setting up for my class, and said that she had “heard good things” about my course.  I’m very proud of the fact that several people who took my class enjoyed it so much that they went on the enroll in a full-time jewellery program.  It’s equally gratifying that students from the program have joined my class and showed openness to this alternative form of jewelry making.

So… it drives me crazy when I see self-styled “instructors” churning out tutorials that teach bad technique.  Worse still is when I see a publication which positions itself as an industry leader allowing bad technique to be showcased without making the slightest effort to ensure a reasonable quality of workmanship.  It makes me want to bang my head in utter frustration.

I happened to pass by a local newsstand yesterday, and decided to stop in to see if any of the magazines I regularly peruse  were in.  I flipped through the latest issue of Step-by-Step Wire Jewelry.  SbSWJ is the only magazine since the demise of The Wire Artist Jeweller to devote itself exclusively to wirework.  In all honesty, it can only be regarded as the poor cousin of the latter.  Certainly, the projects are more simplistic – most are geared towards beginners – but to some extent I can understand that.  There is a limit to the number of steps that can be included to make each project when you’re showcasing 10+ designs an issue.

One of the projects was a neckpiece, attractive enough and easy to make.  It used square wire, also not a problem.  Here’s what made my jaw drop:  the right half of the necklace was riddled with components where the wire had gone “off square“.  What that means is that the artist did not have control of her wire.

Square wire bent around something curved like round nose pliers or a ring mandrel has a tendency to want to turn on its edge.  As a result, what you see is the corner of the wire rather than the smooth surface.  Maintaining control of the wire is vital for ensuring that the finished product looks nice, otherwise you’ve wasted your effort.  Any artist that cannot control their wire has no business trying to teach others.  It’s a waste of the students’ time.

There are a bunch of issues I see here:

First, by allowing the photo of this project with its poor workmanship to be published, SbSWJ is telling the wire community that not paying attention to the details is okay.  IT’S NOT OKAY.  Historically, it’s the lack of attention to detail that has caused the greater metalsmithing community to dismiss wirework.  Publishing crappy workmanship undermines the efforts of all of the people trying to educate the public and raise the profile of the craft.  This is a huge deal to the people who do wirework professionally.

Some might argue that they’re not interested in doing it professionally, that they are only interested in making it for themselves or as gifts for friends and family.  Okay fine.  Learning to make a piece well makes it that much more special and treasured.  It’s worth the effort.  The magazine still has a responsibility to provide the best visuals and instructions for accomplishing that goal.

Some might argue that the magazine can only work with what they’re sent.

To this I say:  BULLSH*T

I’m the editor of a magazine that publishes three issues a year.  Yes, it is difficult to deal with images that are poor quality.  But here’s the thing:  when SbSWJ published my Ladder Pendant project in March 2005, they asked me to reshoot some of the images, because the quality wasn’t good enough for print.  It is up to the magazine to set the bar and that includes setting the bar for the editorial content.  A magazine that purports to teach should at the very least START with insisting on proper technique.  Anything less does not service the readership, and people will stop buying the magazine.  Wire control is one of the fundamental techniques and SbSWJ is failing in their mandate.  Subscribers should be writing to the magazine and DEMANDING better.

As an artist, it’s a huge deal to be published.  It’s a fabulous achievement.  I still remember the high I felt being published in a major magazine for the first time.  Your work is out there, getting attention, filed in the Library of Congress, available for people to read about 5, 10, 25, 50 years from now.  So.. why would you submit something that is less than absolutely perfect? Is this really how you want posterity to see you?

As an instructor, if you can show that your workmanship is of the highest quality, being published is a stellar marketing tool.  Your tutorials will be in demand.  You’ll have repeat customers.  You’ll make more money. It’s not just about making money though, it’s about mentoring.  People just starting out want the best information available.  They want to do well, and it is the instructor’s responsibility to help them take the baby steps that builds their confidence in their abilities.  Not everyone will be able to make a virtuoso piece, but if the instructor’s work is not much better than the beginner’s first efforts, there is no chance at all for the student to develop the necessary skills to even make the attempt.

Step by Step Wire Jewelry, in its writers guidelines, states that their readers are “active amateurs and practicing professionals”.  By publishing workmanship that is blatantly unprofessional, they are not doing themselves, their contributing artists or their readers any favours; in fact, they are actively damaging the larger wire jewellery community.  They have an opportunity to take a leadership role in fostering best practices for quality.  There is no excuse for not taking it.

* Disclosure:  I am currently a member of the MAGC Board of Directors, but I do not participate in choosing who gets featured on the front page of the website.

YOJ09-41 Goddess Jewels

Goddess Jewels (2009)
Constructed, cold joined
Sterling silver, Preciosa crystal

The opening of the Metal Arts Guild of Canada exhibition “MAGC 2067 – Crafting the Future”, held on November 7 at Arta Gallery in Toronto, was a costume ball.  In connection with the theme of the show, people were encouraged to dress up in character.

I originally planned to wear a costume, but then, in the week before the opening, the issue I had been dealing with in my personal life came to a head.  Although able to attend, I didn’t have the emotional or physical energy to dress up.

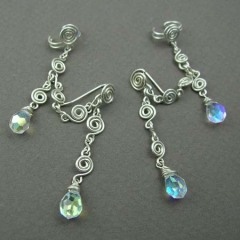
My character was “an acolyte of the Goddess” – a jewellery maker for a matriarchal society devoted to worshiping a Gaia-centred deity.  As part of the costume, I made a couple of “Goddess Jewels”.  These are very loosely based on Bajoran earrings, of Star Trek fame.  My version has a chain of handmade spirals, two Preciosa crystal drops, because I love dangles and sparklies, and is worn via an earcuff on the centre of the ear, and a spiral earwire through the lobe.

I used to wear these a lot, and had forgotten how much fun they are.  It’s been several years since I made one.  Usually only worn on the left side, this time I wanted the pair.  Someone took this photo of me at the opening, where you can see one of them.  The whole set of photos from the show is worth a peek.

YOJ09-40 Knotted Tourmaline Earrings

Knotted Tourmaline Earrings (2009)
Constructed, cold joined
Sterling silver, fine silver, tourmaline

Recently members of the Starving Artists Etsy Team did a critique of my Etsy shop.  One of the comments that came up a couple of times was that my descriptions tend to be a bit on the sparse side.  I generally give information about the piece, what it’s made of, basic sizing, etc., but only rarely is there a “story”.

My reply to one of the ladies who asked me about this was “Well, sometimes the design is the result of nothing more than “I had this idea and decided to play around with it.” ”

The truth is that I just have no talent for writing bullshit.  What I write has to feel authentic, otherwise it doesn’t work for me.  Hmmm…. maybe I need to look into a creative writing course…

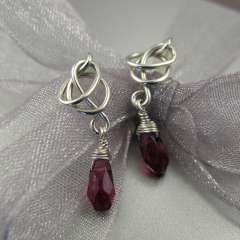
Anyways… I was playing around with some scraps of wire left over from working on my Clip-on Earrings tutorial.  I tied the wire up in a small knot – not quite as tight as I would have liked, but it worked.  I have a “thing” about dangles, so I added these little tourmalines.  I love the vibrant pink – they’re just juicy!  The result is a cute pair of earrings that works for everyday wear.

The SATeam critique did confirm one thing: my photography is pretty good. It never stops surprising me how much time it takes to get the photography done. Nowadays, I’m not only doing photos for my regular record keeping; I’m also doing set up for Etsy. “Product” photography is different from jury photography – attention must be paid to angles, and multiple positions. A lot of people on Etsy photograph on elaborate backgrounds. I have yet to find one that works for me, so I’m still working with the “jurying grey”.

Photographing studs is difficult at the best of times, but these earrings were particularly challenging. There was just no good way of laying them nicely to get a straight-on shot. Finally, I decided to cut a upright display card out of an old layout board and poke holes in it. Voilà! It worked!

Other views:

YOJ09-39 Oblong Purple Jade Pendant

Oblong Purple Jade Pendant (2009)
Constructed, cold joined
Sterling silver, fine silver, purple jade (dyed)
L 2.2 cm x W 2.5 cm

Okay, so life fell apart for me two months ago, and I’m just starting to recover.  I have not been making much new jewellery, but I am going to still try to keep up with the YOJ postings.

I got this purple jade cabochon through a Bead Box swap several years ago.  Those Bead Boxes were lots of fun:  the idea was to put in things from your stash that you weren’t using and swap them for beads that other people had put in from their stash.  I was the Bead Box Mama who organized the whole shebang for Bead Box North, which traveled around Canada and the Northern US.  It was a lot of work, but every time the box arrived on my doorstep, it was like Christmas Day!  I managed to keep it going for about three years.

Purple is my favourite colour, and I’m always drawn to it.  For this pendant, I wanted to work with the same sort of weaving I did on the Moonrise pendant, but on this smaller cab.  Well… the cab’s shape proved to be quite a challenge:  getting the wire to fit around the pointed ends was very tricky.  After multiple attempts to get a pendant that hung lengthwise, I gave up and set the stone sideways.  It ends up looking a bit like a genie bottle 🙂

Other views:

Tutorial – Clip-on Earrings

For people who don’t have pierced ears, finding handmade earrings they can wear is a real challenge.  Back when I did shows, I’d occasionally get requests for clip-on findings, and lost sales because I didn’t have them.  Commercial findings were not an option for the types of shows I was doing.

So when, about a year ago, someone posted a message to one of the forums I’m on asking if there was a pattern for clip-ons, I thought “What a great idea!”.  I got out an old pair of my mom’s clip-ons and studied them to figure out a way to make a pair in wire.   And today I’m very pleased to announce the release of a new tutorial – Clip-on Earrings!

Clip-OnEarrings-Main

The Clip-on Earrings tutorial includes two variations:  Variation 1 makes a basic spiral, with a loop for adding a dangle.  Variation 2 forms a base on which you can add your own embellishment, so if you have a favourite bead, or button, you can add it.  Variation 2 also has a loop for adding a dangle.

13 pages, 45 photos and 40 steps
USD $8.00

Level of Difficulty:  Easy

Tools and Materials You’ll need:

Tools:
3-Step Pliers
Flat Nose Pliers
Round Nose Pliers
Flush Cutting Wire Nippers
Permanent Marker
Measuring Tape/Ruler
Jeweller’s File
Rouge Cloth
10 mm Dowel/Knitting Needle (for Variation 2)

Materials:
15″ (38 cm) 20 ga. Hard Round Sterling Silver wire

Substitutions:
20 ga Half Hard Silver wire can be substituted.

Available from my tutorials page and my Etsy Shop.

Tutorial – Art Nouveau Bangle

I’m pleased to announce that my newest tutorial, Art Nouveau Bangle, is now available!

This bangle features lovely flowing curves and Celtic elements that were common in the Art Nouveau period.

The project was a big hit with my students at the Haliburton School of the Arts! Once you have the basic technique down, you can easily adapt the design and let your creativity flow to create your own variations!

16 pages, 103 photos, 110 steps, plus design notes
USD $15.00

Level of Difficulty: Advanced

Tools and Materials you’ll need:

Tools:
Flat Nose Pliers
Round Nose Pliers
Flush Cutting Wire Nippers
Permanent Marker
Measuring Tape/Ruler
Bracelet Mandrel
Penknife
1/4″ dia. Masking Tape
Rouge Cloth

Materials:
96″ (240 cm) 20 ga Soft Square Silver wire
69″ (175 cm) 22 ga Half Round Silver wire
22 x 30 mm cabochon

Substitutions:
22 ga Soft Square Silver wire can be substituted for the 20 ga. wire.

Available from my tutorials page and my Etsy Shop.

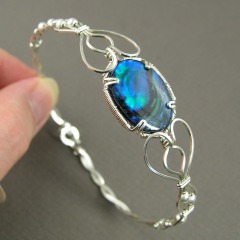
YOJ09-37 Paua Shell Bangle

Paua Shell Bangle (2009)
Constructed, cold joined
Sterling silver, fine silver, paua shell
L 19 cm x W 1.5 cm

I have lots of supplies left over from my classes at Haliburton, which I’ve decided I will not be using next year.  The cabs I ordered were a huge disappointment, with widely variant thicknesses.  In particular, the green paua shell cabs were paper thin, making them virtually useless for wrapping.  Basically, they can be pressed into something else, like maybe polymer clay, glued into a pre-manufactured setting or as part of some other craft item.  Unfortunately, by the time I got them, it was too late to send them back to the supplier and order something different:  the supplier wouldn’t have been able to give me anything else in any case, because I had already cleaned out the stock she had.  The students who had to work with these cabs did admirably, but we had to change the project to make it work.  Oh well, lesson learned.  I’ll use a different supplier next year and put the remainder up for sale as a destash on Etsy to see if I can recoup any money that way.

The blue pauas were meant to be used for rings, but again, the thickness (while much better than the green) was an issue.  They are actually quite pretty, so I may try to make something out of some them.

The first go is this variation on my Art Nouveau Bangle, which uses four wires instead of eight.  It ends up being a very dainty looking piece.

More views: