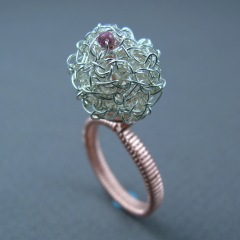
YOJ10-05 A New Home for Whoville

A New Home For Whoville (2010)
Fine silver, copper, garnet
Constructed, cold-joined
Size 7

I’ve fallen behind with my YOJ postings due to a bout of creative block.  I keep picking up the wire and the pliers in an effort to make something, and end up with nothing but frustration and a pile of scrap.  Earlier this week I joked on Twitter that I was tempted to solve the problem by piling up my scrap, adding fire and Presto! A brooch!

One of my Job Jar jobs this week was to “Organize beads and materials in the studio”.  Translated, that means “Clean up the mess!”  So I started sorting through a drawer where I’d dumped a bunch of finished and half finished pieces.  Some went into a “for packaging” box, some into a “for salvage” box, and some went into the scrap bin.

Amongst the half finished pieces were a bunch of crochet balls I’d made two years ago.  I thought it might be interesting to set one as a bead in a ring.  Since I was just experimenting, I didn’t want to use silver, so I hauled out the copper wire to make the ring shank.

Once the bead was mounted, it occurred to me that it looked a lot like the little puff ball in “Horton Hears A Who” by Dr. Seuss.  So, I added a little garnet bead to represent the Who’s world.

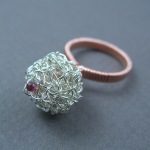
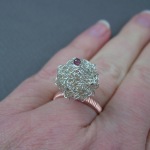
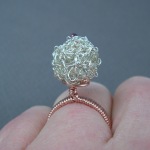
More photos:

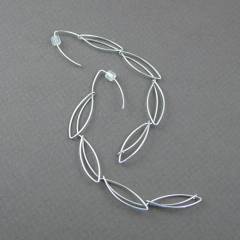
YOJ10-04 Marquise Series: Earrings 2

Marquise Series:  Earrings 2 (2010)
Sterling silver
Constructed
L 10 cm x W 0.8 cm

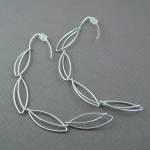
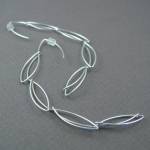
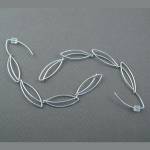
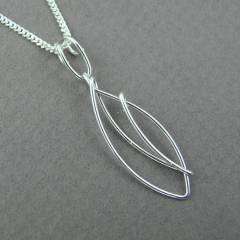
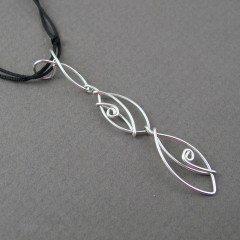
This week I decided to go back to and adapt the project I made at the beginning of this Year of Jewelry.  I wanted to explore it a bit more. The idea was to create a “string” of marquise shapes.  The result was a pendant and this pair of earrings.  They remind me a bit of palm fronds!

The most challenging part of the construction was getting each of the marquise shapes to end up on the same side, rather than having them alternate.  Made with hard wire, it had to be twisted very gently, because there was a high risk of snapping.  Getting the pattern to repeat in mirror image was also very tricky and took several tries.  (I have several pendants!  LOL)

I intended the earrings to be large and they are!  They make a very dramatic sweep from the earlobe to mid neck.

More photos:

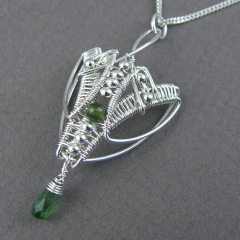
YOJ10-03 Marquise Series: Pendant 8

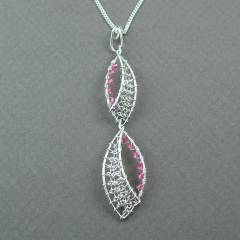
Marquise Series:  Pendant 8 (2010)
Sterling silver, fine silver, tourmaline
Constructed, cold-joined, woven
L 5.0 cm x W 2.25 cm x D 1.0 cm
(Update: SOLD June 2013)

One of my new year’s resolutions was to start using a Job Jar.  My family and friends, who know me very well, know that I’m hopeless about housework.  I think it was Erma Bombeck who said “Nature can’t abhor a vacuum as much as I do.”  That kind of sums up my attitude nicely.

However, I do live with three other (messy) people, so some token effort to maintain order must be made.  So… enter the Job Jar.  I wrote all the various chores on the little slips of paper, and included some fun things, and every day I pick one out of the jar.  The choice is completely random, although I like to think of it as leaving it up to God/the Universe to pick the task that is right for me on any particular day.  Some days I have more energy than others, and interestingly enough, each task so far has been perfect for the day it was chosen.  I do my Job Jar job early in the day, and then the rest of the day is mine to do as I please.

The net result of doing my housework this way is that I’m being much more productive with my jewellery making as well.  So, I feel good because my house is slowly getting cleaner, and I’m getting to work guilt-free on something I love every day.  Bonus!

The studio gremlins paid a me a visit this week and stole this piece for a few hours.  I noticed it was missing after my husband had done a sweep through the house collecting detritus to put out in the garbage on Monday night.  He tends to be somewhat brisk and indiscriminate when he does this.  A frantic search turned up nothing, and I was resigned to it having disappeared into the mass of trash.  On Tuesday, my job from the Jar was “Clean the livingroom.”  It was like a bunch of angels were standing around saying “We want to help you”.  LOL

So, I set to work, cleaning, sweeping and reorganizing the room.  When I picked up and moved one of the toy boxes, lo and behold, there was the pendant!  With a quick prayer of thanks, I put it in a safe location, where I knew I’d find it again.

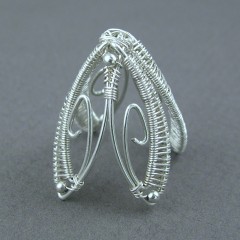
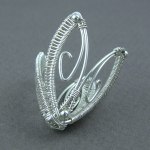
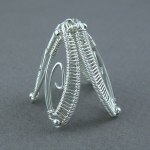
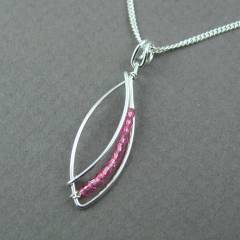
Like the previous pieces in the series, the pendant is formed using a marquise shape.  When I was first shaped the wire, I thought the pendant looked like a moth.  The form evoked a very strong Art Nouveau influence.  As I added the weaving and the beads, the moth form persisted, and I noticed that the pendant was starting to look like Rainbow Wrapping.

Originally, I was going to hang the pendant the other way around, from the point.  It reminded me of the Star Trek logo.  I didn’t like how the tourmaline drop looked hanging from the long tail though – it threw off the balance.  So the drop was moved to the point, and the tail became the hanging point.

While photographing the piece today, I started seeing the form of an elephant face.   How cool!  I don’t remember ever seeing so many different influences in one piece.

What do you see?  Let me know!

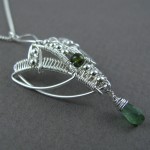
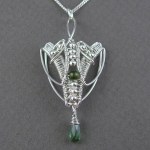
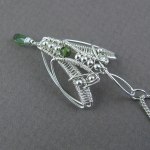
More photos:

YOJ10-02 Marquise Series: Bead Cap 1

Marquise Series: Bead Cap 1 (2010)
Sterling silver, fine silver
Constructed, cold-joined, woven
L 2.7 cm x W 2.6 cm

Last week’s project was about going beyond a simple marquise shape to a compound shape.  This week, I’m going a step further and moving into working in 3D.

The original germ for this piece was a project I made in 2003 as a Secret Santa gift.  The Cathedral Egg Pendant was made of two pieces, connected with bead links.  Cathedral Egg was inspired by a piece, called “Gluttony”, which I had made for the “Heavenly Virtues/Deadly Sins” exhibition presented by Object Design Gallery the same year.

The ladder weaving here was very time consuming to do, but the effect is so nice!

I think this really needs to grace a fabulous lampwork bead by some superbly talented artist.  The problem I’m finding is that I need a big bead:  the base of this bead cap is almost (2.5 cm (1 inch) across.  So, I’m on the hunt for something appropriate.  It still needs to go into the tumbler to shine it up, but I wanted to get it posted.

Other views:

YOJ10-01 Marquise Series: Pendant 7

Marquise Series: Pendant 7 (2009)
Sterling silver
Constructed, cold-joined
L 5.2 cm X W 3.3 cm

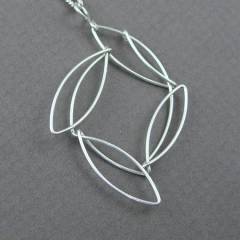
I made this pendant in the early part of the week, knowing that the first project for the new YOJ was due today.  Up to now, I’ve been working with marquise shapes as single pieces, either as pendants on their own, or linked together in a bracelet.  This one is a compound structure, made from one piece of wire.  It took a bit of torturing to get it to look like this, LOL, but I like how it resembles a whirligig.

YOJ09-52 Marquise Series: Pendant 6

Marquise Series:  Pendant 6 (2009)
Sterling silver, ribbon
Constructed, cold-joined
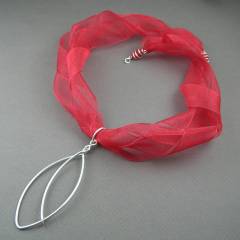
L 9.8 cm x W 3.4 cm/Ribbon: L 52 cm x W 3.0 cm

.
My ex-husband used to say “Go Big or Stay Home”, so I’m finishing off the Year of Jewelry 2009 with a super-sized version of the Marquise Pendant.  This started off as an experiment to see if the basic marquise shape would translate to a bangle, but I haven’t worked out the kinks to that yet.

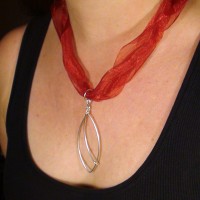
I also decided to give the ribbon necklace another try, although again, it’s technically uneconomic to make.  Ah well, I wanted to finish up the year in style!  LOL

Here’s another shot of what it looks like on:

And so this very challenging year comes to an end.  I’ll have a look back over the year and post some thoughts about what I achieved.

Until then, I wish you and those close to you a very Happy New Year, filled with enough challenge to keep you interested, and enough joy to keep you inspired!

All the best in 2010!

YOJ09-51 Marquise Series: Pendant 5

Marquise Series:  Pendant 5 (2009)
Sterling silver, fine silver, Swarovski crystal
Constructed, cold-joined, nalbinding
L 6.5 cm x W 1.3 cm

This pendant is made of two “recycled” pieces from Bracelet 3, which didn’t match the other links.  Initially I only added the Swarovskis as embellishment, but the pendant looked unbalanced.  So I decided to add some viking knitting – nalbinding – and create a ribbon-like effect.  The work involved in adding the nalbinding bumps this up from production piece to a “couture” One of a Kind or Limited Edition.

I’m not completely satisfied with how it turned out, but I’m also not able to define what is bothering me about it.   It might just be that it doesn’t work as a pendant.  The design would certainly make a fabulous pair of earrings.  Comments are welcome!

YOJ09-50 Marquise Series: Bracelet 3

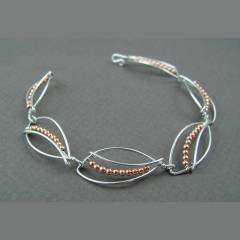
Marquise Series: Bracelet 3 (2009)
Sterling silver, copper, fine silver
Constructed, cold-joined
L 16.8 cm x W 1.1 cm

For this piece, I took the idea developed in Week 48 and extended it to a bracelet.  The design looks simple, yet it surprised me how much work was involved in adding the copper beads.

I like the bi-metal toning – it’s a nice effect, and would really sparkle on tanned, warm toned or dark skin.

Like the project in Week 45, I alternated the links in mirror image; however, the alternating pattern sets up an issue for sizing.  I noticed it with the Week 45 bracelet as well, but because it’s all one metal it’s not as obvious.   With this bracelet, because there are two metals, it becomes clear that there can’t be an odd number of links: it throws off the pattern.  This design will fit either a very small wrist (like this bracelet does), or a very large wrist.  On my wrist, which is a little thinner than standard, but not small, the bracelet fits comfortably with room to move easily, but I generally like to wear my bracelets loose so that they jingle.

The design would look stunning with the Swarovskis I used in Week 48, but adding them will also add to the price of the finished piece.  If you’re interested in a Swarovski version, please email me for a quote.

YOJ09-49 Marquise Series: Pendant 4

Marquise Series:  Pendant 4 (2009)
Sterling silver
Constructed, cold-joined
L 3.6 cm x W 1.6 cm

Here is one more variation in sterling silver.  The original idea was to add a 2 mm Swarovski crystal, similar to what I did in the Week 47 project, but I ended up deciding against it.

YOJ09-48 Marquise Series: Pendant 3

Marquise Pendant:  Pendant 3 (2009)
Sterling silver, fine silver, Swarovski crystal
Constructed, cold-joined
L3.5 cm x W 1.6 cm

Lots of playing going on!  I love the sparkle of Swarovskis, so I added a thin row of crystals to this next pendant in the series.  I love the classic “sweetheart” look that resulted!

YOJ09-47 Marquise Series: Pendant 2

Marquise Series:  Pendant 2 (2009)
Sterling silver, fine silver, Swarovski crystal
Constructed, cold-joined
L 3.4 cm x W 0.9 cm

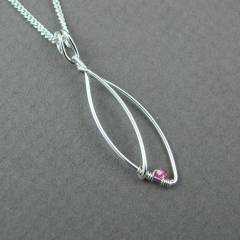
I’m still working along the lines of “quick and simple” for this series, but this time, I wanted to add a tiny splash of colour.

Still trying to keep the cost of the pendant down, I didn’t want to spend too much time on the coiling, so I added only one little Swarovski, strategically placed.

I bought a bunch of these 2 mm Swarovskis back in the late spring when I was preparing for my class at Haliburton.  I hadn’t intended to buy them, but when the supplier I was visiting only had half the tools in stock that I needed, I had to choose some other things to bump up my purchase to their minimum order requirement.  (It’s incredibly irritating when the stuff is shown in stock on the website, only to discover empty bins when you get there.  Unfortunately, this is not an unusual occurrence with this particular supplier, which is why I always go in person, and I don’t shop there unless absolutely necessary.)  They are one of the few officially sanctioned wholesale suppliers of Swarovski and Preciosa, so I picked up a few packages.

After several different attempts, I also finally came up with a nice bail that compliments the marquise shape of the pendant.

YOJ09-46 Marquise Series: Pendant 1

Marquise Series:  Pendant 1
Sterling silver, fine silver, cord
Constructed, cold-joined
L 6.1 cm x W 1.0 cm

One of the jewelry groups on Facebook is currently running a design contest to “overcome the economic crisis”.  The idea is to use cheaper materials to reduce the price point of the finished piece.  The problem I see with the contest is that the value of the physical effort involved is completely discounted.  The cost of the labour stays the same regardless of the materials used.

The only way reduce the cost of the labour is to simplify the designs so that they take less time to make.

There are two challenges to making simple designs:  one is to make them well, because the simpler the design, the more important the finishing becomes; the other is coming up with an original concept, something that will appeal to the customer without looking like the same old same old that someone else has produced.

I think the latter is the harder of the two to overcome.

This was the background I was thinking about while making this pendant.  The goal was to produce a nice, quick-to-make design, that could become part of my bread-and-butter line for next year.  As much as I like making the complex one-of-a-kind pieces, most of my sales fall in the in $20-$150 price range.

Without the neck rope, the pendant on its own would fall easily in the lower end of that range.

It’s been my experience that chains are uneconomic for me to make from scratch, and that was proven true again with this piece.  The labour involved in making the neck rope bumps the price up substantially, and the change to the cheaper material (polymer cord) has a huge impact on the perceived value.  I end up with a piece that is not sellable at the price I need to sell it at to recoup my costs and actually pay myself.

It’s perverse.  It’s also why I don’t generally use “cheap” materials.  I want you to feel good about what you’re buying from me, so I make high quality jewellery, with high quality materials.  It’s worth every cent.