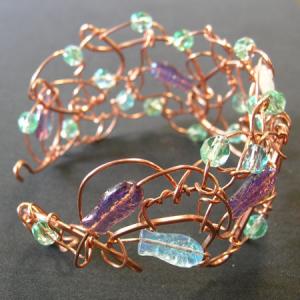
Tutorial – Art Nouveau Bangle

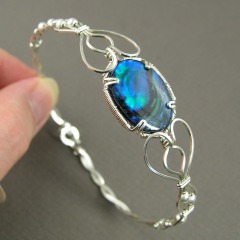
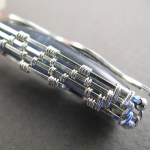
I’m pleased to announce that my newest tutorial, Art Nouveau Bangle, is now available!

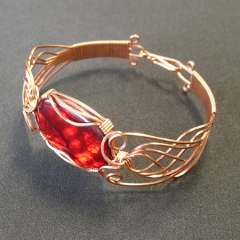
This bangle features lovely flowing curves and Celtic elements that were common in the Art Nouveau period.

The project was a big hit with my students at the Haliburton School of the Arts! Once you have the basic technique down, you can easily adapt the design and let your creativity flow to create your own variations!

16 pages, 103 photos, 110 steps, plus design notes
USD $15.00

Level of Difficulty: Advanced

Tools and Materials you’ll need:

Tools:
Flat Nose Pliers
Round Nose Pliers
Flush Cutting Wire Nippers
Permanent Marker
Measuring Tape/Ruler
Bracelet Mandrel
Penknife
1/4″ dia. Masking Tape
Rouge Cloth

Materials:
96″ (240 cm) 20 ga Soft Square Silver wire
69″ (175 cm) 22 ga Half Round Silver wire
22 x 30 mm cabochon

Substitutions:
22 ga Soft Square Silver wire can be substituted for the 20 ga. wire.

Available from my tutorials page and my Etsy Shop.

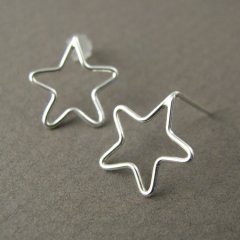
YOJ09-38 Star Earrings

Star Earrings (2009)
Constructed, soldered
Sterling silver
L 1.5 cm x W 1.5 cm

I’m about a month behind in my YOJ postings due to a personal crisis that has blown me completely off track.  It’s been a very emotional couple of weeks with some highs and a lot of lows.  I am determined to catch up, but it’s going to take some time.

I figure the easiest way to get ahead of the game is to focus on earrings.  Since I’m stocking up for Christmas anyways, this is a logical course of action.

So… first up is a pair of Star Earrings.  I wanted to make a simple pair of stud earrings, something neat and clean looking.  Making this design and trying to wrap the tail around the stem would not have given me the look I was after, so it was time to break out the torch.  Yes, Virginia, I do solder!

It’s been a while since I’ve soldered anything, and I discovered that my solder is really old.  Initially, the solder absolutely refused to flow.  I ended up melting the wire.  After I pickled the pallet, it worked better.

These earrings will be available for purchase from my Etsy shop.

YOJ09-37 Paua Shell Bangle

Paua Shell Bangle (2009)
Constructed, cold joined
Sterling silver, fine silver, paua shell
L 19 cm x W 1.5 cm

I have lots of supplies left over from my classes at Haliburton, which I’ve decided I will not be using next year.  The cabs I ordered were a huge disappointment, with widely variant thicknesses.  In particular, the green paua shell cabs were paper thin, making them virtually useless for wrapping.  Basically, they can be pressed into something else, like maybe polymer clay, glued into a pre-manufactured setting or as part of some other craft item.  Unfortunately, by the time I got them, it was too late to send them back to the supplier and order something different:  the supplier wouldn’t have been able to give me anything else in any case, because I had already cleaned out the stock she had.  The students who had to work with these cabs did admirably, but we had to change the project to make it work.  Oh well, lesson learned.  I’ll use a different supplier next year and put the remainder up for sale as a destash on Etsy to see if I can recoup any money that way.

The blue pauas were meant to be used for rings, but again, the thickness (while much better than the green) was an issue.  They are actually quite pretty, so I may try to make something out of some them.

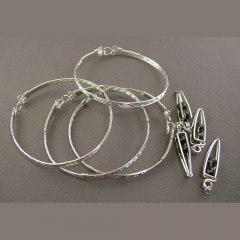
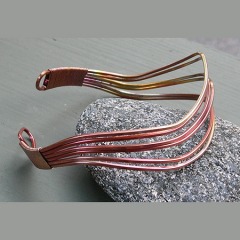
The first go is this variation on my Art Nouveau Bangle, which uses four wires instead of eight.  It ends up being a very dainty looking piece.

More views:

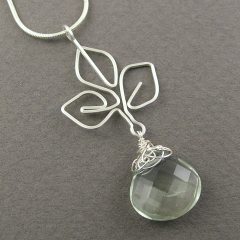
YOJ09-36 Green Sprout Pendant

Green Sprout Pendant (2009)
Constructed
Sterling silver, fine silver, prasiolite (green amethyst)
L 4.6 cm x W 2.2 cm

This week, I’ve been thinking alot about growing things, regeneration and rejuvenation.  Unfortunately, spring is a long way off, so I’m sort of out of sync with the cycle of life.  It’s the colour of prasiolite beads I bought in Bancroft (the only strand of beads I bought there).  It’s such a sweet, fresh green, and it reminds me of spring, seeds sprouting, life bursting forth anew.

So, I used the bead as a sort of seed, with “roots” growing around the peak, and a little plant “sprouting” out from the roots.

Prasiolite, commonly called “green amethyst” as a marketing ploy, does occur naturally, but is very rare.  Most prasiolite is created by heat treating amethyst or citrine.  Just to confuse things, there is another stone called praseolite, also green, which is created by heat treating iolite (cordierite).  This latter stone has a greasy luster, which may help in distinguishing the two.

My copy of Love is in the Earth by Melody (Sixth Printing 1993) doesn’t include an entry for either stone, but I found this entry just now on another website while writing this blog entry (added emphasis mine):

Prasiolite brings one appreciation, approval, and acclaim (and occasionally) fame. It further promotes the recognition of ones accomplishments and furthers the completion of same.

Prasiolite has been known as the “celestial root”, bringing the ancient knowledge of illumination, germination, and growth. …. Prasiolite further provides for sufficient tranquility of the minds to assist one in contemplating metaphors without vulnerability to the unknown.

Prasiolite has also been used to bring forth a polarizing prismatic energy, which engenders a spectrum of energy to clear and to activate all of the chakras……

Prasiloite has been used to stimulate healing on the spiritual level and to assist one in regaining the connection with the perfection of the self and the physical body….

Ha! How’s that for connecting with stone energy!?

More views:

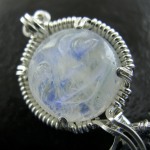
YOJ09-35 Moonrise

Moonrise (2009)
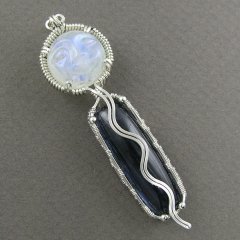
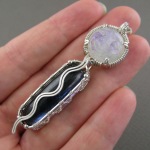
Pendant, Sterling silver, fine silver, rainbow moonstone, indicolite (blue) tourmaline
Constructed, cold joined
L 6.4 cm x W 1.8 cm x D 1.2 cm (widest point)
SOLD to a private collector, September 2010

On my annual trek to Bancroft this year, I decided to focus on buying cabachons.  I have a huge stash of beads, but I’ve been moving away from working with them.  The last time I was in Bancroft, I bought some really nice cabs from one particular vendor, and was really happy to see them again.  This year, I scored a bunch of beautiful tourmaline, prehnite, kyanite, garnet and rainbow moonstone.

As a member of the Etsy Wire Artisans Guild, I’m supposed to make a monthly “theme” piece.  Well… I’ve been a bit lax about it because of my other commitments.  So I’m playing a bit of catch up.

It’s been a couple of years since my last attempt at a multi-stone pendant.  That attempt was… adequate… but really not up to the standard I like to set for myself.  So, for the EWAG’s “Blue Moon” theme, I decided I’d take another stab at it.

Back when I was single, I lived within walking distance of Woodbine Beach in Toronto, and would regularly stroll along the water’s edge.  I always loved watching moonrise over the water.  The reflected light from Luna rippling over the waves was so peaceful.  The Moon is the ruler of my astrological sign, Cancer, so I feel a special connection with it.  With my feet in the water, I would say prayers of thanks to the Creator for all of the blessings in my life, and listen for the messages in my heart of what direction I needed to go.

For quite a long time now, I’ve been getting messages telling me I need to reconnect my spiritual side with my jewellery.  I feel really strongly that doing that is going to resonate with others.  So, in the past few months, I’ve been making and posting work that draws from my inner life.

I gave conscious thought to the stones I chose for this piece.    The calming, balancing energy of the 11.7 ct moonstone helps connect with intuitive promptings, and the loving, powerful energy of the 24.42 ct blue tourmaline helps bring awareness and communication of those messages.

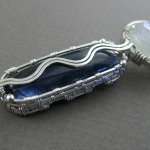
The wavy line coming down from the moon was always part of the design, but I also wanted to incorporate the shimmering and rippling of the water by incorporating weaving into the bezel of the lower stone.  I’m very happy with the way it turned out, and the energy that comes off the piece is wonderful.

[mp:id=5]
.
.
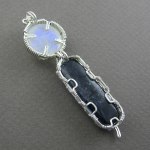
Other views:

YOJ09-34 Stocking up for Christmas

The week 34 project isn’t a specific piece of jewellery, per se, more like a bunch of things I made in preparation for Christmas sales on my Etsy shop.

Not really much more to say than that.  Oh, and if you’re interested in purchasing my jewellery, click this link.

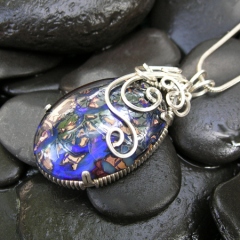
YOJ09-33 A Boulder Opal from a friend

Boulder Opal Pendant (2009)
Sterling silver, boulder opal
Constructed, cold joined
L 3.7 cm x W 1.8 cm
Private collection

I used to be very active in the Gem & Mineral of Scarborough, and developed many good friends there.  One of them, David Bellamy, gave me this stunning Australian boulder opal as a Christmas gift.  We were at the club’s annual Christmas Sale, and one of the vendors was selling self-cut cabochons.  Most of them were stones from Nova Scotia, but a few, like this opal, were from rough he had bought.  I was completely enamoured with the stone, but put off by the price:  $60.  At that point, I was still trying to recover financially from my first failed marriage, and couldn’t justify spending that much on one stone.  So, I was absolutely speechless and overwhelmed when David presented me with the stone.

I made many trips up to the Bancroft Gemboree with David over the years.  He’s an avid collector of “species” thumbnails, and consistently creates some of the most interesting displays at the club’s annual show.

I used this stone for the prong set pendant tutorial I wrote for Haliburton, but the setting really didn’t do the stone justice.  So this week, I took the setting apart and remade it.  This one is staying in my personal collection, as a reminder of a passionate rockhound and generous friend.

YOJ09-32 Cooked Copper Bangle

Cooked Copper Bangle (2009)
Copper
Constructed, cold joined
L 22 cm x W 3.0 cm

During week 2 of my stay in Haliburton, one of the students taking my Wire Jewellery II class, Barbara-Joy Peel, showed us some pieces she had made in copper.  The pieces had a really fabulous patina, which she said she achieved by “cooking” the copper in a frying pan.  On the last day of the class, she brought in an iron frying pan, borrowed a hot plate from the Teen Cuisine class, and we tried out the technique for ourselves.

What fun!  The copper changes colours gradually, going from copper, to orange, to yellow, to red, to purple, and then to dark blue.  The dark blue turns silvery when the piece cools.  If the piece doesn’t lie flat, then the result is a mottled colouration.

For week 32, I decided to try it again.  I made a bangle, and cooked it.  I think this is a really cool technique which I’m going to experiment with more.

YOJ09-31 CZ Solitaire Pendant

CZ Solitaire Pendant (2009)
Sterling silver, cubic zirconium
Constructed, cold joined
L 1.5 cm x W 0.6 cm

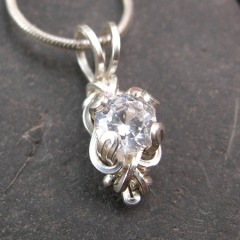
Getting caught up after a couple of weeks away.  I kept up with the projects, but didn’t have a chance to photograph them until today.  My entry for week 31 is an adaptation of the solitaire prong setting by Jorgen Greftegreff.  My husband gave me a solitaire pendant for Christmas a couple of years ago, and I’ve always wondered if the setting could work in wire.  This version, while successful in the sense that the adaptation worked, is a bit too messy on the back for my preferences.  It was worth the experiment though :-).

YOJ09-30 Copper Art Nouveau Cab Bangle

Copper Art Nouveau Cab Bangle (2009)
Copper, dyed paua shell
Constructed, cold joined
L 8 1/2 inches x W 1 inch

Over the next couple of days I’ll be posting the work produced by my students in Wire Jewellery 1 and 2, but for this week’s YOJ entry, I’m posting my teaching sample of the AN Cab Bangle.  This project ended up being quite challenging for the students and took an entire day for the class to complete.  That was something I hadn’t anticipated, so there’s going to be a scheduling adjustment for next year’s class.  What really impressed me was that everyone showed a lot of persistence in doing the project, which had a few tricky steps in it.  One lady, Janice, was so determined to do it – despite how much it was frustrating her – that she refused any suggestion by me to modify it to something simpler.  That caused me to joke that she was channeling her inner German:  “I VILL complete zis bracelet!”  The class cracked up laughing.

The next day, Janice came to class proudly showing off the bracelet, which she had attempted again on her own at home.  She said that she’d found the instructions very clear and easy to follow.  She had every right to be proud:  her bracelet had turned out beautifully!

YOJ09-28 Prong Set Ring

Prong Set Ring (2009)
Sterling silver, cubic zirconium
Size 7
Constructed, cold joined

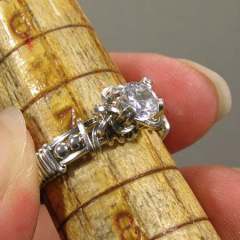
Life is crazy busy right now as I finish preparations for Haliburton.  So this week’s entry is a variation on Jorgen Greftegreff’s Prong Ring (published originally in the April 2001 issue of The Wire Artist Jeweller).

The good news is that my wire arrived finally, and I didn’t need to reorder anything!  *Whew*

My computer access is going to be limited for the next two weeks, so while I’ll try to post YOJ pieces on time, more than likely it will wait until I get back.

George Brown College – 2009-10 Class Schedule

The 2009-2010 classes for Wire Jewellery at George Brown College have now been posted!  Here’s the schedule (quoted from the GBC website):

Wire Art Jewellery 1

October 18-November 8, 2009
Course Number:   JEWL 9038, CRN# F10447

February 21-March 14, 2010
Course Number:  JEWL 9038, CRN# W45521

Learn the foundational skills needed to make wire jewellery. Make chains, earrings and findings using cold-joining techniques. Learn to manipulate different gauges of wire. Complete three bracelets, one necklace and four pairs of earrings. Create a piece based on a design of your own.

Note: A project kit of basic tools and wire will be supplied in the first class, but you must provide beads. The supplies required will be discussed in the first class.

Cost:  $412, plus cost of beads
Location:  Casa Loma
Hours: 20
Day/Time:  Sunday, 10 a.m. – 4 pm.

Click here to register.

Wire Art Jewellery 2

April 11-May 2, 2010
Course Number:  JEWL 9050, CRN# W45608

Refine your ability to control wire by creating bracelets, pendants and rings using multiple wires, twisted wires and binding techniques. Learn how to calculate the price of a finished piece of jewellery.

Note: A project kit of basic tools and wire will be supplied in the first class.

Cost:  $450
Location:  Casa Loma
Hours: 20
Day/Time:  Sunday, 10 a.m. – 4 pm.

Click here to register.