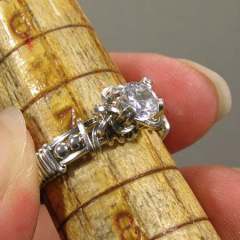
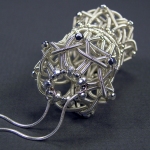
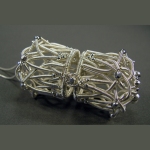
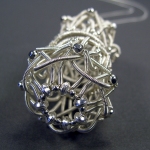
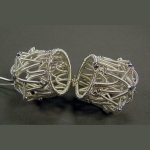
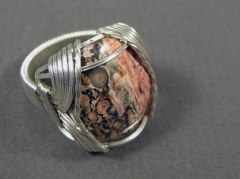
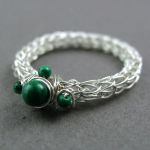
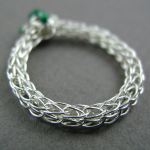
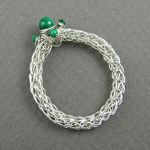
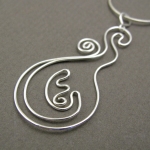
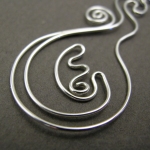
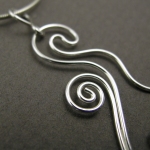
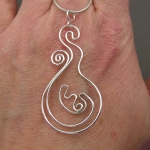
YOJ09-28 Prong Set Ring

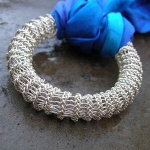
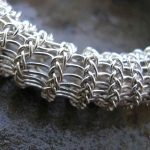
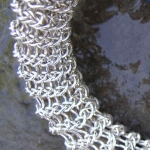
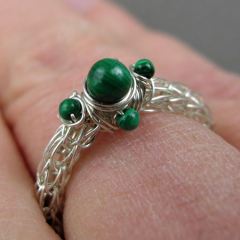
Prong Set Ring (2009)
Sterling silver, cubic zirconium
Size 7
Constructed, cold joined

Life is crazy busy right now as I finish preparations for Haliburton.  So this week’s entry is a variation on Jorgen Greftegreff’s Prong Ring (published originally in the April 2001 issue of The Wire Artist Jeweller).

The good news is that my wire arrived finally, and I didn’t need to reorder anything!  *Whew*

My computer access is going to be limited for the next two weeks, so while I’ll try to post YOJ pieces on time, more than likely it will wait until I get back.

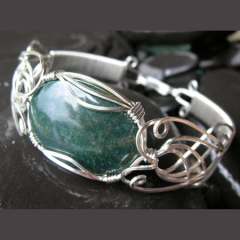
YOJ09-27 Art Nouveau Cab Bangle

Art Nouveau Cab Bangle (2009)
Sterling silver, bloodstone
L 21.5 cm x W 2.5 cm
Constructed, cold joined

Although it’s supposed to be a calming stone, I’ve always found bloodstone to have a kind of overpowering “in-your-face” energy that’s difficult to deal with.  For the last few weeks, though, I’ve been wearing it while working on my tutorials, and it’s been helpful for keeping my energy levels up and focused.  I love the red spotting on this cab, and the slight yellow cloud overlaying the green.  This was part of a group of cabs I bought when The Nautilus closed 10 years ago.  The Nautilus was *the* place in Toronto to buy rockhounding and lapidary supplies.  Located in the far, far east of the city, I remember it taking an obscenely long time to get there on city transit from where I lived in Little India.  But what a treasure trove!  The owner, Roy MacLeod, was a passionate rockhound and filled his store with all the bits and bobs needed to work with and admire rocks.  Sadly, Roy didn’t live to see the millennium, and the closing of his store left a void that still hasn’t been filled.

In designing the Level II course for Haliburton, I was thinking about what skills would be most useful for the students to learn.  In Level I, they learn the basics:  working with single wires, developing dexterity with tools, etc.  There are very few multi-wire projects.  In Level II all but two of the projects are multi-wire pieces, and the students have to deal with doing steps early on that don’t actually come into full use until much later in the construction. Wire control becomes very important.

One of the things Level II focuses on is settings:  half of the projects deal with some form of stone setting.

I think this is by far the most complex of the projects I’ll be teaching.  Hopefully by the time we get to this point in the course, the students will have enough confidence to tackle it.  If not, it’s easily adapted to something simpler.  I’ll let them decide how energetic they want to be.

This tutorial will be available for purchase and download off my website after I get back from Haliburton.  I’ll post the link when it’s up, along with more photos.

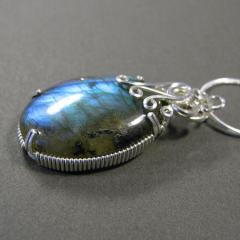
YOJ09-26 Prong Set Pendant

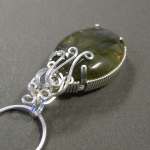
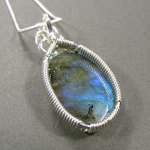
Prong Set Pendant (2009)
Sterling silver, labradorite
Constructed, cold joined
Private Collection

I found this labradorite in my stash again recently while working on the prong set pendant tutorial.

I’m rediscovering my love of stones, and am fantasizing about going to Bancroft to *shop*!  Having put myself on a buying moratorium for the last few years, I normally go to the gemboree just to have a look around.

When I floated the idea of going this year, my DH surprised me by suggesting I go by myself!  It’s a long drive to take the boys on, and since they don’t show much interest in rocks (other than the ones they can throw into water), the show is wasted on them.

Hmmm…. the possibilities…

More photos:

YOJ09-24 Shiva’s Pomander

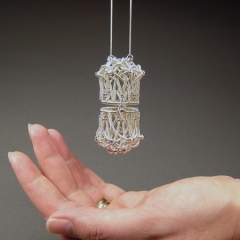
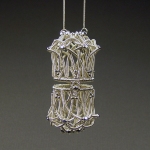
Shiva’s Pomander (2009)
Fine silver, sterling silver
Pendant: L 6.1 cm x W 3.2 cm
Chain: 88 cm
Constructed, coiled, cold joined, flameworked

A little over a year ago, Perri Jackson sent me Strange Attractor, a stunning wire bead she’d made as a thank you gift for helping her with a tutorial.  Looking at it, I wondered how the structural coiling technique she used could be adapted to something other than a bead.  Something like a locket maybe… It got me puzzling…

An opportunity to experiment came in the form of a call for entry from Rails End Gallery.  Every year the gallery hosts a show featuring work by the faculty of the Haliburton School of the Arts.  This year, the theme is “Vessel”.

Originally, I had wanted to make the vessel to house this heart, but screwed up – err… made a Design Choice that ended up creating a much larger container than intended. The original design would have hung horizontally, with the chain running through the centre.  With this one, the design lends itself better to a vertical orientation.

This week when I was talking to Perri, I mentioned that I was working on a locket-type piece for the show.  She asked what it looked like.  “Sort of like a Shivalingam,” I said.

So… the piece is heading out the door today to get sent up to Haliburton.  There is, of course, the obligatory Artist Statement that goes with it:

In Hinduism, the lingam is a symbol of Shiva. Worn in a similar fashion as a Christian cross, the intent is to draw the blessings of the Higher Power to the wearer. Using structural coiling and weaving techniques developed by Perri Jackson, I decided to interpret this symbol as a pomander worn over the solar plexus. It allows the wearer to carry a prayer or fresh flowers within: a reminder to always recognize the Source of all life’s gifts.

VESSEL: HSTA Faculty Exhibition
Rails End Gallery & Arts Centre
23 York Street
Haliburton, Ontario, K0M 1S0
June 30 – July 30, 2009
www. railsendgallery.com

More photos:

YOJ09-23 Standard Form Ring (Again)

Standard Form Ring
Sterling silver, jasper
Constructed, cold connected
Size 10

Yes I’m posting the same project as in Week 2.  At that point I had written the instructions for the tutorial, and the carnelian ring posted was the product of the writing process.   This time the ring is the product of the photography process.  I have now completed two of the six tutorials I need to write for my class.  Number three is written and transcribed to computer; photography for that project will happen tomorrow.  With any luck, number three will be done by Wednesday.

I’m now into the most challenging part of my schedule for the year.  With five weeks to go until my class, I’m multitasked up to wazoo.  I’ve been taking advantage of the convenience my netbook is offering me:  I can sit out on the front porch and work in the warmth of a sunny day while my children play in the yard.  If they are working on an educational CD doing “homework” on the clunker laptop in the kitchen, I can also sit at the table and do “my” homework.

Life is humming along…

Next week’s project will be much more spectacular, I promise.  It’s in the finishing stages now, and will be on its way to the Rails End Gallery this week for the HSTA Faculty Exhibition, “Vessel”, which opens on June 30.

YOJ09-21 Viking Knit Torus

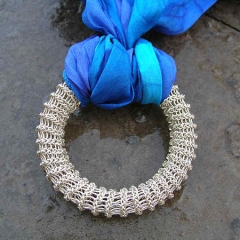
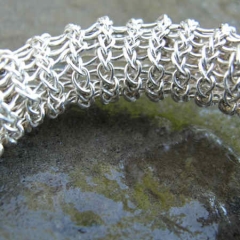
Viking Knit Torus (2009)
Sterling silver
Nalbinding
L 55 mm x W 55 mm x D 10 mm

I’m insane.

People who know me are familiar with this quirk in my personality, but every now and again I feel compelled to demonstrate it.  Hence, this week I decided – despite numerous pressing deadlines – I absolutely had to attempt making a torus out of viking knitting.

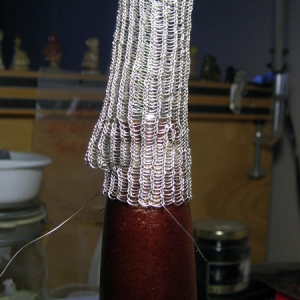
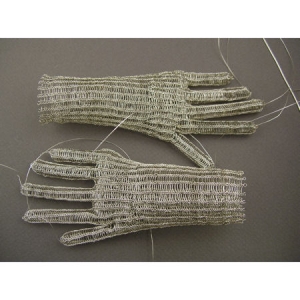
Nalbinding was historically used for things like socks, mittens, bags, hats and the like.  In wire, it’s been used mostly for chainwork.  To the best of my knowledge, no one has tried using it for sculptural wirework, and certainly no one has tried using it to construct a torus.  Loren Damewood, who I’ve had the pleasure of meeting, has made a toroid bracelet out of string, with plans to attempt it in wire, but his technique is marlinspike knotting.

Thanks to my experience making the Merry Meet necklace, I decided to make the first attempt in polymer coated wire.  I have pounds of the stuff, and it’s great for experimenting.  Unfortunately though, it doesn’t lend itself to annealing, which meant I could only get as far as shaping the torus.  I couldn’t finish the seaming without risking wire breakage.

I’m contributing that first piece to The Metal Arts Guild of Canada’s call for Nuit Blanche 2009.

I’m completely obsessed with this idea, so decided that I would try one in silver.  At the Zilberschmuck “Connection” opening a couple of weeks ago, I was talking to Charles Funnell about viking knitting.  He had been trying to do some chainwork and was finding it challenging.  I commented that it would work better in fine silver than in sterling, because the metal is more maleable.  Unfortunately, the only fine silver wire I have on hand at the moment is 28 ga, and the idea of doing it in that fine a gauge really didn’t appeal to me.  So, I decided to try 24 ga sterling in dead soft.

Well…

It was easier to work than the polymer coated copper, but I still ended up with a blister on my pinky from pulling wire.  After a while, even wearing a bandage on the finger didn’t help.  Yes, I suffer for my art…

The main challenge of a torus is making it seamless. The rest is just like making tubing.  I figured out a way of making the stitches nice and tight, thanks to a tool that Loren uses for his turks head knot rings.  Three stitches before the finish, and despite frequent annealing, the wire broke on me!  :bang head:

Luckily the repair was easy, and I was able to finish it up.  I spent far too many hours on this, but I’m very pleased with it and want to make more as time and my finger permit.  The ghost of Frank Hoffmann is whispering in my ear again though:  for the amount of work involved, I should be making it in gold.

More photos:

YOJ09-20 Viking Knit Ring

Viking Knit Ring (2009)
Fine silver, malachite, howlite
Nalbinding, single knit, constructed, cold joined

I finally got back to writing this week!  I have six tutorials to write in preparation for my class in Haliburton in July.  So far I have completed writing the draft on one of them.  Photos and actually putting the tutorials together are still outstanding.  I’m keenly aware of how quickly the time is going, so a few weeks ago I decided to put Tigger into daycare two days as week.  That is giving me several hours of uninterrupted work time, since it co-incides with the days that Thumper is in school.  What Heaven!

Usually I make the project, writing the steps as I go.  Then I put the text aside for a week or so, come back to it and reconstruct it following my instructions.  If I stumble on any part of it, that means a rewrite is in order.   Refining continues as I take the photos and do the layout.  Lots of work… which means I gotta start makin’ like a bread truck and haul buns…

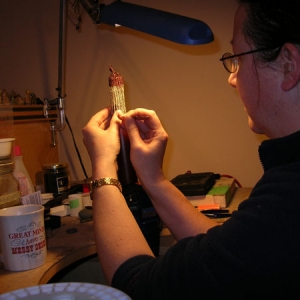
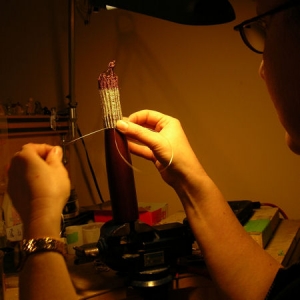
This week, I was working on instructions for viking knitting.  I experimented with incorporating 2 and 4 mm beads, which led to a screw up – err… “Design Choice” – when I went to draw the chain.  I ended up having to take the chain apart, but salvaged enough to make this ring.  It’s been an interesting experiment in timing myself as well – construction of enough chain to make a bracelet is taking a little over 2 hours.  Adding the beads was just for my amusement, and won’t be part of the final instructions.

More photos:

YOJ09-19 Mother & Child Pendant

Mother & Child Pendant (2009)
Sterling silver, formed, flame-worked
L 5.4 cm x W 2.4 cm

It’s Mother’s Day, so my piece this week is in honour of Motherhood.

I’ve had pregnancy on my mind a lot in the last week, because last weekend I had a miscarriage.  That was why I didn’t post anything for Week 18. What bugs me is not that I had the miscarriage – it’s that I had originally planned to wait until May 1 to do the pregnancy test.  Had I followed through, I would never have known I was pregnant.  Instead, I did the test on the 27th.  My husband was completely gobsmacked when I told him the news:  he thought I was too old to have any more babies.  I had to explain to him that even though I am of a somewhat advanced childbearing age, until I actually stop having periods, I can still get pregnant.  On the 30th I went to visit my GP, and that afternoon I started spotting.  I spent the evening at Emergency, where they took some blood and sent me home.  On Saturday, I started bleeding in earnest, so I went back to Emerg, where more blood tests and 5 hours of waiting confirmed what I already knew:  the pregnancy had aborted.

I knew the chances of this baby going full term were very slim.  I’m on medication that can cause birth defects, and, in the second and third trimesters, is toxic to the fetus.  Even that aside, this would have been an extraordinarily difficult and potentially life-threatening pregnancy because of my various health conditions.  I swear, my warranty ran out after I turned 40…

I’m sad, but not as upset as I was with the miscarriage two years ago.  More than anything, the experience has left both my husband and I wishing we had met ten years earlier.  I am able to take comfort in the idea that I am still “Mommy” to five children:  two I cuddle every day, and now three others I cuddle in spirit.

So, here is the Mother, full with her Child.  The design is a bit abstract, and I decided that it would not work without a bit of soldering.  I’ve wanted to do a Mother & Child piece for a long time, and, I’m pleased to finally have a design I like.

Happy Mothers Day to all the Mommies who read this :-).

More photos:

YOJ09-14 Lame-O Earrings

Lame-O Earrings (2009)
Sterling silver, Preciosa crystal

I’m feeling completely tired and shagged out.  And I haven’t even squawked!

I’m working on meeting a print deadline this week, so my focus is not on jewellery.  I do have an idea for my next major undertaking, and did work a bit on that over the past few days, but it’s still in the prep phase, not the construction phase.

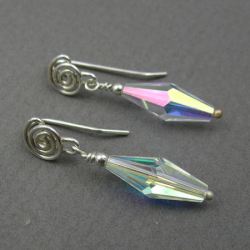
So now it’s Sunday, and I don’t want to be late two weeks in a row.  So I’m posting a pair of lame-ass earrings, constructed in about 1 minute.  Don’t have the energy for anything more this week.

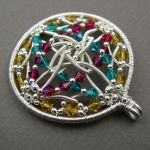
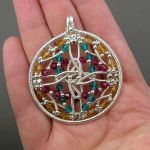
YOJ09-13 Kaleidoscope Pendant

Kaleidoscope Pendant (2009)
Fine Silver, sterling silver, Swarovski crystal
L 5.5 cm x W 4.7 cm x H 1.0 cm
Cold-connected, formed

For the first time this session, my entry is one day late.  It proved to be much more challenging to construct, as I kept changing my mind about what I wanted it to look like.

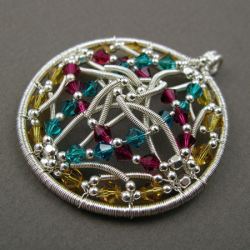
This piece also doubles as my entry for the Etsy Wire Artisan Guild‘s April theme “Kaleidoscope”.  The technique is drawn from a tutorial written by Perri Jackson, a friend and very talented wire artist who makes very intricate pieces from very thin gauge wire.  Ever since Perri asked me to test the tutorial for her, I’ve been mulling over an idea in my head for a piece that adapts the technique.  I’m not ready for that project yet, but “Kaleidoscope” is an intermediate step.

Perri’s blog features more of her spectacular work, and is well worth the visit.

More photos:

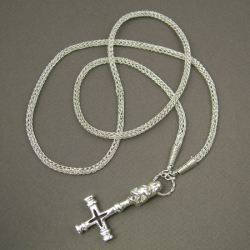
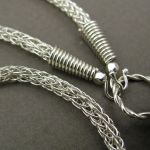
YOJ09-12 Viking Knit Chain (and “Merry Meet”)

Viking Knit Chain (2009)
Fine silver, sterling silver
Chain L 68.6 cm x W 0.35 cm
Pendant L 5.8 cm x W 2.5 cm
Nalbinding, constructed, cold-connected, flameworked, cast

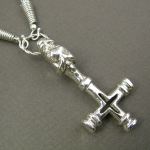
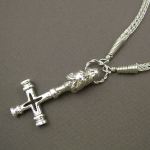
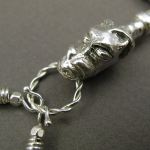
Several years ago, my husband and I collaborated on making a Thor’s Hammer.  Malcolm is fascinated by all things Norse, to the point where I’ve joked many times about him being a born-again Viking.  He carved the cross for this pendant, but struggled to model the head properly.  I came up with the idea of forming the head out of stick tack (aka white tack, blue tack etc etc), and then we cold molded the whole piece for casting.  That original was finished, and then remolded and four more pieces were cast.

Malcolm made himself a lovely chain to go with the original.  Unfortunately, our studio gremlins made off with it some time during our move, so all he has now are the copies.  Wanting to wear his Thor’s Hammer, he recently asked me to make a chain for him.

So this week, on the heels of finishing my competition entry, I decided to whip it off.  My hands are not quite recovered from the massive project, so by the time I was half way through working on this chain, I was having to put a bandaid on my pinky.  I was developing a blister from all the pulling.

My beloved husband is very happy with his new chain, and thrilled to be wearing his pendant.

Some more photos:


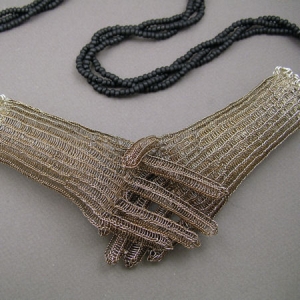
Also, as promised, I’m posting the photo of my competition entry to “Connection”, the National Juried Exhibition being held by Zilberschmuck Art Jewellery and hosted at Shao Design. The call for entry asked: “What is your interpretation of the word “CONNECTION”? Is there a connection part, link or bond? Is there an association or relationship between two or more things? Do associates, relations, acquaintances or friends influence the outcome of the piece? Is it a single connection or one of many types and kinds of connections that make up the piece? How can these ideas be formalized into a three-dimensional piece?”  My entry focused on the connection we make with each other, through a handshake. Clasping hands in greeting, in parting, in confirming business arrangements, in offering congratulations, is often the only physical connection we make with each other.
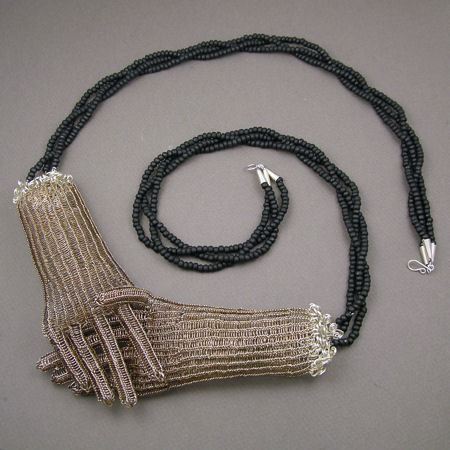
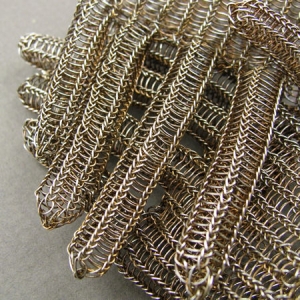
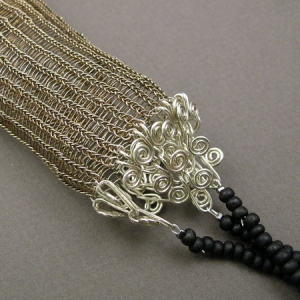
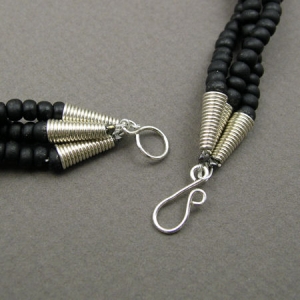
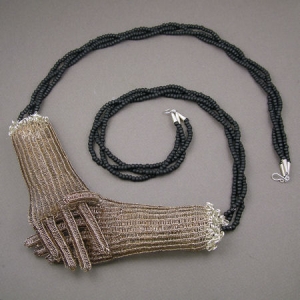
Merry Meet (2009)
Fine silver, sterling silver, glass
L 102 cm x W 7.0 cm
Nalbinding, constructed, cold-joined, liver of sulphur patination

My husband’s comment about this piece:  “It’s odd.”
Yes, but that’s  “art” jewellery for you… LOL

The hands clasp together just over the solar plexus.  If I thought anyone would wear it that way, I would have liked to turn it into a stomacher – I think it would be well suited for that – but it works as a necklace as well.

From start to finish, it took two months of solid work to construct, and is (pardon the pun) hands down, one of the most ambitious pieces I’ve ever attempted.  It’s not exactly what I envisioned – that would have taken another three months of work to complete.

As I mentioned last week, it didn’t make the final cut for the exhibition, but I’m not disappointed about that.  I am satisfied that I got it done in time for judging.

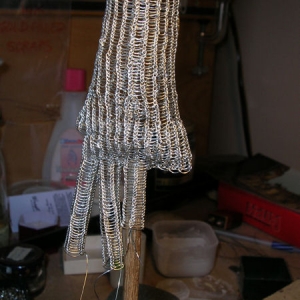
Here are more detail photos, along with shots taken during construction: