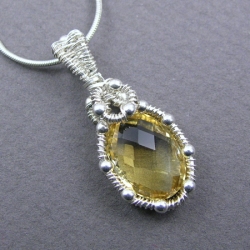
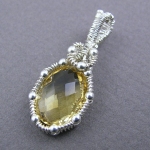
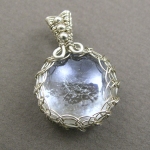
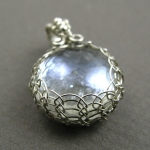
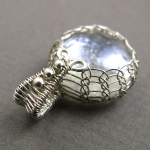
YOJ09-07 Double-sided Citrine Pendant

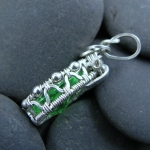
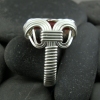
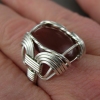
Double-Sided Citrine Pendant (2009)
Sterling silver, fine silver, citrine
L 3.0 cm x W 1.3 cm
Constructed, woven

I bought this wonderful citrine at the Toronto Gem & Mineral Show many years ago.  I think I bought it when Thumper was still a baby.  Part of the reason I’ve never used it is that despite how beautifully cut it is – double sided cushion cut – I didn’t really know how I wanted to set it.

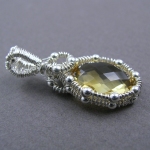
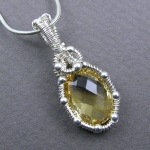
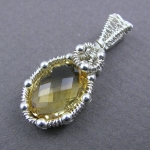
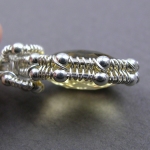
This week, while giving myself a break from the never ending viking knit project, I decided to go digging in my stash and found this beauty again.  I decided to try setting it to show off both sides of the stone.  I’ve discovered that I’ve developed a serious dislike of wrapping with half round wire.  At least, I dislike the 21 ga half round I have.  It’s just too thick for what I want to do.  So, to make a thinner setting, I use 28 ga fine silver.  It’s fiddly to work with, but it allows the stone to take centre stage instead of being overwhelmed by the wire.  Both sides are worked almost identical.  The bezel is basically two pieces of square wire woven with 28 ga wire.  The channel created in the centre of the weaving holds the girdle of the stone.  The 2 mm beads act like prongs to hold the stone in the setting.  It’s visually similar to the pendant I made in Week 4.  I like the way it turned out.

I’m making progress on the viking knit piece – it’s now 3 1/2″ long, but I’m starting to doubt that I will have it finished in time for entry to the competition.  *sigh*  I’ll keep plugging away at it, because it’s really starting to take shape.  At the same time though I need to work on production pieces, hence the citrine pendant.

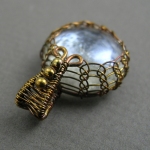
More photos:

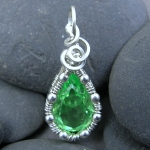
YOJ09-06 Viking Knit Pendant

Viking Knit Pendant (2009)
Sterling silver, fine silver, glass
Constructed, liver of sulphur patination
L 2.9 cm x W 1.9 cm

I’ve got Viking knitting on the brain this week, because I’m working on a competition piece that uses that technique.  It’s a slow, tedious process, but at the same time, strangely rhythmic and meditative.  So far on the competition piece I’ve used about 15 ft of wire, and have oh… 1 1/2″ (just under 4 cm) of knitting completed.

Needless to say, it’s not the piece I’m posting for this week.

Since I have my fingers suitably warmed up, I figured I’d try using the technique on a pendant, and add a woven bail.  This result is slightly different than the netted pendant I made for myself about a year ago.

I also decided to add liver of sulphur patina to it because silver and clear glass is just plain boring.  The thing I love about LOS is the range of colours that can be produced, from straw yellow to deep dark black.  My LOS is very old – so old in fact that it doesn’t dissolve properly anymore.  I mixed up a weak solution and swirled the pendant around in it.  Initially it went gold/brass coloured, but I decided I wanted to go deeper, so I popped it back in.  I like the coppery brown colour I have now.

More photos, both with and without LOS:

YOJ09-04 Swarovski Pendant

This has been a busy week.  I’ve been juggling a bunch of different projects, trying to wrap some up, get ahead on others.  I’ve made some progress in my quest to figure out how to incorporate felting for a bonsai.  Unfortunately, the avenue I’m following at the moment is very labour intensive.

Years ago, an acquaintance at the Gem & Mineral Club of Scarborough named Frank Hoffman commented that if you’re going to go to the effort of making a piece of jewellery, you should make it out of karat gold.  His reasoning was that for the same labour you would be able to charge a much higher price, because of the perceived value of the gold.  For this felted bonsai, I’m starting to think he made a good point.

Anyways… I made a pair of earrings this week, which are being given away as a birthday present, but I didn’t want to post those.  So… here it is, Sunday night, and I need to post something.

About a year ago, a lady on CWJ, Nancy Van Tassell, was selling off some Swarovski gems.  I bought a bunch.  They’ve been sitting in my stash ever since.  Recently, when I was cleaning up my bench, I discovered them again.  So… with the clock ticking down, I decided to try my hand at a pendant.  Since the gem has a deep back, I had to figure out how to set it without ending up with the point sticking out too much.  I also didn’t want the pendant to look really heavy.  So, the solution was to make an openworked bezel.  It turned out okay, but I think it would have looked better in a thinner gauge of wire.

My eyesight is going…  *gloom*… and I’m tired… and the pendant took forever to make… but hey, at least I got a piece done.

YOJ09-03 The Bird Ring

The Bird Ring (2009)
Sterling silver, wool
Needle-felted, constructed
Size 7

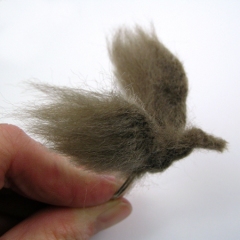
Alright, I admit: this looks a bit odd, but trust me, it’s part of the process of figuring out if felting will work for a bonsai ring.  This week, I was needle-felting onto an armature.  I’m working with wool roving, which is very fiddly on a small scale.  This was worked dry, but I’m going to have to try it wet to see if it gives me more control.  I’m also thinking that I may need to buy some felt sheets and see how that works.

Here are some other views:

YOJ09-02 Standard Form Ring

Standard Form Ring (2009)
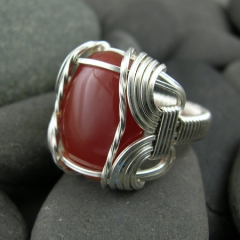
Sterling silver, carnelian
Size 10

I wasn’t intending to post this as my second entry for the YOJ, but it’s now Sunday, the due date for this week, and the piece I actually wanted to post isn’t finished.  I’m “tweaking”.  It feels very much like I’m doing a science experiment.

So… in the meantime…

I’m going to be teaching at Haliburton again this summer, and I have a bunch of tutorials I need to write in preparation for the class.  Last fall I proposed a second level wire jewelry course, which was accepted.  One of the projects is going to be the Standard Form Ring, aka Pharaoh’s Ring.  (Why it’s called the “Pharaoh’s Ring” is a mystery:  I haven’t been able to find any historical examples using wire.  References to cast versions, yes, wire, no…).  It’s called the “Standard Form Ring” because it’s one of the all-time classic wireworking ring patterns.  A version of this ring was published in Moods in Wire by Ellsworth Sinclair, Beginning Wirecraft by Jessie Donnan, and in the Wire Artist Jeweller Magazine (June 2003).  It’s a substantial ring, usually worn by men.  I started writing my version this week, in between printing off “printing sheets” for Number 2 Son, who likes to do “homework”.

(Edit Jun. 25/09:  Thanks to some excellent detective work by Helen Goga, a historical reference for the Standard Form Ring has been found!  Mr. Thomas Vincent Phelan received a patent for the ring design (US Des. 150,726) in August 1948.  The patent lasted for 14 years, and the design went into the public domain in 1962.)

My own personal artistic proclivities don’t lean towards classical wirework, so I haven’t made this type of ring before.  I followed the WAJ instructions for my first two attempts.  I often tell my students that they shouldn’t worry about what their first attempt looks like:  usually with the first one, you’re just trying to get your head around the steps, so clumsiness is part of the process.  It’s no different for me.  This ring was attempt number 3… and I’ll likely make at least two more in the process of refining, writing and photographing the steps for the instructions.

There are useful wireworking skills to be learned from doing this project.  There are definitely some “tricks” to getting it to look nice.  Notes are being scribbled…

Some other views:

YOJ09-01 Needle Felted Circle Pendant

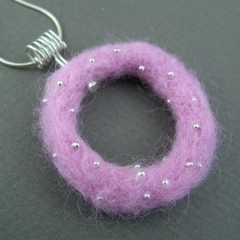
Needle Felted Circle Pendant (2009)
Sterling silver, wool
Needle-felted, flame-worked, cold connected
L 5.2 cm x W 4 cm

Back in 2006, when I was working with the Bonsai Rings one of the challenges I faced was to create realistic looking foliage.  A technique I thought might work well was felting.  I signed up for a felting course, but unfortunately various circumstances prevented me from taking it.

So recently, when I was putting together a Treasury on Etsy.com, I came across a shop that sold needle felting kits.  The price was good, so I took the plunge and bought one.

I decided to experiment first with the least appealing colour for foliage:  pink.

The technique is quite simple and fun.  On the first night, I made two little balls.  The next night I had a meeting with Maegen Black, a colleague who works with me on MAGazine.  She was wearing three felted bangles made by a BC artist whose name I didn’t catch.  (Edit: Maegen let me know the artist’s name is Deb Dumka). Intrigued, I tried a version of my own the next night.

Since I’m now working on my YOJ projects, I decided to use this little circle for my week 1 submission.  To jazz it up, I broke out the torch and made a bunch of sterling silver studs to decorate the circle.  Remembering the mess I got myself into during the previous YOJ, I did all of the finishing prior to assembling the pendant.

One for my collection :-)

Ruby Net PendantTis the season for making something for myself for a change. I won this ruby cab as part of the prize for winning a a tutorial writing contest on the IGWJA board. The cab is so large it almost qualifies as a hood ornament. LOL.

Again as part of easing myself back into doing work, I decided to try my hand at some netting. It’s really tricky to get the netting even, and as a first attempt, this pendant is all over the place. Then there are the added decorative beads in the last row. I have some delica-type beads in my stash that have enormous holes – perfect for the double threading the netting requires.

Ruby Net PendantAll in all, the result is a simple statement. It’s a very heavy pendant to wear. I strung it on a handmade chain I’d been working on over several of my beginner classes. I made the links from 24 ga square wire to show my students what can be done with a simple S-link chain.

The close up shot shows the netting (with slight kinking in the wire) and the bead detailing. I started work on a second netted pendant using some fabulous lava stone beads I bought in Bancroft last summer. I quickly discovered that there are a two of ways of putting these beads on and each gives a different look. More when I post that pendant…

Ruby Net PendantI tried something different with the photography this time: using a translucent juice jug. Milk in Ontario is sold in bags rather than in jugs, so it was only the fact that we bought some OJ that I was able to get a jug. I’m not convinced it does better than my regular setup, but I may continue to play around with it.

Ruby Netted Pendant, Sterling and fine silver, 7.4 cm long x 4.8 cm wide. Private collection.

Bridal Commission

Flotiste Headpiece Final Flotiste Necklace FinalBack in December I was contacted by a lady who wanted a bridal set based on the Musicali Necklace.

She wanted the necklace and a headpiece based on the necklace.

Since she was getting married in Scotland, she also wanted two Celtic-style pendants for her attendants – one based on a shield with a malachite bead, and another based on a treskele with garnet beads.

Flotiste Treskele Flotiste ShieldI got a follow up email from her at the end of last month. She was very happy with all of the jewellery.

Apparently the dressmaker loved the jewellery so much “she refused to allow me to put any kind of embellishment on the dress, because she said the necklace and headpiece were already the perfect compliment to it, and would take away from the overall effect.”

Here’s the bride wearing the headpiece and necklace, and another shot of the bridesmaids wearing their pendants.