Interview with Jewelry Report – Part 1

I was recently contacted by Angela Neal of Jewelry Report, asking to interview me for an article.  I’m happy and grateful for the opportunity!

Part 1 of the article was posted today, and deals with selling jewelry tutorials online.

Part 2 will be published on Thursday, and I’ll post the link then.


About Jewelry Report (from the website)
The Jewelry Report is intended to be a place to find news, reviews, tools & tips, and more miscellaneous information from the jewelry making and design world, featuring articles by jewelry enthusiasts and experts.
News Science brings us new materials and designers create innovative techniques every day.  We look at hot new trends in jewelry making, along with what’s hot in jewelry fashion, and other news from the jewelry industry.  Read about how cutting edge designers are taking jewelry to new levels and discover what trends that could lead the way for the jewelry of tomorrow. Reviews There are literally thousands of jewelry related web pages on the net.  We try to bring you the best.  Our writers give their opinion on some of the best supplier sites, jewelry blogs and how-to educational sites,  as well as reviewing new jewelry making books and materials. Tools & Tips In this section our contributors share their own experiences and present some solutions to common jewelry making problems as well as offer up a few clever shortcuts to save you time and hassle. More Miscellaneous Information We bring you a random assortment of articles such as ‘Why jewelry making and cats don’t mix’, ‘How to find your signature jewelry style’, ‘The problems and pitfalls of pricing your work’ and many more jewelry related topics, all served up with a dash of humor and the wry wisdom that comes from getting it right only after getting it wrong. Happy reading and beading!

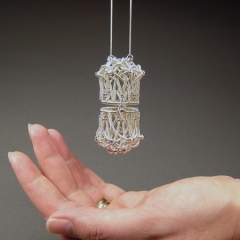
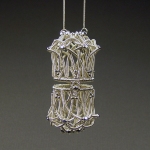
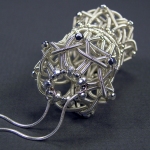
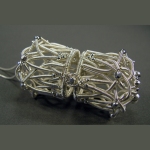
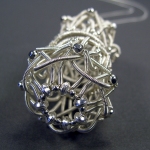
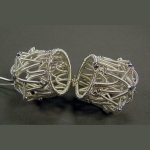
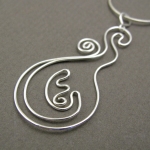
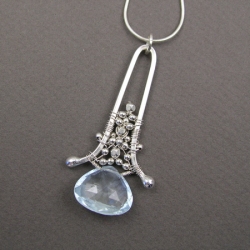
YOJ09-24 Shiva’s Pomander

Shiva’s Pomander (2009)
Fine silver, sterling silver
Pendant: L 6.1 cm x W 3.2 cm
Chain: 88 cm
Constructed, coiled, cold joined, flameworked

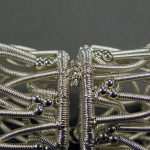
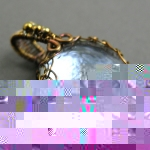
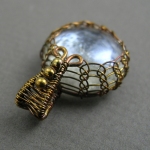
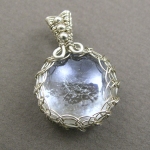
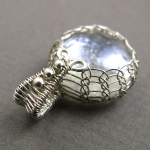
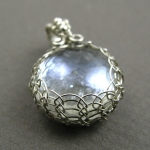
A little over a year ago, Perri Jackson sent me Strange Attractor, a stunning wire bead she’d made as a thank you gift for helping her with a tutorial.  Looking at it, I wondered how the structural coiling technique she used could be adapted to something other than a bead.  Something like a locket maybe… It got me puzzling…

An opportunity to experiment came in the form of a call for entry from Rails End Gallery.  Every year the gallery hosts a show featuring work by the faculty of the Haliburton School of the Arts.  This year, the theme is “Vessel”.

Originally, I had wanted to make the vessel to house this heart, but screwed up – err… made a Design Choice that ended up creating a much larger container than intended. The original design would have hung horizontally, with the chain running through the centre.  With this one, the design lends itself better to a vertical orientation.

This week when I was talking to Perri, I mentioned that I was working on a locket-type piece for the show.  She asked what it looked like.  “Sort of like a Shivalingam,” I said.

So… the piece is heading out the door today to get sent up to Haliburton.  There is, of course, the obligatory Artist Statement that goes with it:

In Hinduism, the lingam is a symbol of Shiva. Worn in a similar fashion as a Christian cross, the intent is to draw the blessings of the Higher Power to the wearer. Using structural coiling and weaving techniques developed by Perri Jackson, I decided to interpret this symbol as a pomander worn over the solar plexus. It allows the wearer to carry a prayer or fresh flowers within: a reminder to always recognize the Source of all life’s gifts.

VESSEL: HSTA Faculty Exhibition
Rails End Gallery & Arts Centre
23 York Street
Haliburton, Ontario, K0M 1S0
June 30 – July 30, 2009
www. railsendgallery.com

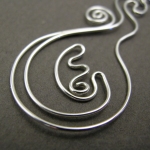
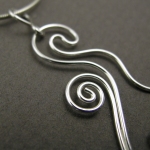
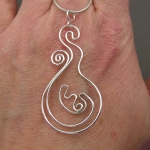
More photos:

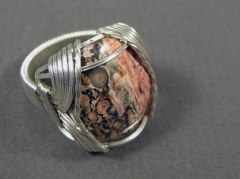
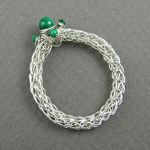
YOJ09-23 Standard Form Ring (Again)

Standard Form Ring
Sterling silver, jasper
Constructed, cold connected
Size 10

Yes I’m posting the same project as in Week 2.  At that point I had written the instructions for the tutorial, and the carnelian ring posted was the product of the writing process.   This time the ring is the product of the photography process.  I have now completed two of the six tutorials I need to write for my class.  Number three is written and transcribed to computer; photography for that project will happen tomorrow.  With any luck, number three will be done by Wednesday.

I’m now into the most challenging part of my schedule for the year.  With five weeks to go until my class, I’m multitasked up to wazoo.  I’ve been taking advantage of the convenience my netbook is offering me:  I can sit out on the front porch and work in the warmth of a sunny day while my children play in the yard.  If they are working on an educational CD doing “homework” on the clunker laptop in the kitchen, I can also sit at the table and do “my” homework.

Life is humming along…

Next week’s project will be much more spectacular, I promise.  It’s in the finishing stages now, and will be on its way to the Rails End Gallery this week for the HSTA Faculty Exhibition, “Vessel”, which opens on June 30.

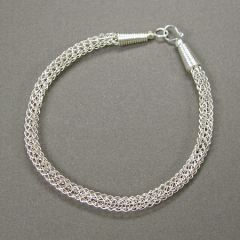
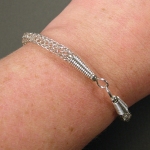
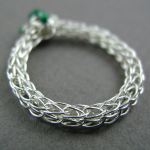
YOJ09-22 Viking Knit Bracelet

Viking Knit Bracelet (2009)
Fine silver, sterling silver
Nalbinding, cold connected
L 20.5 cm x W 0.4 cm

I’m hard at work on the tutorials for my class, so this week’s project is the product of that work.  I’ve been doing a lot of photography, and editing and layout.  I’ve been pretty much eating, sleeping and breathing the project.  The first tutorial is finished, and the second is well in hand.  Four to go… and six weeks until the classes start.

More photos:

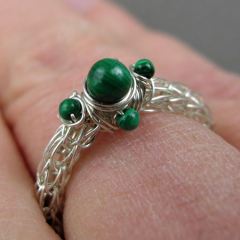
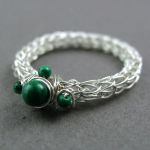
YOJ09-20 Viking Knit Ring

Viking Knit Ring (2009)
Fine silver, malachite, howlite
Nalbinding, single knit, constructed, cold joined

I finally got back to writing this week!  I have six tutorials to write in preparation for my class in Haliburton in July.  So far I have completed writing the draft on one of them.  Photos and actually putting the tutorials together are still outstanding.  I’m keenly aware of how quickly the time is going, so a few weeks ago I decided to put Tigger into daycare two days as week.  That is giving me several hours of uninterrupted work time, since it co-incides with the days that Thumper is in school.  What Heaven!
Usually I make the project, writing the steps as I go.  Then I put the text aside for a week or so, come back to it and reconstruct it following my instructions.  If I stumble on any part of it, that means a rewrite is in order.   Refining continues as I take the photos and do the layout.  Lots of work… which means I gotta start makin’ like a bread truck and haul buns…

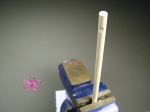
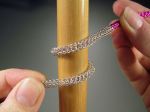
This week, I was working on instructions for viking knitting.  I experimented with incorporating 2 and 4 mm beads, which led to a screw up – err… “Design Choice” – when I went to draw the chain.  I ended up having to take the chain apart, but salvaged enough to make this ring.  It’s been an interesting experiment in timing myself as well – construction of enough chain to make a bracelet is taking a little over 2 hours.  Adding the beads was just for my amusement, and won’t be part of the final instructions.

More photos:

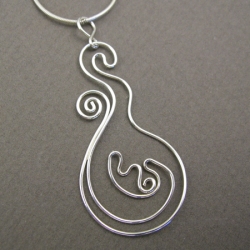
YOJ09-19 Mother & Child Pendant

Mother & Child Pendant (2009)
Sterling silver, formed, flame-worked
L 5.4 cm x W 2.4 cm

It’s Mother’s Day, so my piece this week is in honour of Motherhood.

I’ve had pregnancy on my mind a lot in the last week, because last weekend I had a miscarriage.  That was why I didn’t post anything for Week 18. What bugs me is not that I had the miscarriage – it’s that I had originally planned to wait until May 1 to do the pregnancy test.  Had I followed through, I would never have known I was pregnant.  Instead, I did the test on the 27th.  My husband was completely gobsmacked when I told him the news:  he thought I was too old to have any more babies.  I had to explain to him that even though I am of a somewhat advanced childbearing age, until I actually stop having periods, I can still get pregnant.  On the 30th I went to visit my GP, and that afternoon I started spotting.  I spent the evening at Emergency, where they took some blood and sent me home.  On Saturday, I started bleeding in earnest, so I went back to Emerg, where more blood tests and 5 hours of waiting confirmed what I already knew:  the pregnancy had aborted.

I knew the chances of this baby going full term were very slim.  I’m on medication that can cause birth defects, and, in the second and third trimesters, is toxic to the fetus.  Even that aside, this would have been an extraordinarily difficult and potentially life-threatening pregnancy because of my various health conditions.  I swear, my warranty ran out after I turned 40…

I’m sad, but not as upset as I was with the miscarriage two years ago.  More than anything, the experience has left both my husband and I wishing we had met ten years earlier.  I am able to take comfort in the idea that I am still “Mommy” to five children:  two I cuddle every day, and now three others I cuddle in spirit.

So, here is the Mother, full with her Child.  The design is a bit abstract, and I decided that it would not work without a bit of soldering.  I’ve wanted to do a Mother & Child piece for a long time, and, I’m pleased to finally have a design I like.

Happy Mothers Day to all the Mommies who read this :-).

More photos:

YOJ09-14 Lame-O Earrings

Lame-O Earrings (2009)
Sterling silver, Preciosa crystal

I’m feeling completely tired and shagged out.  And I haven’t even squawked!

I’m working on meeting a print deadline this week, so my focus is not on jewellery.  I do have an idea for my next major undertaking, and did work a bit on that over the past few days, but it’s still in the prep phase, not the construction phase.

So now it’s Sunday, and I don’t want to be late two weeks in a row.  So I’m posting a pair of lame-ass earrings, constructed in about 1 minute.  Don’t have the energy for anything more this week.

YOJ09-08 Effervescence Pendant

Effervescence Pendant (2009)
Sterling silver, fine silver, blue topaz
L 5.4 cm x W 2.5 cm
Constructed, flame-worked

Having made the decision to make more production pieces, I’m picking out stones from my stash and setting to work.  This week’s piece reminds me of the “Use it Up” pendants I made back in YOJ 2005-06.  I fished a piece of 15 ga. square wire out of the scrap bin and balled up the ends, then bent it into shape and added this 8.96 carat blue topaz brio.  It looked too plain, so I embellished it with 2 and 3 mm sterling beads.

Even since my friend Anna did the flower arrangements for my wedding, I’ve been mindful of the principle of using odd numbers for groupings.  She explained that it’s more pleasing to the eye to see 1, 3, or 5 things together, rather than 2, 4, or 6.  To some extent that principle is at work here with the three larger beads, and groups of 5 beads.

After I got it out the tumbler this morning, I tried it on.  The beads looked like fizzing over top of the brio, and made me think of what my kids refer to as “bubble water” – soda water.  So, it has the name “Effervescence”.   *grin*

My husband likes the pendant, but then again, he prefers any pieces to which I’ve take a torch.  The pendant wears well, but I’m not completely happy with the result – decorative beading is really not my forté – so I may it try again.

More photos:

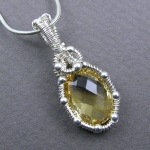
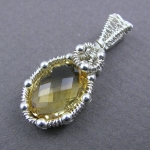
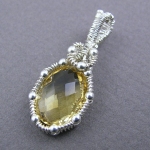
YOJ09-07 Double-sided Citrine Pendant

Double-Sided Citrine Pendant (2009)
Sterling silver, fine silver, citrine
L 3.0 cm x W 1.3 cm
Constructed, woven

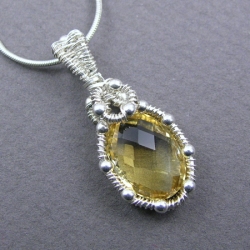
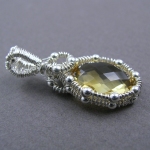
I bought this wonderful citrine at the Toronto Gem & Mineral Show many years ago.  I think I bought it when Thumper was still a baby.  Part of the reason I’ve never used it is that despite how beautifully cut it is – double sided cushion cut – I didn’t really know how I wanted to set it.

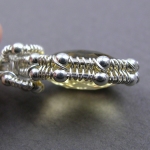
This week, while giving myself a break from the never ending viking knit project, I decided to go digging in my stash and found this beauty again.  I decided to try setting it to show off both sides of the stone.  I’ve discovered that I’ve developed a serious dislike of wrapping with half round wire.  At least, I dislike the 21 ga half round I have.  It’s just too thick for what I want to do.  So, to make a thinner setting, I use 28 ga fine silver.  It’s fiddly to work with, but it allows the stone to take centre stage instead of being overwhelmed by the wire.  Both sides are worked almost identical.  The bezel is basically two pieces of square wire woven with 28 ga wire.  The channel created in the centre of the weaving holds the girdle of the stone.  The 2 mm beads act like prongs to hold the stone in the setting.  It’s visually similar to the pendant I made in Week 4.  I like the way it turned out.

I’m making progress on the viking knit piece – it’s now 3 1/2″ long, but I’m starting to doubt that I will have it finished in time for entry to the competition.  *sigh*  I’ll keep plugging away at it, because it’s really starting to take shape.  At the same time though I need to work on production pieces, hence the citrine pendant.

More photos:

YOJ09-06 Viking Knit Pendant

Viking Knit Pendant (2009)
Sterling silver, fine silver, glass
Constructed, liver of sulphur patination
L 2.9 cm x W 1.9 cm

I’ve got Viking knitting on the brain this week, because I’m working on a competition piece that uses that technique.  It’s a slow, tedious process, but at the same time, strangely rhythmic and meditative.  So far on the competition piece I’ve used about 15 ft of wire, and have oh… 1 1/2″ (just under 4 cm) of knitting completed.

Needless to say, it’s not the piece I’m posting for this week.

Since I have my fingers suitably warmed up, I figured I’d try using the technique on a pendant, and add a woven bail.  This result is slightly different than the netted pendant I made for myself about a year ago.

I also decided to add liver of sulphur patina to it because silver and clear glass is just plain boring.  The thing I love about LOS is the range of colours that can be produced, from straw yellow to deep dark black.  My LOS is very old – so old in fact that it doesn’t dissolve properly anymore.  I mixed up a weak solution and swirled the pendant around in it.  Initially it went gold/brass coloured, but I decided I wanted to go deeper, so I popped it back in.  I like the coppery brown colour I have now.

More photos, both with and without LOS:

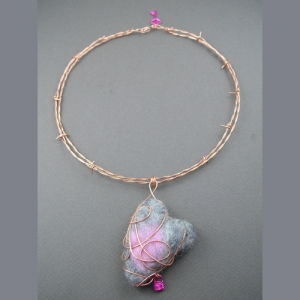
YOJ09-05 The Caged Heart Grows Cold

The Caged Heart Grows Cold or Portrait of the Artist circa 1998 (2009)
Bare copper, polymer coated copper, wool
Constructed, needle-felted
Pendant:  L 7.5 cm x W 4.2 cm; Neckwire:  L 45 cm

I’ve been debating with myself for three weeks about what and how much to write about this week’s entry.  I made the felted heart in week 2, but then discovered that studio gremlins had made off with my copper wire…  I finally found a small spool of it last week, so was able to start work on the project.  The gremlins are refusing to let go of the rest, though, so this is the last copper piece I’m going to be making for the time being.

I spent a lot of time during my hiatus meditating on the direction I should go with my jewellery.  Time and time again I’ve gotten the message that my jewellery needs to connect with the spirit, and express more of my inner voice.

So, my piece this week speaks from a very personal perspective.  The very long story behind it is one that only my very closest friends have known about before now.

YOJ09-03 The Bird Ring

The Bird Ring (2009)
Sterling silver, wool
Needle-felted, constructed
Size 7

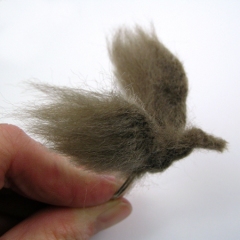
Alright, I admit: this looks a bit odd, but trust me, it’s part of the process of figuring out if felting will work for a bonsai ring.  This week, I was needle-felting onto an armature.  I’m working with wool roving, which is very fiddly on a small scale.  This was worked dry, but I’m going to have to try it wet to see if it gives me more control.  I’m also thinking that I may need to buy some felt sheets and see how that works.

Here are some other views: