YOJ09-05 The Caged Heart Grows Cold

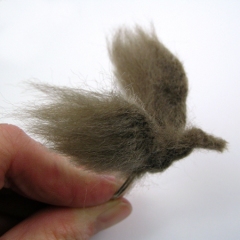
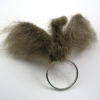
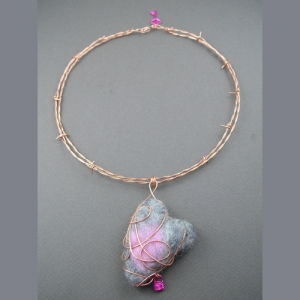
The Caged Heart Grows Cold or Portrait of the Artist circa 1998 (2009)
Bare copper, polymer coated copper, wool
Constructed, needle-felted
Pendant:  L 7.5 cm x W 4.2 cm; Neckwire:  L 45 cm

I’ve been debating with myself for three weeks about what and how much to write about this week’s entry.  I made the felted heart in week 2, but then discovered that studio gremlins had made off with my copper wire…  I finally found a small spool of it last week, so was able to start work on the project.  The gremlins are refusing to let go of the rest, though, so this is the last copper piece I’m going to be making for the time being.

I spent a lot of time during my hiatus meditating on the direction I should go with my jewellery.  Time and time again I’ve gotten the message that my jewellery needs to connect with the spirit, and express more of my inner voice.

So, my piece this week speaks from a very personal perspective.  The very long story behind it is one that only my very closest friends have known about before now.

YOJ09-04 Swarovski Pendant

This has been a busy week.  I’ve been juggling a bunch of different projects, trying to wrap some up, get ahead on others.  I’ve made some progress in my quest to figure out how to incorporate felting for a bonsai.  Unfortunately, the avenue I’m following at the moment is very labour intensive.

Years ago, an acquaintance at the Gem & Mineral Club of Scarborough named Frank Hoffman commented that if you’re going to go to the effort of making a piece of jewellery, you should make it out of karat gold.  His reasoning was that for the same labour you would be able to charge a much higher price, because of the perceived value of the gold.  For this felted bonsai, I’m starting to think he made a good point.

Anyways… I made a pair of earrings this week, which are being given away as a birthday present, but I didn’t want to post those.  So… here it is, Sunday night, and I need to post something.

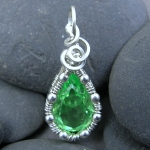
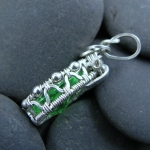
About a year ago, a lady on CWJ, Nancy Van Tassell, was selling off some Swarovski gems.  I bought a bunch.  They’ve been sitting in my stash ever since.  Recently, when I was cleaning up my bench, I discovered them again.  So… with the clock ticking down, I decided to try my hand at a pendant.  Since the gem has a deep back, I had to figure out how to set it without ending up with the point sticking out too much.  I also didn’t want the pendant to look really heavy.  So, the solution was to make an openworked bezel.  It turned out okay, but I think it would have looked better in a thinner gauge of wire.

My eyesight is going…  *gloom*… and I’m tired… and the pendant took forever to make… but hey, at least I got a piece done.

YOJ09-03 The Bird Ring

The Bird Ring (2009)
Sterling silver, wool
Needle-felted, constructed
Size 7

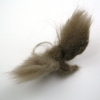
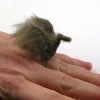
Alright, I admit: this looks a bit odd, but trust me, it’s part of the process of figuring out if felting will work for a bonsai ring.  This week, I was needle-felting onto an armature.  I’m working with wool roving, which is very fiddly on a small scale.  This was worked dry, but I’m going to have to try it wet to see if it gives me more control.  I’m also thinking that I may need to buy some felt sheets and see how that works.

Here are some other views:

YOJ09-02 Standard Form Ring

Standard Form Ring (2009)
Sterling silver, carnelian
Size 10

I wasn’t intending to post this as my second entry for the YOJ, but it’s now Sunday, the due date for this week, and the piece I actually wanted to post isn’t finished.  I’m “tweaking”.  It feels very much like I’m doing a science experiment.

So… in the meantime…

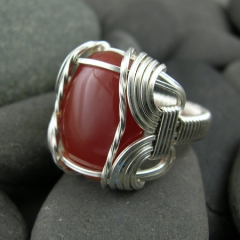
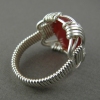
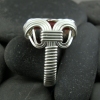
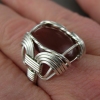
I’m going to be teaching at Haliburton again this summer, and I have a bunch of tutorials I need to write in preparation for the class.  Last fall I proposed a second level wire jewelry course, which was accepted.  One of the projects is going to be the Standard Form Ring, aka Pharaoh’s Ring.  (Why it’s called the “Pharaoh’s Ring” is a mystery:  I haven’t been able to find any historical examples using wire.  References to cast versions, yes, wire, no…).  It’s called the “Standard Form Ring” because it’s one of the all-time classic wireworking ring patterns.  A version of this ring was published in Moods in Wire by Ellsworth Sinclair, Beginning Wirecraft by Jessie Donnan, and in the Wire Artist Jeweller Magazine (June 2003).  It’s a substantial ring, usually worn by men.  I started writing my version this week, in between printing off “printing sheets” for Number 2 Son, who likes to do “homework”.

(Edit Jun. 25/09:  Thanks to some excellent detective work by Helen Goga, a historical reference for the Standard Form Ring has been found!  Mr. Thomas Vincent Phelan received a patent for the ring design (US Des. 150,726) in August 1948.  The patent lasted for 14 years, and the design went into the public domain in 1962.)

My own personal artistic proclivities don’t lean towards classical wirework, so I haven’t made this type of ring before.  I followed the WAJ instructions for my first two attempts.  I often tell my students that they shouldn’t worry about what their first attempt looks like:  usually with the first one, you’re just trying to get your head around the steps, so clumsiness is part of the process.  It’s no different for me.  This ring was attempt number 3… and I’ll likely make at least two more in the process of refining, writing and photographing the steps for the instructions.

There are useful wireworking skills to be learned from doing this project.  There are definitely some “tricks” to getting it to look nice.  Notes are being scribbled…

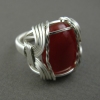
Some other views:

Tutorial – Double Celtic Cross & Scrolls Earrings

.

.

.

.

.

.

.

.

.

At long last, a new tutorial!

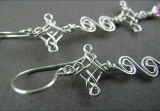
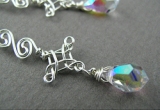
Double Celtic Cross & Scrolls Earrings

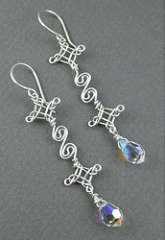
I created this design back in 1998, and it’s always been very near and dear to my heart!  For those of you who love all things Celtic, these earrings combine a couple of classic Celtic elements:  crosses and scrolls!

14 pages, 63 photos, 45 steps, plus design notes

USD $10.00

Available now from my Tutorials Page.

Tutorial – QEW Earrings

QEW EarringsQEW Earrings

Inspiration comes from the strangest places! This modern-looking pair of earrings was inspired by an Art Deco-era light standard I spied while driving along the Queen Elizabeth Way, in Toronto – and hence the name, QEW! I can’t remember exactly where it was – somewhere between High Park and the Humber Hump – only a quick glimpse, but it was enough!

9 pages, 26 photos, 22 steps, plus design notes

FREE

Available now from my Tutorials Page.

(Let me know what you think of the new tutorials format.)

Happy New Year!

One for my collection :-)

Ruby Net PendantTis the season for making something for myself for a change. I won this ruby cab as part of the prize for winning a a tutorial writing contest on the IGWJA board. The cab is so large it almost qualifies as a hood ornament. LOL.

Again as part of easing myself back into doing work, I decided to try my hand at some netting. It’s really tricky to get the netting even, and as a first attempt, this pendant is all over the place. Then there are the added decorative beads in the last row. I have some delica-type beads in my stash that have enormous holes – perfect for the double threading the netting requires.

Ruby Net PendantAll in all, the result is a simple statement. It’s a very heavy pendant to wear. I strung it on a handmade chain I’d been working on over several of my beginner classes. I made the links from 24 ga square wire to show my students what can be done with a simple S-link chain.

The close up shot shows the netting (with slight kinking in the wire) and the bead detailing. I started work on a second netted pendant using some fabulous lava stone beads I bought in Bancroft last summer. I quickly discovered that there are a two of ways of putting these beads on and each gives a different look. More when I post that pendant…

Ruby Net PendantI tried something different with the photography this time: using a translucent juice jug. Milk in Ontario is sold in bags rather than in jugs, so it was only the fact that we bought some OJ that I was able to get a jug. I’m not convinced it does better than my regular setup, but I may continue to play around with it.

Ruby Netted Pendant, Sterling and fine silver, 7.4 cm long x 4.8 cm wide. Private collection.

Tutorial – Undercurrents Earrings

Undercurrents EarringsUndercurrents Earrings

The surface of the ocean shows only the smallest hint of the turbulence underneath the waves! This is a great project for practicing precise measuring and mirror images.

11 pages, 35 photos, 39 steps, plus design notes

USD $5.00

This tutorial was voted “Best Advanced Tutorial” &”Favourite Piece” by the Members of the International Guild of Wire Jewelry Artists, Earring Tutorials Contest 2007. IGWJA decided to put it into the advanced category for the purposes of the contest, but in my opinion, this is an easy project.

(FREE to IGWAJ members, login to the guild’s website to access the tutorials library. Note: IGWAJ version does not include all of the design notes)

Available now from my Tutorials Page.

Tutorial – Micki Ring

Micki RingMicki Ring

This bold, geometric design was inspired by the work of Max Froehlich (1908-1997), a Swiss-born goldsmith who was part of the “Modern” school of jewellery design. With one change, it is possible to make two variations of this ring! In heavier gauges, it makes an appealing men’s ring! The ring is named after Micki Bleily of Parma, ID, for whom it was made as a Secret Santa gift in 2002.

Project instructions contain both variations – 11 pages, 52 photos, 43 steps, plus design notes

USD $5.00

Available now from my Tutorials Page.

Tutorial – Illusion Prong Ring

Illusion Prong RingIllusion Prong Ring

This quick and simple ring creates an illusion prong setting for a 6 mm bead. A modified version of this project was published in “Contemporary Bead and Wire Jewelry” by Suzanne Tourtillott and Nathalie Mornu.

5 pages, 16 photos, 14 steps, plus design notes

USD $5.00

Available now from my Tutorials Page.

Tutorial – Stud Earrings

Stud EarringsStud Earrings Tutorial

Not eveyone likes to wear dangling earrings, so here’s a quick and easy-to-make pair of stud earrings!

6 pages, 23 photos, 20 steps, plus design notes

USD $5.00

Available now from my Tutorials Page.

Tutorial – Ancient Horn Earrings

Ancient Horn EarringsAncient Horn Earrings
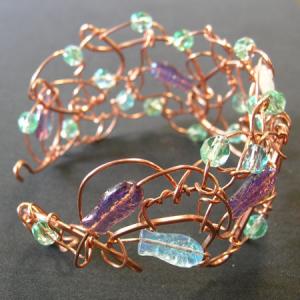
This design is based on jewellery found in archeological excavations in Ancient Greece. Coiled beads of this shape were often used in necklaces. The beads were filled with wax to give them stability when strung. This design adds an ingenious trick to provide structure.

7 pages, 22 photos, 16 steps, plus design notes

USD $5.00

Available now from my Tutorials Page