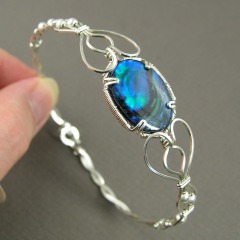
YOJ11-10 Wave Bracelet

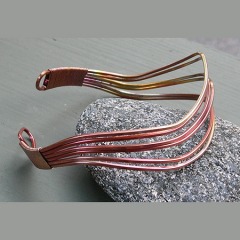
YOJ11-10 Wave BraceletWave Bracelet (2011)
Sterling silver
Formed, fused
L 17.5 cm x W 1.1 cm (variable)


I’m still behind with posting, and I’m remembering that it was at about this point last year that I gave up on the YOJ because other parts of my life were overwhelming me.

I’ve been doing interviews for the next College Review issue of MAGazine this week, and talking to the instructors in various Canadian metals programs. One of the questions I’ve been asking everyone is how they balance their academic life with their own creative work. Across the board, all have commented about how challenging it is.

At the moment, I’m juggling work on MAGazine with trying to get ready for the Lake Scugog Spring Studio Tour. I’m trying to strike a balance between production work and some more involved one-of-a-kinds. I’ve been working on a challenging woven piece for about 1 1/2 weeks now. It’s a dry run for another piece I want to make to submit to the HSTA Faculty Show in June. It’s taking up more time than I expected, and I’m becoming very conscious how quickly my deadlines are approaching.

So, I’ve had to set it aside and go back to production work.

YOJ11-10 Wave BraceletThis bracelet is a repeat of one I made for YOJ 2004-05, only more refined and simplified. I love bracelets, and this one lends itself to being worn in multiples. I made them quite small, but they are still quite loose on my wrist. Surprisingly they fit my husband’s wrist comfortably as well.

I’m still determined to keep up with YOJ, and hopefully between now and next week I’ll be caught up again.

Tutorial – Art Nouveau Bangle

I’m pleased to announce that my newest tutorial, Art Nouveau Bangle, is now available!

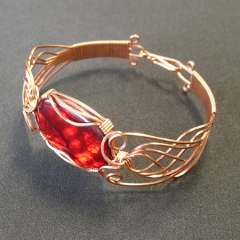
This bangle features lovely flowing curves and Celtic elements that were common in the Art Nouveau period.

The project was a big hit with my students at the Haliburton School of the Arts! Once you have the basic technique down, you can easily adapt the design and let your creativity flow to create your own variations!

16 pages, 103 photos, 110 steps, plus design notes
USD $15.00

Level of Difficulty: Advanced

Tools and Materials you’ll need:

Tools:
Flat Nose Pliers
Round Nose Pliers
Flush Cutting Wire Nippers
Permanent Marker
Measuring Tape/Ruler
Bracelet Mandrel
Penknife
1/4″ dia. Masking Tape
Rouge Cloth

Materials:
96″ (240 cm) 20 ga Soft Square Silver wire
69″ (175 cm) 22 ga Half Round Silver wire
22 x 30 mm cabochon

Substitutions:
22 ga Soft Square Silver wire can be substituted for the 20 ga. wire.

Available from my tutorials page and my Etsy Shop.

YOJ09-37 Paua Shell Bangle

Paua Shell Bangle (2009)
Constructed, cold joined
Sterling silver, fine silver, paua shell
L 19 cm x W 1.5 cm

I have lots of supplies left over from my classes at Haliburton, which I’ve decided I will not be using next year.  The cabs I ordered were a huge disappointment, with widely variant thicknesses.  In particular, the green paua shell cabs were paper thin, making them virtually useless for wrapping.  Basically, they can be pressed into something else, like maybe polymer clay, glued into a pre-manufactured setting or as part of some other craft item.  Unfortunately, by the time I got them, it was too late to send them back to the supplier and order something different:  the supplier wouldn’t have been able to give me anything else in any case, because I had already cleaned out the stock she had.  The students who had to work with these cabs did admirably, but we had to change the project to make it work.  Oh well, lesson learned.  I’ll use a different supplier next year and put the remainder up for sale as a destash on Etsy to see if I can recoup any money that way.

The blue pauas were meant to be used for rings, but again, the thickness (while much better than the green) was an issue.  They are actually quite pretty, so I may try to make something out of some them.

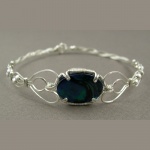
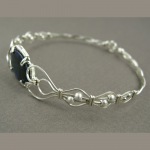
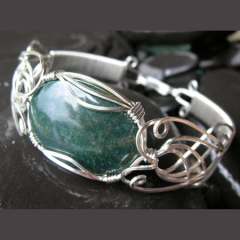
The first go is this variation on my Art Nouveau Bangle, which uses four wires instead of eight.  It ends up being a very dainty looking piece.

More views:

YOJ09-34 Stocking up for Christmas

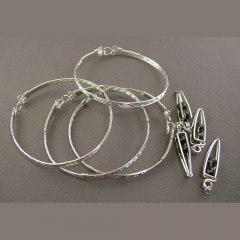
The week 34 project isn’t a specific piece of jewellery, per se, more like a bunch of things I made in preparation for Christmas sales on my Etsy shop.

Not really much more to say than that.  Oh, and if you’re interested in purchasing my jewellery, click this link.

YOJ09-32 Cooked Copper Bangle

Cooked Copper Bangle (2009)
Copper
Constructed, cold joined
L 22 cm x W 3.0 cm

During week 2 of my stay in Haliburton, one of the students taking my Wire Jewellery II class, Barbara-Joy Peel, showed us some pieces she had made in copper.  The pieces had a really fabulous patina, which she said she achieved by “cooking” the copper in a frying pan.  On the last day of the class, she brought in an iron frying pan, borrowed a hot plate from the Teen Cuisine class, and we tried out the technique for ourselves.

What fun!  The copper changes colours gradually, going from copper, to orange, to yellow, to red, to purple, and then to dark blue.  The dark blue turns silvery when the piece cools.  If the piece doesn’t lie flat, then the result is a mottled colouration.

For week 32, I decided to try it again.  I made a bangle, and cooked it.  I think this is a really cool technique which I’m going to experiment with more.

YOJ09-30 Copper Art Nouveau Cab Bangle

Copper Art Nouveau Cab Bangle (2009)
Copper, dyed paua shell
Constructed, cold joined
L 8 1/2 inches x W 1 inch

Over the next couple of days I’ll be posting the work produced by my students in Wire Jewellery 1 and 2, but for this week’s YOJ entry, I’m posting my teaching sample of the AN Cab Bangle.  This project ended up being quite challenging for the students and took an entire day for the class to complete.  That was something I hadn’t anticipated, so there’s going to be a scheduling adjustment for next year’s class.  What really impressed me was that everyone showed a lot of persistence in doing the project, which had a few tricky steps in it.  One lady, Janice, was so determined to do it – despite how much it was frustrating her – that she refused any suggestion by me to modify it to something simpler.  That caused me to joke that she was channeling her inner German:  “I VILL complete zis bracelet!”  The class cracked up laughing.

The next day, Janice came to class proudly showing off the bracelet, which she had attempted again on her own at home.  She said that she’d found the instructions very clear and easy to follow.  She had every right to be proud:  her bracelet had turned out beautifully!

YOJ09-29 Freeform Bangle

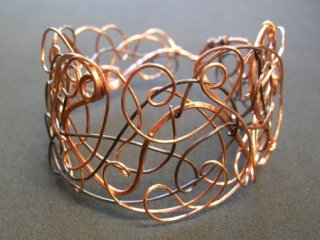
Freeform Bangle (2009)
Copper
Constructed, cold joined, liver of sulphur patination

I’ve been in Haliburton for the last week teaching the Wire Jewellery course, so this week’s entry is one of the projects made during the week.  This is the “freeform” bangle we made on Thursday.

Week 2 and Wire Jewellery II start tomorrow.  Four of the ladies from last year have signed up again, and one from last week is in the class as well.  So there are going to be lots of familiar faces!

I’ll write more about the classes after next week when I’m home again.

YOJ09-27 Art Nouveau Cab Bangle

Art Nouveau Cab Bangle (2009)
Sterling silver, bloodstone
L 21.5 cm x W 2.5 cm
Constructed, cold joined

Although it’s supposed to be a calming stone, I’ve always found bloodstone to have a kind of overpowering “in-your-face” energy that’s difficult to deal with.  For the last few weeks, though, I’ve been wearing it while working on my tutorials, and it’s been helpful for keeping my energy levels up and focused.  I love the red spotting on this cab, and the slight yellow cloud overlaying the green.  This was part of a group of cabs I bought when The Nautilus closed 10 years ago.  The Nautilus was *the* place in Toronto to buy rockhounding and lapidary supplies.  Located in the far, far east of the city, I remember it taking an obscenely long time to get there on city transit from where I lived in Little India.  But what a treasure trove!  The owner, Roy MacLeod, was a passionate rockhound and filled his store with all the bits and bobs needed to work with and admire rocks.  Sadly, Roy didn’t live to see the millennium, and the closing of his store left a void that still hasn’t been filled.

In designing the Level II course for Haliburton, I was thinking about what skills would be most useful for the students to learn.  In Level I, they learn the basics:  working with single wires, developing dexterity with tools, etc.  There are very few multi-wire projects.  In Level II all but two of the projects are multi-wire pieces, and the students have to deal with doing steps early on that don’t actually come into full use until much later in the construction. Wire control becomes very important.

One of the things Level II focuses on is settings:  half of the projects deal with some form of stone setting.

I think this is by far the most complex of the projects I’ll be teaching.  Hopefully by the time we get to this point in the course, the students will have enough confidence to tackle it.  If not, it’s easily adapted to something simpler.  I’ll let them decide how energetic they want to be.

This tutorial will be available for purchase and download off my website after I get back from Haliburton.  I’ll post the link when it’s up, along with more photos.

YOJ09-11 Snowflake Obsidian Bangle

This has been such a physically brutal week for me, it’s a wonder I have any energy at all to post anything.  I finally finished and submitted the viking knit piece I’ve been working on for the past two months.  I haven’t been so stressed out about getting a piece done in ages.  I developed a pinch in my shoulder, which made it difficult to turn my head.  Then the pain spread across my upper back.

As I was staring down the finish, wondering whether or not all the stress was worth the effort, I developed an earworm – a song that plays over and over in your head and won’t stop.  I kept hearing a Peter Gabriel lyric:  “Don’t Give Up, Please don’t give up…”  My spirit cheerleaders were encouraging me to keep me going, pushing me to work through the pain and the feelings of exhaustion and futility.  I’m very proud of myself for pulling through.  When I dropped the piece off, I commented to the organizer that getting it done was my reward:  if it actually made it into the exhibition, I would consider it a bonus.  (I found out tonight that the piece wasn’t accepted for exhibition, but did make it to the final round in the selection process.)

I’m paying for all the pressure now though:  for days I’ve been alternating between exhaustion, nausea, heartburn, loss of appetite, and gastrointestinal distress.  Throw in a runny nose and lots of sneezing, and we have a recipe for Not Wanting To Do Anything.

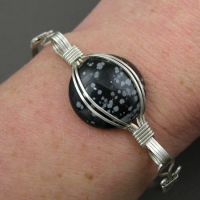
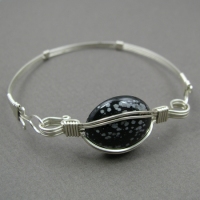
Snowflake Obsidian Bangle (2009)
Sterling silver, snowflake obsidian
Constructed, cold joined
20.32 cm dia.

Luckily, I had made the setting for this obsidian a few weeks ago while doing prep for my class in July.  I wasn’t sure what I wanted to do with it, so I left it sitting on the bench.  Tonight, I whipped off a simple bangle to go with it.  It’s about all I can manage.

I’ll post photos of the competition piece next week when I get it back.

YOJ09-09 Felt Bangle

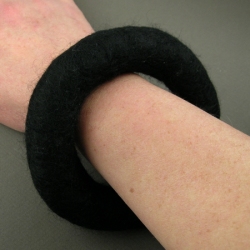
Felt Bangle (2009)
Wool
7 cm i.d.
Wet felted

This is not the project I wanted to post this week, but the one I’ve been playing with most of this evening is being very stubborn.  I’m still struggling with finishing it.

I bought a bunch of wool roving yesterday, and spent part of this afternoon experimenting with wet felting.

I found a really good series of videos on wet felted bangles on eHow.com, so the technique was easy to replicate.  Unfortunately, there’s no indication of who the lady is in the videos – I’d love to give her the credit she’s due.

I made a bunch of different things, which I’ll be playing with over the coming days.  This was my first attempt at a felt bangle.  It’s monstrous, but a reasonable start.

Secret Santa 2008 – Sneak Peak :-)

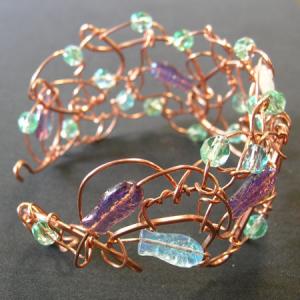
I’m participating in the Secret Santa on CWJ again this year, and as usual, I’m choosing to work outside my comfort zone.  Back in the summer when I was teaching at Haliburton, one of the projects we did was a “freeform” bangle.  Now, anyone who knows me and has any familiarity with my past work, knows that I’m not a freeform kinda gal.  It was the notes I got for my Secret Santa recipient’s preferences that made me think freeform would be the best approach.

The starting point for this bangle was the Illingworth Necklace by Sir Alfred Gilbert (1854-1934).  This is the second time I’ve used this necklace for inspiration.  The first time was during the YOJ 2005.  The results this time look to me like “Wonder Woman meets Jackson Pollack”  LOLOL

The frame was made out of 16 ga round copper.  Then, making use of the miles and miles of Artistic Wire I have, I wound in 20 ga purple and 28 ga tangerine wire.

Gilbert spent literally years working on his necklace, tying and retying the wire knots.  Originally, I was intending to make the interweaving more dense, but time is getting short, and the bracelet needs to be in the mail in the next day or so if I have any hope of getting it to its destination before Christmas.

Funny, I haven’t made much jewellery in the past two years, partly because I haven’t felt very inspired.  But working on this bangle made me feel very energetic – I have the “itch” to do more work.  Unfortunately there are other deadlines looming, so I have to put off making for a little while longer.  I’m starting to have ideas for new pieces though, and am faithfully sketching them in my notebook.  Feels good…

Here are some process photos I took showing the stages of construction.