YOJ11-04 In Production Mode

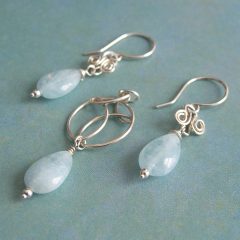
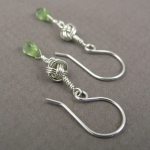
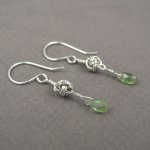
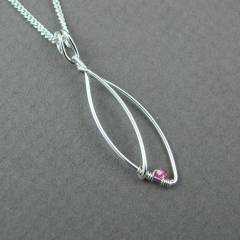
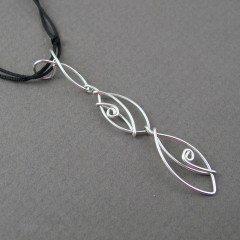
Aquamarine Bridal Set (2011)
Sterling silver, aquamarine
Formed, cold-joined, flameworked
Pendant: L 4.0 cm x W 1.5 cm
Earrings: L 3.8 cm x W 0.7 cm

I had such high hopes this week for getting a lot done.  I did get a lot done, but very little of it related to what I wanted to be doing, which was making jewelry for restocking galleries and for an upcoming studio tour.  Oh well.  As we said when I was a kid:  C’est la vie, c’est la guerre, c’est la pomme de terre…

I’m in production mode and working on things that can be quickly made.  These earrings and pendant are part of a “Something Blue” casual/bridal line.  The stone is aquamarine – a strand I picked up last fall at the GMCS show.  I’m still on a buying moratorium but the icy opaqueness of the stone is part of what appealed to me.  I have very little blue in my stone inventory, because most of the time, blue stones can’t withstand the punishment of tumbling.

I’m actively working through my stash of stones, so pendants and bracelets are also on their way!

YOJ11-03 The Peanut Experiment

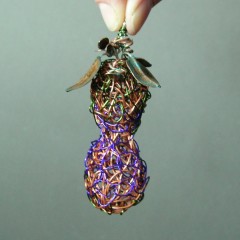
The Peanut Experiment (2011)
Copper, polymer-coated copper, sterling silver
Formed, fold-formed, cold-joined, fused, patinated
W 2.5 cm x H 8.5 cm

.

This week’s entry is actually the end of a several week long process where I experimented with a different method for forming.

This is an idea I’ve been wanting to try ever since seeing a website by a British artist who made life size human figures out of wire.  His name is regretfully forgotten, and the link to his website lost.  What I remember the most – besides the wonderful realism of his figures – was that he built them over a solid core, which was later burned out.

Cores are often used with metal clay for making hollow forms such as boxes or beads.  After some research, I bought some cork clay, and then promptly got too busy to go any further.

Cork clay is usually burned out in a kiln.  Since I’m not interested in making a substantial investment for something I may not stick with, I started researching low-tech alternatives.  I remembered a thread on Ganoksin about using a flower pot kiln for burning out wax.  The Ganoksin archives, while vast and wide-ranging, are frustrating to search, and didn’t provide anything really helpful.  Evenually, I found some basic information elsewhere online for building a flower pot kiln and went about collecting the materials to build one.

I wasn’t sure if the kiln would get hot enough to burn out the cork clay, so I made my first core out of bread dough.  Since it was just an experiment, I opted to do a freeform winding of copper wire around the core.

Finding an unglazed clay pot of an appropriate size in January in Canada is a challenge.  However, I did find one – and only one – at Home Depot.

Once back at home, I lined the pot with tin foil, set up the hotplate on my back deck, put a modified coffee can on the element, added the piece to be fired, covered it, and turned it on.

It smoked a lot, and stunk to high heaven, but considering it was in -12°C and blowing gusts, it worked very well!  The core-free wire looks a bit like a peanut.

Because with the YOJP, a finished piece is supposed to be submitted each week, I decided to also try my hand at making some leaves with fold forming, which were then patinated using salt & ammonia.  They were attached to the peanut and presto! a finished piece.

It’s not pretty, but it wasn’t intended to be.    My next step will be to try again with the cork clay.

Process photos:


YOJ10-15 Knotted Earrings 3

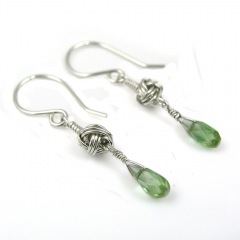
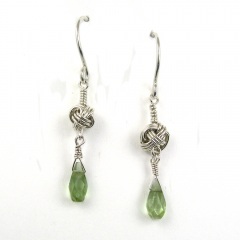
Knotted Earrings 3 (2010)
Sterling silver, fine silver, tourmaline
Constructed, cold-joined
L 3.7 cm x W 0.5 cm (W 1.45″ x L 0.2″)

Continuing on from last week, since I made several of the Monkey’s Fist knots, I made another pair of earrings!

I’ve been doing some experimenting with photography lately, putting my pieces on a white background instead of the medium gray.  I’m looking for ways to make the images “pop” more – in my recent work I’ve been using a lot of stones that have the same value as the background, and it makes the jewellery look dull.  “Value” in colour terms refers to how light or dark it is.  (To see check the value of your stone, stare at the photo with squinted eyes – if the stone disappears it has the same value as the background.)  In order for a photo to have visual interest, it has to be either lighter or darker than the background, otherwise the eyes see what’s there, but the brain registers “ho hum”.

It’s a bit more work to deal with a white background – inevitably, and even though I have a white balance setting on my camera – the raw photo comes out slightly grey.  Photoshop can adjust the balance it easily, but then I usually still have to do some extra clean up.  It’s a bit tricky to lighten the background enough to get rid of “noise” but not so much that the jewellery bleaches out.

From a print perspective, (putting on my editor hat for a moment), getting photos with white background is a godsend for layout.  I can plunk them down anywhere on a page and build text around them.  Or I can crop and put several images close together – something that isn’t possible when the jewellery is shot on a grey or staged background.   There are no distractions – you look at the jewellery and nothing else.

While they work for print and web, white backgrounds do *not* work well for jury photos.  I had the opportunity to sit in on a jury for a show recently (something I highly recommend BTW, it’s very educational), and I noticed that the photos with white backgrounds were always very jarring.  Backgrounds with a value of medium to dark (but not black) and *absolutely no props* worked best for jury photos.  Prop shots work well for Etsy, but are distracting in jury.

More photos:
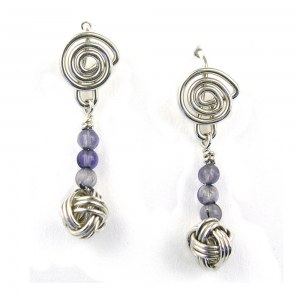
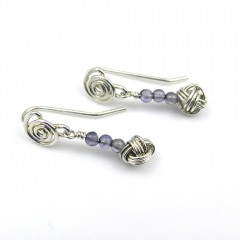
YOJ10-14 Knotted Earrings 2

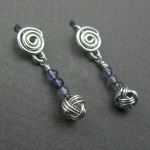
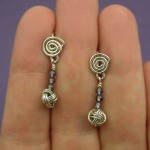
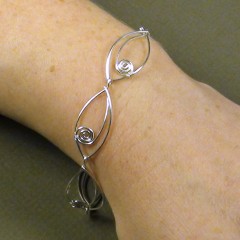
Knotted Earrings 2 (2010)
Sterling silver, iolite
Constructed, cold-joined
L 2.5 cm x W 0.7 cm (L 0.98″ x W 0.275″)

My life is all about choices:  if I choose to focus on one area of my life, another area gets sacrificed.  For the past few weeks, I’ve had to focus on some group endeavours, and so my work on YOJ projects ground to a halt.  I’m working towards finding balance, but haven’t found it just yet.

For this week’s project, my focus was on making bridal jewellery.  My thoughts were on “something blue” and “tying knots”.

The Monkey’s Fist is a classic macramé knot, usually used as a weight or ornament on the end of a rope.  Tying them in rope is relatively easy.  When I learned it as a child, it was just a matter of sticking a marble between two fingers, and wrapping the rope around the marble and fingers, then around the marble through fingers and then through the loops created by the fingers.  Then the loops were pulled tight.

In wire, the stiffness of the metal, and its tendency to kink makes tying challenging.  There is also the issue of trying to get the proportions right:  thinner gauge wire is more flexible to tie, but the knot becomes very small and fiddly.  I found it impossible to tie wire around a bead without it slipping all over the place.  Pulling the loops tight at the end was also a non-starter, so I had to make the initial wraps as close to round as possible – challenging since without a bead in the centre, the tendency is to wrap ovals.  I ended up creating an invent-a-tool to help.

It took a bit of practice to get consistent results (doesn’t everything?), but I did end up with a satisfying “knot”. To get the “blue” part of the earrings, I decided on adding some pale 2 mm iolites. I would love to try these in a larger gauge of wire, but I think that would really only be possible with fine silver.  Sterling just gets too stiff too fast.

More photos:
YOJ09-52 Marquise Series: Pendant 6

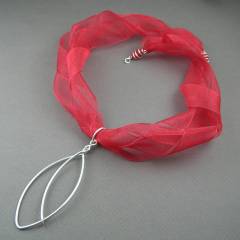
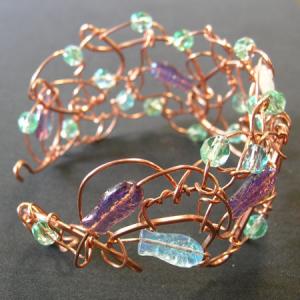
Marquise Series:  Pendant 6 (2009)
Sterling silver, ribbon
Constructed, cold-joined
L 9.8 cm x W 3.4 cm/Ribbon: L 52 cm x W 3.0 cm

.
My ex-husband used to say “Go Big or Stay Home”, so I’m finishing off the Year of Jewelry 2009 with a super-sized version of the Marquise Pendant.  This started off as an experiment to see if the basic marquise shape would translate to a bangle, but I haven’t worked out the kinks to that yet.

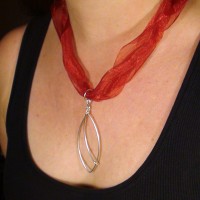
I also decided to give the ribbon necklace another try, although again, it’s technically uneconomic to make.  Ah well, I wanted to finish up the year in style!  LOL

Here’s another shot of what it looks like on:

And so this very challenging year comes to an end.  I’ll have a look back over the year and post some thoughts about what I achieved.

Until then, I wish you and those close to you a very Happy New Year, filled with enough challenge to keep you interested, and enough joy to keep you inspired!

All the best in 2010!

YOJ09-51 Marquise Series: Pendant 5

Marquise Series:  Pendant 5 (2009)
Sterling silver, fine silver, Swarovski crystal
Constructed, cold-joined, nalbinding
L 6.5 cm x W 1.3 cm

This pendant is made of two “recycled” pieces from Bracelet 3, which didn’t match the other links.  Initially I only added the Swarovskis as embellishment, but the pendant looked unbalanced.  So I decided to add some viking knitting – nalbinding – and create a ribbon-like effect.  The work involved in adding the nalbinding bumps this up from production piece to a “couture” One of a Kind or Limited Edition.

I’m not completely satisfied with how it turned out, but I’m also not able to define what is bothering me about it.   It might just be that it doesn’t work as a pendant.  The design would certainly make a fabulous pair of earrings.  Comments are welcome!

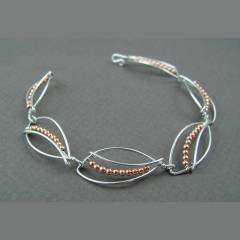
YOJ09-50 Marquise Series: Bracelet 3

Marquise Series: Bracelet 3 (2009)
Sterling silver, copper, fine silver
Constructed, cold-joined
L 16.8 cm x W 1.1 cm

For this piece, I took the idea developed in Week 48 and extended it to a bracelet.  The design looks simple, yet it surprised me how much work was involved in adding the copper beads.

I like the bi-metal toning – it’s a nice effect, and would really sparkle on tanned, warm toned or dark skin.

Like the project in Week 45, I alternated the links in mirror image; however, the alternating pattern sets up an issue for sizing.  I noticed it with the Week 45 bracelet as well, but because it’s all one metal it’s not as obvious.   With this bracelet, because there are two metals, it becomes clear that there can’t be an odd number of links: it throws off the pattern.  This design will fit either a very small wrist (like this bracelet does), or a very large wrist.  On my wrist, which is a little thinner than standard, but not small, the bracelet fits comfortably with room to move easily, but I generally like to wear my bracelets loose so that they jingle.

The design would look stunning with the Swarovskis I used in Week 48, but adding them will also add to the price of the finished piece.  If you’re interested in a Swarovski version, please email me for a quote.

YOJ09-49 Marquise Series: Pendant 4

Marquise Series:  Pendant 4 (2009)
Sterling silver
Constructed, cold-joined
L 3.6 cm x W 1.6 cm

Here is one more variation in sterling silver.  The original idea was to add a 2 mm Swarovski crystal, similar to what I did in the Week 47 project, but I ended up deciding against it.

YOJ09-48 Marquise Series: Pendant 3

Marquise Pendant:  Pendant 3 (2009)
Sterling silver, fine silver, Swarovski crystal
Constructed, cold-joined
L3.5 cm x W 1.6 cm

Lots of playing going on!  I love the sparkle of Swarovskis, so I added a thin row of crystals to this next pendant in the series.  I love the classic “sweetheart” look that resulted!

YOJ09-47 Marquise Series: Pendant 2

Marquise Series:  Pendant 2 (2009)
Sterling silver, fine silver, Swarovski crystal
Constructed, cold-joined
L 3.4 cm x W 0.9 cm

I’m still working along the lines of “quick and simple” for this series, but this time, I wanted to add a tiny splash of colour.

Still trying to keep the cost of the pendant down, I didn’t want to spend too much time on the coiling, so I added only one little Swarovski, strategically placed.

I bought a bunch of these 2 mm Swarovskis back in the late spring when I was preparing for my class at Haliburton.  I hadn’t intended to buy them, but when the supplier I was visiting only had half the tools in stock that I needed, I had to choose some other things to bump up my purchase to their minimum order requirement.  (It’s incredibly irritating when the stuff is shown in stock on the website, only to discover empty bins when you get there.  Unfortunately, this is not an unusual occurrence with this particular supplier, which is why I always go in person, and I don’t shop there unless absolutely necessary.)  They are one of the few officially sanctioned wholesale suppliers of Swarovski and Preciosa, so I picked up a few packages.

After several different attempts, I also finally came up with a nice bail that compliments the marquise shape of the pendant.

YOJ09-46 Marquise Series: Pendant 1

Marquise Series:  Pendant 1
Sterling silver, fine silver, cord
Constructed, cold-joined
L 6.1 cm x W 1.0 cm

One of the jewelry groups on Facebook is currently running a design contest to “overcome the economic crisis”.  The idea is to use cheaper materials to reduce the price point of the finished piece.  The problem I see with the contest is that the value of the physical effort involved is completely discounted.  The cost of the labour stays the same regardless of the materials used.

The only way reduce the cost of the labour is to simplify the designs so that they take less time to make.

There are two challenges to making simple designs:  one is to make them well, because the simpler the design, the more important the finishing becomes; the other is coming up with an original concept, something that will appeal to the customer without looking like the same old same old that someone else has produced.

I think the latter is the harder of the two to overcome.

This was the background I was thinking about while making this pendant.  The goal was to produce a nice, quick-to-make design, that could become part of my bread-and-butter line for next year.  As much as I like making the complex one-of-a-kind pieces, most of my sales fall in the in $20-$150 price range.

Without the neck rope, the pendant on its own would fall easily in the lower end of that range.

It’s been my experience that chains are uneconomic for me to make from scratch, and that was proven true again with this piece.  The labour involved in making the neck rope bumps the price up substantially, and the change to the cheaper material (polymer cord) has a huge impact on the perceived value.  I end up with a piece that is not sellable at the price I need to sell it at to recoup my costs and actually pay myself.

It’s perverse.  It’s also why I don’t generally use “cheap” materials.  I want you to feel good about what you’re buying from me, so I make high quality jewellery, with high quality materials.  It’s worth every cent.

YOJ09-45 Marquise Series: Bracelet 2

Marquise Series:  Bracelet 2
Sterling silver, fine silver
Constructed, cold-joined
L 19.5 cm x W 1.4 cm

The next step in developing the Marquise Series was to add some form of embellishment, like a spiral.  To give this bracelet a bit of visual interest, I decided to alternate the links in mirror image.  They remind me of fish, and a bit like the stylized birds from the Partridge Family tv show.

I debated about using solder to join the spiral to the frame, and then decided that I wouldn’t save enough time doing that to make any difference in price of the finished piece.