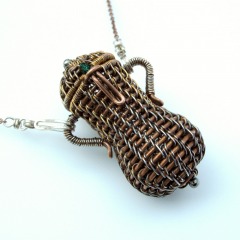
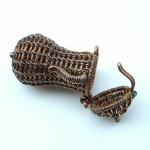
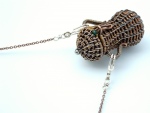
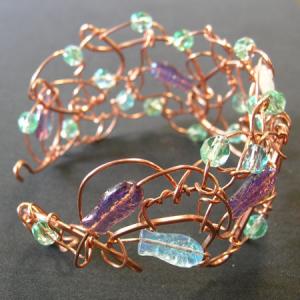
YOJ11-14 The Keeper of My Secret

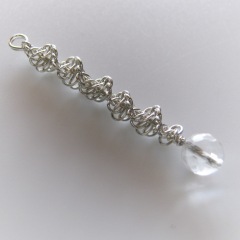
The Keeper of My Secret (2011)
Copper, fine silver, sterling silver, Swarovski crystal
Formed, cold-joined, liver of sulphur and ammonia patination
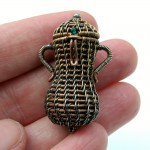
L 3.68 cm x W 2.25 cm x D 1.91 cm

After finishing the locket in Week 11 I said I wasn’t going to work on one of these again for a while, but the idea for this piece refused to stay quietly in the recesses of my mind.

I’ve been thinking a lot about secrets.  What private little treasures do we wear close to our hearts?  A note from a lover, or a totem object?  Does it contain a memory or a reminder?  The wearer gets to choose.

I love the shape of amphorae – very sensuous and feminine!  The construction was another learning experience – not the least reason being that I actually made the clasp properly this time.  Naturally, I now have ideas for two other projects I want to make, but those definitely have to wait until after the studio tour.

Currently available at: META4 Gallery

More photos:

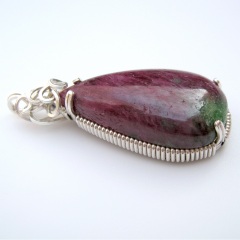
YOJ11-13 Ruby Zoisite Pendant

Ruby Zoisite Pendant (2011)
Ruby zoisite (33.32 ct), sterling silver
Formed, cold-joined
L 4.3 cm x W 1.86 cm x D 1.4 cm

By chance I’m following the YOJ theme again this week, which is “Complementary Colours”.  Ruby can be found in combination with several other metamorphic stones, namely fuschite and thulite, but my favourite is ruby in zoisite.  I picked up this cab, with its rich wine red and splash of sparkly green, at the Toronto Gem Show last year.

I’m a minimalist where bezel setting stones is concerned.  Time and again,  I have avoided the “frilly” and cage-like settings for which wirework tends to be known in favour of something simpler that lets the stone take centre stage.

YOJ11-13 Ruby Zoisite Pendant (back)There’s something about each stone I buy that has really attracted me.  This is one that begs to be held and stroked.  It has a very calming energy that makes it an excellent touchstone for meditation.  I’ve left the back of the stone open so that it can be closer to the skin when worn.

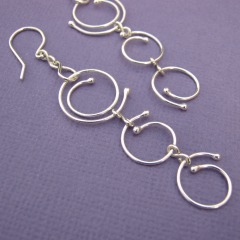
YOJ11-12 Twirl & Swirl Earrings

Twirl & Swirl Earrings (2011)
Sterling silver
Formed, flameworked, cold-joined
L 6.5 cm x W 1.6 cm

So far in this Year of Jewelry I haven’t been following any of the themes, but this week’s theme, Made from Two Feet of Wire,  was intriguing.  The design constraint – using only two feet of wire total, regardless of embellishment – offered many possibilities.  I decided to focus on earrings.  This pair was the first result that best met the criteria.  I tried various permutations of thicker and thinner wire, some of which produced interesting designs, but used either substantially less or more wire.  It turned out to be a fruitful week!  Happily, I’m also caught up again!

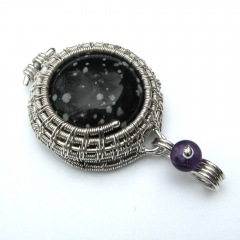
YOJ11-11 Locket Test

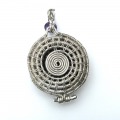
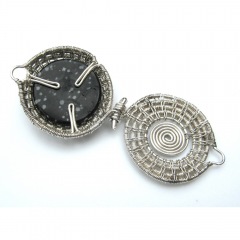
During the YOJ 2009, I made a beaded puffed heart as part of a planned larger work for that year’s HSTA Faculty Show “Vessel”.  The piece that actually went into the show – Shiva’s Pomander – was originally intended as the container for the heart, but ended up being too large.  I loved the design of Shiva’s Pomander, but wasn’t completely satisfied with the clasp.

Since that time I’ve been puzzling over an alternative solution, because I’m determined to make another attempt.  Towards the end of January, I was looking at wirework on Flickr and came across Mary Tucker’s trinket boxes.  I wrote to complement her on the elegant solution she had found to her hinges and closures and asked if I could borrow the  idea.  She graciously directed me to the tutorial she’d posted on her blog.  She also recently had another version of the tutorial published in Step-by-Step Wire Jewelry.

The idea with this locket was simply to practice starting with a large hole, because my plan is to make a much more involved piece based on what I learned here.  I have a wonderful stash of round snowflake obsidian cabs, so I decided to incorporate one into the lid of the locket.  The weaving took a ridiculous amount of time – something I don’t really have to spare as I prepare for the studio tour – so I have stopped short of what I actually wanted to do.

Because I was distracted, I didn’t realize until too late that I hadn’t actually made a hook on the back of the locket!  As a result, I had to macgyver a closure/bail.

I will likely come back to this at a later time and rework it.  The result I got here is not quite as refined as I would like it to be, but given my schedule and deadlines, I can’t spend any more time on it right now.  It was a very good test piece, and I’ll look forward to applying what I’ve learned to the next one.

.

.

Locket Test (2011)
Fine silver, sterling silver, snowflake obsidian, amethyst
Formed, woven, cold-joined, flameworked
L 4.7 cm x W 2.7 cm x D 1.68 cm


YOJ11-10 Wave Bracelet

YOJ11-10 Wave BraceletWave Bracelet (2011)
Sterling silver
Formed, fused
L 17.5 cm x W 1.1 cm (variable)


I’m still behind with posting, and I’m remembering that it was at about this point last year that I gave up on the YOJ because other parts of my life were overwhelming me.

I’ve been doing interviews for the next College Review issue of MAGazine this week, and talking to the instructors in various Canadian metals programs. One of the questions I’ve been asking everyone is how they balance their academic life with their own creative work. Across the board, all have commented about how challenging it is.

At the moment, I’m juggling work on MAGazine with trying to get ready for the Lake Scugog Spring Studio Tour. I’m trying to strike a balance between production work and some more involved one-of-a-kinds. I’ve been working on a challenging woven piece for about 1 1/2 weeks now. It’s a dry run for another piece I want to make to submit to the HSTA Faculty Show in June. It’s taking up more time than I expected, and I’m becoming very conscious how quickly my deadlines are approaching.

So, I’ve had to set it aside and go back to production work.

YOJ11-10 Wave BraceletThis bracelet is a repeat of one I made for YOJ 2004-05, only more refined and simplified. I love bracelets, and this one lends itself to being worn in multiples. I made them quite small, but they are still quite loose on my wrist. Surprisingly they fit my husband’s wrist comfortably as well.

I’m still determined to keep up with YOJ, and hopefully between now and next week I’ll be caught up again.

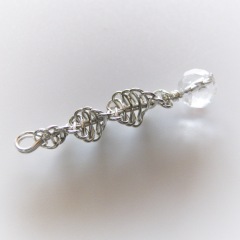
YOJ11-09 Spiral Wand Pendant

Spiral Wand Pendant (1) (2011)
Argentium silver, quartz
Formed, knotted
L 4.4 cm x .5 cm (6 mm bead)

I pulled out the spool of argentium silver while working on the week 8 project, and this pendant grew out of one of the failed attempts at embellishing the earrings.

I used to make little mini-wands with quartz points set in copper tubing and wrapped in leather for the New Age crowd. Clear quartz is regarded as an energy amplifier, and in wand form is used to direct healing energy to a specific place in the body. This updated version of the wand gives a nod to the DNA helix in the knotted spiral, and the faceted quartz bead adds a little touch of bling.

Macramé is one of those techniques that makes a very natural transition to wire, but the stiffness of the metal requires that the knots be planned out to minimize kinking.  Pulling the knots tight also quickly work-hardens the wire.

Besides a bit of coiling, I haven’t worked with the argentium silver, so this was really my first experience with it.  I’m finding it a bit stiffer to work than sterling, but I’m looking forward to seeing what it can do.

Spiral Wand Pendant (2) (2011)
Argentium silver, quartz
Formed, knotted
L 3.3 cm x .5 cm (6 mm bead)

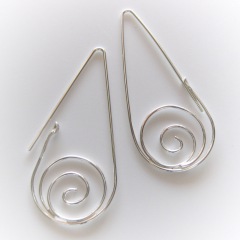
YOJ11-08 Teardrop Spiral Earrings

Teardrop Spiral Earrings (2011)
Sterling silver
Formed, forged, soldered
L 4.3 cm x W. 1.95cm

I’m late posting this week.

I had started working with this teardrop shape last week, after doing research for the next installment of my essay series.  There are many historical examples of boat-shaped earrings, and I found myself paying particular attention to how they were closed.  I wanted to make the earrings secure and still maintain a sleek line.

Originally my intention was to incorporate some sort of weaving, but my muse wasn’t co-operating.  Time and again, I cut the bits off the frame to start over.  Finally, I decided to develop the spiral idea I used on last week’s earrings.YOJ11-08 Teardrop Spiral Earrings

There are so many things on my To Do List at the moment that I’m waking up in the middle of the night thinking about it. It’s one of those situations where I’m too awake to sleep, but too tired to get up. So I just lie there with my mind spinning circles and then during the day I feel exhausted and unproductive. Finally yesterday when I had a chance to sit down to work on jewelry, I couldn’t find my flow. It’s kind of ironic that I ended up with spirals – it reflects what’s going on in my over-active mind!

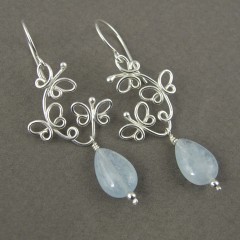
YOJ11-06 More Butterflies :)

Fluttering Butterflies (2011)
Sterling silver, aquamarine
Formed, flame-worked, cold-joined
L 4.8 cm x W 1.9 cm


This week has been very satisfying, both in terms of the pieces I’ve made and the quantity of work I was able to produce.  On top of it all, I had fun!

Early in the week, I was still thinking about butterflies and how they flitter and loop around each other.  That lead to this pair of earrings, and a matching pendant (not shown).  With our local temperatures here still below normal, spring really cannot come too soon.

I’ll be happy to see real butterflies again.

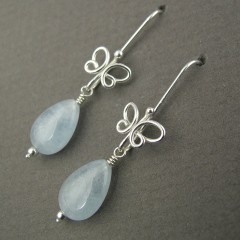
Butterfly Drop Earrings (2011)
Sterling silver, aquamarine
Formed, flame-worked, cold-joined
L 3.8 cm x W 1.0 cm

Last year, as part of the Marquise Series, I made an earring with drops that were interchangeable.  I continued that thought with these butterfly drops – the briolette can be removed and exchanged for a different drop, or can be worn plain.

The rest of the week has been devoted to other production pieces, and I’m pleased to be in a good groove!

YOJ11-05 Butterflies

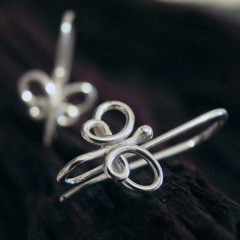
Butterfly Earrings (2011)
Sterling silver
Formed, flame-worked
L 1.9 cm x W 0.5 cm

This week, after Snowpocolypse rolled through, Canada’s own Wiarton Willie brought the very welcome news that we will have a early spring this year!  Woo hoo!  That got me looking forward to sunshine and flowers… spring weddings and butterflies.  I love watching tiny butterflies flittering around, oblivious to me being there.

I’m still in production mode, so I’m focussed on quick to make jewellery.  I wanted to make something that would appeal to brides, but also to young girls.  These little butterflies are lending themselves to drop earwires, like the ones shown here, but also to studs and to pendants.  This is one of those rare times when the design I’ve come up with uses soldered elements.  In this case, the structural requirements of the design didn’t lend itself to working cold.

I’m really looking forward to warmer weather.  I’m done with the cold feet, cold hands, and sniffles that have been my constant companion since October.

YOJ11-04 In Production Mode

Aquamarine Bridal Set (2011)
Sterling silver, aquamarine
Formed, cold-joined, flameworked
Pendant: L 4.0 cm x W 1.5 cm
Earrings: L 3.8 cm x W 0.7 cm

I had such high hopes this week for getting a lot done.  I did get a lot done, but very little of it related to what I wanted to be doing, which was making jewelry for restocking galleries and for an upcoming studio tour.  Oh well.  As we said when I was a kid:  C’est la vie, c’est la guerre, c’est la pomme de terre…

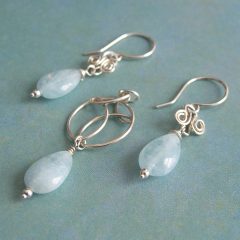
I’m in production mode and working on things that can be quickly made.  These earrings and pendant are part of a “Something Blue” casual/bridal line.  The stone is aquamarine – a strand I picked up last fall at the GMCS show.  I’m still on a buying moratorium but the icy opaqueness of the stone is part of what appealed to me.  I have very little blue in my stone inventory, because most of the time, blue stones can’t withstand the punishment of tumbling.

I’m actively working through my stash of stones, so pendants and bracelets are also on their way!

YOJ11-03 The Peanut Experiment

The Peanut Experiment (2011)
Copper, polymer-coated copper, sterling silver
Formed, fold-formed, cold-joined, fused, patinated
W 2.5 cm x H 8.5 cm

.

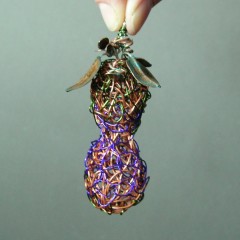
This week’s entry is actually the end of a several week long process where I experimented with a different method for forming.

This is an idea I’ve been wanting to try ever since seeing a website by a British artist who made life size human figures out of wire.  His name is regretfully forgotten, and the link to his website lost.  What I remember the most – besides the wonderful realism of his figures – was that he built them over a solid core, which was later burned out.

Cores are often used with metal clay for making hollow forms such as boxes or beads.  After some research, I bought some cork clay, and then promptly got too busy to go any further.

Cork clay is usually burned out in a kiln.  Since I’m not interested in making a substantial investment for something I may not stick with, I started researching low-tech alternatives.  I remembered a thread on Ganoksin about using a flower pot kiln for burning out wax.  The Ganoksin archives, while vast and wide-ranging, are frustrating to search, and didn’t provide anything really helpful.  Evenually, I found some basic information elsewhere online for building a flower pot kiln and went about collecting the materials to build one.

I wasn’t sure if the kiln would get hot enough to burn out the cork clay, so I made my first core out of bread dough.  Since it was just an experiment, I opted to do a freeform winding of copper wire around the core.

Finding an unglazed clay pot of an appropriate size in January in Canada is a challenge.  However, I did find one – and only one – at Home Depot.

Once back at home, I lined the pot with tin foil, set up the hotplate on my back deck, put a modified coffee can on the element, added the piece to be fired, covered it, and turned it on.

It smoked a lot, and stunk to high heaven, but considering it was in -12°C and blowing gusts, it worked very well!  The core-free wire looks a bit like a peanut.

Because with the YOJP, a finished piece is supposed to be submitted each week, I decided to also try my hand at making some leaves with fold forming, which were then patinated using salt & ammonia.  They were attached to the peanut and presto! a finished piece.

It’s not pretty, but it wasn’t intended to be.    My next step will be to try again with the cork clay.

Process photos:


YOJ11-02 Peacock Feather Earrings

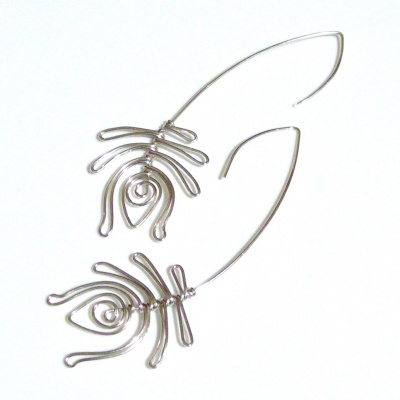
Peacock Feather Earrings (2011)
Sterling silver
Formed
L 8.5 cm x W 2.9 cm

.

I devoted a lot of this week to experimentation, and specifically to working with forming wire over a solid core.  Although my experiment went well, I didn’t finish the project to the point where I can post it.  More about this next week.

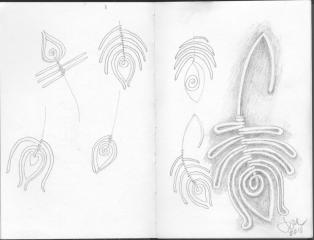
So… it being Saturday, and due date for my next YOJ posting, I went back into my sketchbook and pulled out a design from last summer.

Because of the price of metals, I’ve taken to working out some of my ideas on paper before attempting them in wire.  This is challenging for me because I’ve never been particularly good at translating things from two dimensions into three.

I love sketching, and for a few of the pieces I worked on this summer, I did a more elaborate drawing.  But, I know very well that just because I can draw something doesn’t mean I can build it.

However, I’m getting better at it, and this was one of the projects that worked well on paper and in 3D.