YOJ11-06 More Butterflies :)

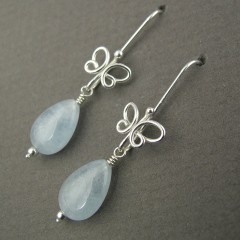
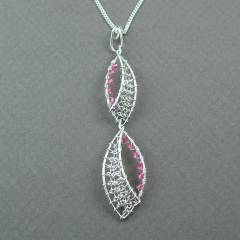
Fluttering Butterflies (2011)
Sterling silver, aquamarine
Formed, flame-worked, cold-joined
L 4.8 cm x W 1.9 cm


This week has been very satisfying, both in terms of the pieces I’ve made and the quantity of work I was able to produce.  On top of it all, I had fun!

Early in the week, I was still thinking about butterflies and how they flitter and loop around each other.  That lead to this pair of earrings, and a matching pendant (not shown).  With our local temperatures here still below normal, spring really cannot come too soon.

I’ll be happy to see real butterflies again.

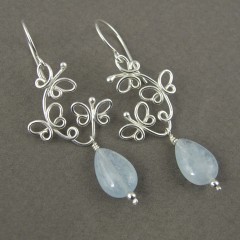
Butterfly Drop Earrings (2011)
Sterling silver, aquamarine
Formed, flame-worked, cold-joined
L 3.8 cm x W 1.0 cm

Last year, as part of the Marquise Series, I made an earring with drops that were interchangeable.  I continued that thought with these butterfly drops – the briolette can be removed and exchanged for a different drop, or can be worn plain.

The rest of the week has been devoted to other production pieces, and I’m pleased to be in a good groove!

YOJ11-05 Butterflies

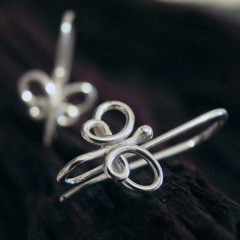
Butterfly Earrings (2011)
Sterling silver
Formed, flame-worked
L 1.9 cm x W 0.5 cm

This week, after Snowpocolypse rolled through, Canada’s own Wiarton Willie brought the very welcome news that we will have a early spring this year!  Woo hoo!  That got me looking forward to sunshine and flowers… spring weddings and butterflies.  I love watching tiny butterflies flittering around, oblivious to me being there.

I’m still in production mode, so I’m focussed on quick to make jewellery.  I wanted to make something that would appeal to brides, but also to young girls.  These little butterflies are lending themselves to drop earwires, like the ones shown here, but also to studs and to pendants.  This is one of those rare times when the design I’ve come up with uses soldered elements.  In this case, the structural requirements of the design didn’t lend itself to working cold.

I’m really looking forward to warmer weather.  I’m done with the cold feet, cold hands, and sniffles that have been my constant companion since October.

Tutorial – Sweetheart Ring

Sweetheart Ring - Tutorial Instant Download from wrapturetutorials.com

Sweetheart Ring
Level of Difficulty:  Intermediate

This little ring is very economical in its use of wire, but what a pretty result! Its look is perfect for delicate fingers, but the pattern can be easily adjusted for larger ring sizes and stones. For those who have mastered the basics and are looking to move on a new skill level, this project introduces some precise measuring and calculation.

13 pages, 45 photos, 40 steps, plus design notes

USD $15.00

Tools & Materials You’ll Need:

Tools:
Flat Nose Pliers
Round Nose Pliers
Chain Nose Pliers
Flush Cutting Wire Nippers
Vernier Caliper
Permanent Marker
Measuring Tape/Ruler
Jeweller’s File
Rouge Cloth
Wooden Ring Mandrel
1/4″ (6 mm) Masking Tape

Materials:
16″ (41 cm) 22 ga. (.65 mm) Soft Square wire
1 1/2″ (4 cm) 22 ga. (.75 x .5 mm) Half-hard half round wire
1x 6 mm facetted Cubic Zirconium or other stone

Substitutions:
Substitutions are not recommended for this project.

Available now from my Tutorials Page and in my Artfire Shop.

YOJ10-15 Knotted Earrings 3

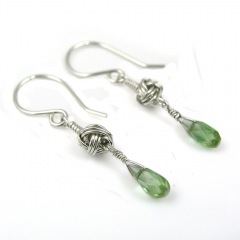
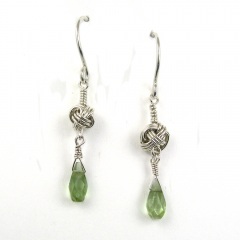
Knotted Earrings 3 (2010)
Sterling silver, fine silver, tourmaline
Constructed, cold-joined
L 3.7 cm x W 0.5 cm (W 1.45″ x L 0.2″)

Continuing on from last week, since I made several of the Monkey’s Fist knots, I made another pair of earrings!

I’ve been doing some experimenting with photography lately, putting my pieces on a white background instead of the medium gray.  I’m looking for ways to make the images “pop” more – in my recent work I’ve been using a lot of stones that have the same value as the background, and it makes the jewellery look dull.  “Value” in colour terms refers to how light or dark it is.  (To see check the value of your stone, stare at the photo with squinted eyes – if the stone disappears it has the same value as the background.)  In order for a photo to have visual interest, it has to be either lighter or darker than the background, otherwise the eyes see what’s there, but the brain registers “ho hum”.

It’s a bit more work to deal with a white background – inevitably, and even though I have a white balance setting on my camera – the raw photo comes out slightly grey.  Photoshop can adjust the balance it easily, but then I usually still have to do some extra clean up.  It’s a bit tricky to lighten the background enough to get rid of “noise” but not so much that the jewellery bleaches out.

From a print perspective, (putting on my editor hat for a moment), getting photos with white background is a godsend for layout.  I can plunk them down anywhere on a page and build text around them.  Or I can crop and put several images close together – something that isn’t possible when the jewellery is shot on a grey or staged background.   There are no distractions – you look at the jewellery and nothing else.

While they work for print and web, white backgrounds do *not* work well for jury photos.  I had the opportunity to sit in on a jury for a show recently (something I highly recommend BTW, it’s very educational), and I noticed that the photos with white backgrounds were always very jarring.  Backgrounds with a value of medium to dark (but not black) and *absolutely no props* worked best for jury photos.  Prop shots work well for Etsy, but are distracting in jury.

More photos:

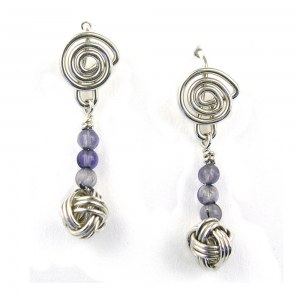
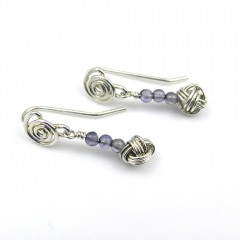
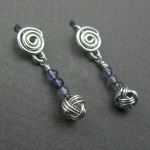
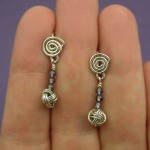
YOJ10-14 Knotted Earrings 2

Knotted Earrings 2 (2010)
Sterling silver, iolite
Constructed, cold-joined
L 2.5 cm x W 0.7 cm (L 0.98″ x W 0.275″)

My life is all about choices:  if I choose to focus on one area of my life, another area gets sacrificed.  For the past few weeks, I’ve had to focus on some group endeavours, and so my work on YOJ projects ground to a halt.  I’m working towards finding balance, but haven’t found it just yet.

For this week’s project, my focus was on making bridal jewellery.  My thoughts were on “something blue” and “tying knots”.

The Monkey’s Fist is a classic macramé knot, usually used as a weight or ornament on the end of a rope.  Tying them in rope is relatively easy.  When I learned it as a child, it was just a matter of sticking a marble between two fingers, and wrapping the rope around the marble and fingers, then around the marble through fingers and then through the loops created by the fingers.  Then the loops were pulled tight.

In wire, the stiffness of the metal, and its tendency to kink makes tying challenging.  There is also the issue of trying to get the proportions right:  thinner gauge wire is more flexible to tie, but the knot becomes very small and fiddly.  I found it impossible to tie wire around a bead without it slipping all over the place.  Pulling the loops tight at the end was also a non-starter, so I had to make the initial wraps as close to round as possible – challenging since without a bead in the centre, the tendency is to wrap ovals.  I ended up creating an invent-a-tool to help.

It took a bit of practice to get consistent results (doesn’t everything?), but I did end up with a satisfying “knot”. To get the “blue” part of the earrings, I decided on adding some pale 2 mm iolites. I would love to try these in a larger gauge of wire, but I think that would really only be possible with fine silver.  Sterling just gets too stiff too fast.

More photos:

Interview with Your Daily Muse News

Shortly before Christmas I was contacted with an interview request by Tina of Your Daily Muse News.  Tina’s blog is a terrific collection of unusual, inspiring and drop dead gorgeous creations that span a wide range of fine craft.  Her blog immediately became one of my regularly visited bookmarks.

While having a look at the blog earlier today, I discovered that our interview was posted!  You can read it here.

I’m thrilled to be included with the plethora of talent Tina has featured on the site!  Thanks Tina!

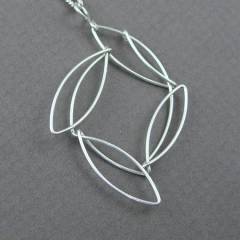
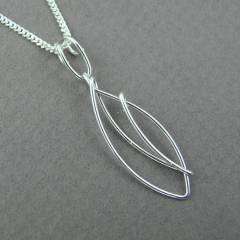
YOJ10-01 Marquise Series: Pendant 7

Marquise Series: Pendant 7 (2009)
Sterling silver
Constructed, cold-joined
L 5.2 cm X W 3.3 cm

I made this pendant in the early part of the week, knowing that the first project for the new YOJ was due today.  Up to now, I’ve been working with marquise shapes as single pieces, either as pendants on their own, or linked together in a bracelet.  This one is a compound structure, made from one piece of wire.  It took a bit of torturing to get it to look like this, LOL, but I like how it resembles a whirligig.

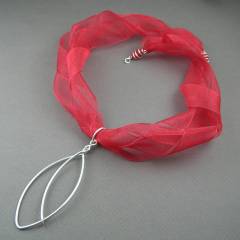
YOJ09-52 Marquise Series: Pendant 6

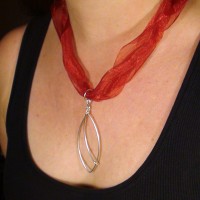
Marquise Series:  Pendant 6 (2009)
Sterling silver, ribbon
Constructed, cold-joined
L 9.8 cm x W 3.4 cm/Ribbon: L 52 cm x W 3.0 cm

.
My ex-husband used to say “Go Big or Stay Home”, so I’m finishing off the Year of Jewelry 2009 with a super-sized version of the Marquise Pendant.  This started off as an experiment to see if the basic marquise shape would translate to a bangle, but I haven’t worked out the kinks to that yet.

I also decided to give the ribbon necklace another try, although again, it’s technically uneconomic to make.  Ah well, I wanted to finish up the year in style!  LOL

Here’s another shot of what it looks like on:

And so this very challenging year comes to an end.  I’ll have a look back over the year and post some thoughts about what I achieved.

Until then, I wish you and those close to you a very Happy New Year, filled with enough challenge to keep you interested, and enough joy to keep you inspired!

All the best in 2010!

YOJ09-51 Marquise Series: Pendant 5

Marquise Series:  Pendant 5 (2009)
Sterling silver, fine silver, Swarovski crystal
Constructed, cold-joined, nalbinding
L 6.5 cm x W 1.3 cm

This pendant is made of two “recycled” pieces from Bracelet 3, which didn’t match the other links.  Initially I only added the Swarovskis as embellishment, but the pendant looked unbalanced.  So I decided to add some viking knitting – nalbinding – and create a ribbon-like effect.  The work involved in adding the nalbinding bumps this up from production piece to a “couture” One of a Kind or Limited Edition.

I’m not completely satisfied with how it turned out, but I’m also not able to define what is bothering me about it.   It might just be that it doesn’t work as a pendant.  The design would certainly make a fabulous pair of earrings.  Comments are welcome!

YOJ09-49 Marquise Series: Pendant 4

Marquise Series:  Pendant 4 (2009)
Sterling silver
Constructed, cold-joined
L 3.6 cm x W 1.6 cm

Here is one more variation in sterling silver.  The original idea was to add a 2 mm Swarovski crystal, similar to what I did in the Week 47 project, but I ended up deciding against it.

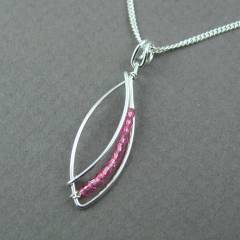
YOJ09-48 Marquise Series: Pendant 3

Marquise Pendant:  Pendant 3 (2009)
Sterling silver, fine silver, Swarovski crystal
Constructed, cold-joined
L3.5 cm x W 1.6 cm

Lots of playing going on!  I love the sparkle of Swarovskis, so I added a thin row of crystals to this next pendant in the series.  I love the classic “sweetheart” look that resulted!