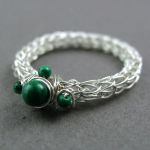
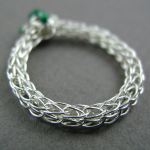
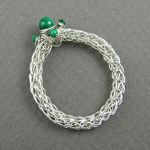
Tutorial – Sweetheart Ring

Sweetheart Ring - Tutorial Instant Download from wrapturetutorials.com

Sweetheart Ring
Level of Difficulty:  Intermediate

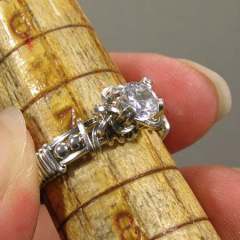
This little ring is very economical in its use of wire, but what a pretty result! Its look is perfect for delicate fingers, but the pattern can be easily adjusted for larger ring sizes and stones. For those who have mastered the basics and are looking to move on a new skill level, this project introduces some precise measuring and calculation.

13 pages, 45 photos, 40 steps, plus design notes

USD $15.00

Tools & Materials You’ll Need:

Tools:
Flat Nose Pliers
Round Nose Pliers
Chain Nose Pliers
Flush Cutting Wire Nippers
Vernier Caliper
Permanent Marker
Measuring Tape/Ruler
Jeweller’s File
Rouge Cloth
Wooden Ring Mandrel
1/4″ (6 mm) Masking Tape

Materials:
16″ (41 cm) 22 ga. (.65 mm) Soft Square wire
1 1/2″ (4 cm) 22 ga. (.75 x .5 mm) Half-hard half round wire
1x 6 mm facetted Cubic Zirconium or other stone

Substitutions:
Substitutions are not recommended for this project.

Available now from my Tutorials Page and in my Artfire Shop.

YOJ10-10 Ring Week at the Studio

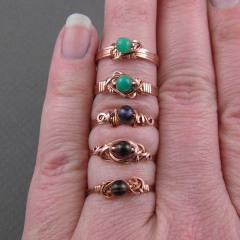
Copper Single Bead Rings (2010)
Copper, iolite, smoky quartz, amazonite
Constructed, cold-joined
Various sizes

It’s ring week here at the studio!

For a long time, I’ve been wanting to develop an original method for constructing a single bead ring, so this week I spent some time playing around with a couple of ideas.  The one I teach in my course at George Brown College is Mavis Llewellyn’s One Bead Ring (published in The Wire Artist Jeweller, September 1999).  According to her daughter Susan, Mavis developed the design back in the late 70s-early 80s as a quick-to-make-project to sell at shows.

Other single bead ring patterns are easier to make (i.e. 3-minute ring), but the shanks (to my eye) are sloppy looking.  In square wire, they often look tortured. If you’re looking for something quick and dirty to sell for $8 and you work “organically”, then Bob’s Your Uncle…

The thing I like most about Mavis’ design is how elegant it looks, especially the shank.  The ones I produced this week haven’t achieved anything resembling elegance or consistency yet, but I’m happy to have made progress.

YOJ10-05 A New Home for Whoville

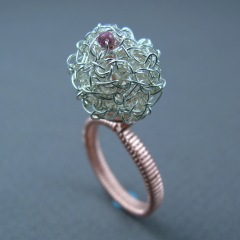
A New Home For Whoville (2010)
Fine silver, copper, garnet
Constructed, cold-joined
Size 7

I’ve fallen behind with my YOJ postings due to a bout of creative block.  I keep picking up the wire and the pliers in an effort to make something, and end up with nothing but frustration and a pile of scrap.  Earlier this week I joked on Twitter that I was tempted to solve the problem by piling up my scrap, adding fire and Presto! A brooch!

One of my Job Jar jobs this week was to “Organize beads and materials in the studio”.  Translated, that means “Clean up the mess!”  So I started sorting through a drawer where I’d dumped a bunch of finished and half finished pieces.  Some went into a “for packaging” box, some into a “for salvage” box, and some went into the scrap bin.

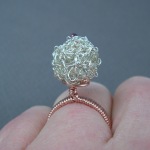
Amongst the half finished pieces were a bunch of crochet balls I’d made two years ago.  I thought it might be interesting to set one as a bead in a ring.  Since I was just experimenting, I didn’t want to use silver, so I hauled out the copper wire to make the ring shank.

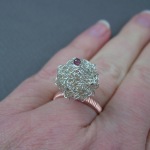
Once the bead was mounted, it occurred to me that it looked a lot like the little puff ball in “Horton Hears A Who” by Dr. Seuss.  So, I added a little garnet bead to represent the Who’s world.

More photos:

YOJ09-28 Prong Set Ring

Prong Set Ring (2009)
Sterling silver, cubic zirconium
Size 7
Constructed, cold joined

Life is crazy busy right now as I finish preparations for Haliburton.  So this week’s entry is a variation on Jorgen Greftegreff’s Prong Ring (published originally in the April 2001 issue of The Wire Artist Jeweller).

The good news is that my wire arrived finally, and I didn’t need to reorder anything!  *Whew*

My computer access is going to be limited for the next two weeks, so while I’ll try to post YOJ pieces on time, more than likely it will wait until I get back.

YOJ09-23 Standard Form Ring (Again)

Standard Form Ring
Sterling silver, jasper
Constructed, cold connected
Size 10

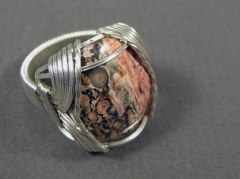
Yes I’m posting the same project as in Week 2.  At that point I had written the instructions for the tutorial, and the carnelian ring posted was the product of the writing process.   This time the ring is the product of the photography process.  I have now completed two of the six tutorials I need to write for my class.  Number three is written and transcribed to computer; photography for that project will happen tomorrow.  With any luck, number three will be done by Wednesday.

I’m now into the most challenging part of my schedule for the year.  With five weeks to go until my class, I’m multitasked up to wazoo.  I’ve been taking advantage of the convenience my netbook is offering me:  I can sit out on the front porch and work in the warmth of a sunny day while my children play in the yard.  If they are working on an educational CD doing “homework” on the clunker laptop in the kitchen, I can also sit at the table and do “my” homework.

Life is humming along…

Next week’s project will be much more spectacular, I promise.  It’s in the finishing stages now, and will be on its way to the Rails End Gallery this week for the HSTA Faculty Exhibition, “Vessel”, which opens on June 30.

YOJ09-20 Viking Knit Ring

Viking Knit Ring (2009)
Fine silver, malachite, howlite
Nalbinding, single knit, constructed, cold joined

I finally got back to writing this week!  I have six tutorials to write in preparation for my class in Haliburton in July.  So far I have completed writing the draft on one of them.  Photos and actually putting the tutorials together are still outstanding.  I’m keenly aware of how quickly the time is going, so a few weeks ago I decided to put Tigger into daycare two days as week.  That is giving me several hours of uninterrupted work time, since it co-incides with the days that Thumper is in school.  What Heaven!

Usually I make the project, writing the steps as I go.  Then I put the text aside for a week or so, come back to it and reconstruct it following my instructions.  If I stumble on any part of it, that means a rewrite is in order.   Refining continues as I take the photos and do the layout.  Lots of work… which means I gotta start makin’ like a bread truck and haul buns…

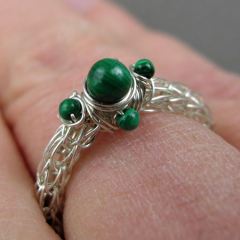
This week, I was working on instructions for viking knitting.  I experimented with incorporating 2 and 4 mm beads, which led to a screw up – err… “Design Choice” – when I went to draw the chain.  I ended up having to take the chain apart, but salvaged enough to make this ring.  It’s been an interesting experiment in timing myself as well – construction of enough chain to make a bracelet is taking a little over 2 hours.  Adding the beads was just for my amusement, and won’t be part of the final instructions.

More photos:

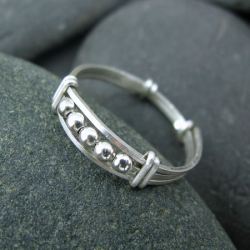
YOJ09-16 Beaded Channel Ring

Beaded Channel Ring (2009)
Sterling silver, constructed, cold worked
Size 5 1/2

My lack of energy is starting to concern me.  If this keeps up I’m going to haul my carcass off to the doctor and find out what’s going on.

For now, another simple offering this week – a beaded channel ring.  The tutorial for this ring was published in “Contemporary Bead & Wire Jewelry” by Nathalie Mornu and Suzanne Tourtillot, one of two projects I contributed to the book.

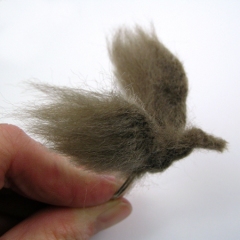
YOJ09-03 The Bird Ring

The Bird Ring (2009)
Sterling silver, wool
Needle-felted, constructed
Size 7

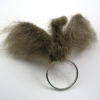
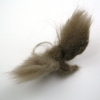
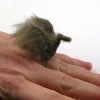
Alright, I admit: this looks a bit odd, but trust me, it’s part of the process of figuring out if felting will work for a bonsai ring.  This week, I was needle-felting onto an armature.  I’m working with wool roving, which is very fiddly on a small scale.  This was worked dry, but I’m going to have to try it wet to see if it gives me more control.  I’m also thinking that I may need to buy some felt sheets and see how that works.

Here are some other views:

Found a freebie :-)

Does anyone besides me occasionally do a search for their own name on Google? (C’mon… admit it…LOL)

Actually, I was doing it to check how many sites are linking to mine. In the process I stumbled across a link to my Beaded Channel Ring tutorial, published in Lark Books’ Contemporary Bead and Wire Jewelry. So, give it a try!

Tutorial – Micki Ring

Micki RingMicki Ring

This bold, geometric design was inspired by the work of Max Froehlich (1908-1997), a Swiss-born goldsmith who was part of the “Modern” school of jewellery design. With one change, it is possible to make two variations of this ring! In heavier gauges, it makes an appealing men’s ring! The ring is named after Micki Bleily of Parma, ID, for whom it was made as a Secret Santa gift in 2002.

Project instructions contain both variations – 11 pages, 52 photos, 43 steps, plus design notes

USD $5.00

Available now from my Tutorials Page.

Tutorial – Illusion Prong Ring

Illusion Prong RingIllusion Prong Ring
This quick and simple ring creates an illusion prong setting for a 6 mm bead. A modified version of this project was published in “Contemporary Bead and Wire Jewelry” by Suzanne Tourtillott and Nathalie Mornu.

5 pages, 16 photos, 14 steps, plus design notes

USD $5.00

Available now from my Tutorials Page.