Pop! Goes the Circle wins Award at International Bead Awards 2012

The disappointment of having to cancel my classes in Germany was mellowed a bit this week, when news came from fellow instructor Dian Hierschel that my necklace “Pop! Goes the Circle” had placed second in the Metals/Wirework category at the International Bead Awards!  The IBA was exhibited as part of Beaders Best Perlenkunst Messe, just wrapped up in Hamburg.

Dian kindly sent along this photo from show.

Pop! Goes the Circle (2011)

.

I worked at break-neck speed on this necklace, spending most of New Year’s Eve finishing it.  It was uploaded almost at the last minute before entries closed.  The sore shoulder lasted a few days, but this makes it all worth while!  Thank you to the jury and to everyone who voted for it!


Tutorial – Sweetheart Ring

Sweetheart Ring - Tutorial Instant Download from wrapturetutorials.com

Sweetheart Ring
Level of Difficulty:  Intermediate

This little ring is very economical in its use of wire, but what a pretty result! Its look is perfect for delicate fingers, but the pattern can be easily adjusted for larger ring sizes and stones. For those who have mastered the basics and are looking to move on a new skill level, this project introduces some precise measuring and calculation.

13 pages, 45 photos, 40 steps, plus design notes

USD $15.00

Tools & Materials You’ll Need:

Tools:
Flat Nose Pliers
Round Nose Pliers
Chain Nose Pliers
Flush Cutting Wire Nippers
Vernier Caliper
Permanent Marker
Measuring Tape/Ruler
Jeweller’s File
Rouge Cloth
Wooden Ring Mandrel
1/4″ (6 mm) Masking Tape

Materials:
16″ (41 cm) 22 ga. (.65 mm) Soft Square wire
1 1/2″ (4 cm) 22 ga. (.75 x .5 mm) Half-hard half round wire
1x 6 mm facetted Cubic Zirconium or other stone

Substitutions:
Substitutions are not recommended for this project.

Available now from my Tutorials Page and in my Artfire Shop.

Tutorial – Ancient Whispers Earrings (Free)

Tutorial - Ancient Whispers Earrings

Ancient Whispers Earrings (Free download)
8 pages, 43 photos, 43 steps
Level of Difficulty:  Easy

What do these earrings remind you of?  A lady of Ancient Rome strolling in her garden, admiring the mosaics and calla lilies?  The Ionic Columns of Ancient Greece soaring above the Acropolis? Whatever springs to mind, the classics are never out of style!

It’s been quite a while since I released a free tutorial! While I put the finishing touches on my upcoming (and first!) Intermediate tutorial, I decided I’d make available this pair of earrings, which were originally featured in Week 13 the Year of Jewelry 2010.

This project was developed for a workshop I’ll be teaching this week and next at Harbourfront Community Centre in Toronto.

Tools & Materials You’ll Need:

Tools:
Flat Nose Pliers
Round Nose Pliers
Flush Cutting Wire Nippers
Permanent Marker
Measuring Tape/Ruler
Jeweler’s File
Rouge Cloth
Materials:
33 inches (75 cm) 20 gauge (.80 mm) Hard Round Wire  

Substitutions:
Half hard wire can be used for this project.

https://wrapturewirejewellery.on.ca/blog/2010/03/yoj10-13-ancient-whispers-earrings/

Click here to download!

Other tutorials (fee and free) are available on my Tutorials page.

PASSAGE: HSTA Faculty Exhibition – June 30-July 30, 2010

There are times when a call for entry with a specific theme is put out and I draw a complete blank.  I go through all kinds of contortions trying to come up with some sort of inspiration, and then what I end up with looks equally tortured! So I was really excited when, upon finding out out last summer that the theme for this year’s HSTA Faculty Exhibition was going to be “Passage”, I immediately had an idea.

A former boss made the comment to me once that we are all dependent on the products of mining:  “If it can’t be grown, it has to be mined,” he said.  While this statement could almost be considered a universal truth, it is particularly true for jewelers.

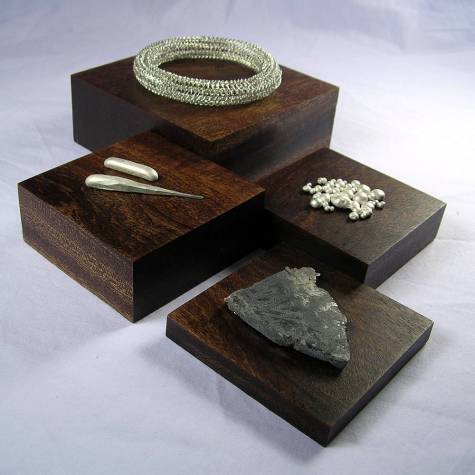
I wanted to show a piece through various stages of its development – the passage from ore to granule, from granule to ingot, from ingot to wire, from wire to jewelry.

Having attended a number of fine craft exhibitions during my time with The Metal Arts Guild of Canada, one thing that has always struck me is how jewellers have dealt with the issue of effectively displaying something so small.

The first MAG show I attended, Behind Glass (2000), directly challenged the problem by asking everyone to display their pieces in shadow boxes.  The pieces I remember were a silhouette of a person – a brooch in silver – attached to a picture of a beach, to give the illusion of it standing at the water’s edge.  Another entry was a ring topped by a tiny sewing machine displayed in front of a old photograph of the artist’s grandmother, who loved to sew.

At the most recent exhibition, MAGC 2067:  Crafting the Future, several of the artists included supplementary props with their pieces.  Anne Lumsden’s piece was displayed over a bed of zebra mussel shells.  Rosalyn Woo’s award winning brooch, “Dear Linda” was envisioned as a birthday gift for its fictitious namesake, and included the “letter” written by the “maker”, Jacob.  Some might argue that the props detracted from the work – turning them into sculpture rather than jewelry – but for me, it added visual interest and helped to put the pieces into the context of the scenarios they were made to represent.

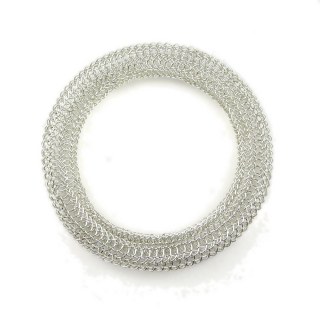
So, for this year’s HSTA Faculty Exhibition, I decided to approach my submission as jewelry cum sculpture.  The pinnacle of the Passage – and the piece that took the longest to construct – is the torus bangle.  Despite my ravings last year after a previous attempt at a torus, the thought of trying again appealed to me.

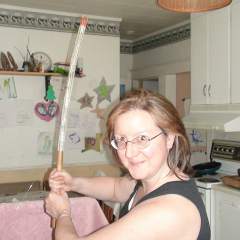
My six year old is currently obsessed with all things LEGO and Star Wars, so when I got the tube to the final length (18″/45 cm) I decided to have a little fun, and took a picture of myself in my best Jedi Princess Warrior pose.
.

My wonderful handyman husband whipped up a wooden drawplate with large holes for me.  (He loves it when I give him an excuse to buy tools!)  After drawing, the length of the tube was over 40″ (101 cm). The reason I made it that long was to give me extra material in case I had to try again.

The technique for making a seamless join is called kitchener stitching.  It’s a common knitting technique for adding pockets to sweaters, or fingers to mittens, etc.  It’s tricky to do in wire, because the wire work hardens very quickly and the join tends to have a bit of a bulge.

I made two attempts at tori before finally working out an effective way of keeping the seam from being visible.

The casting grain and ingots gave me an opportunity to feed my own tool fetish:  I now have a new ingot mold! *grin*

The silver ore came from a vendor at the Bancroft Gemboree last year.  Unfortunately, no locality info was included with the specimen, so I don’t know if the source is a Canadian mine.

The mahogany display blocks play an integral role in delineating the passage through the stages.

I am grateful to be able to work with metal and to make wearable art, and so my submission to the HSTA Faculty Exhibition is really about paying homage.

.

Passage:  From Ore to Jewelry (2010)
Silver ore, slabbed
Grains, 18.43 g, sterling silver, cast
Ingot, sterling silver, cast, 6.844 g
Ingot, sterling silver, cast, forged, drawn, 7.992 g
Torus, sterling silver, viking knit, kitchener stitching, 1.3 cm tube, 8.5 cm OD
Displays, mahogany wood, danish oil finish, various sizes

Every piece of jewelry is the end of a journey.  The metal forms as ore deep underground.  It is mined, extracted and formed into granules, then melted and cast into ingots.  The ingots are compressed and made into a usable shape.  In this case, it was drawn into wire, then knitted into a torus.

We see and admire only the final form, and acknowledge only the artist whose name is attached to it; yet the piece has been touched by many hands.  I wanted to recognize and thank those who labour behind the scenes to bring my jewelry into being.

.

PASSAGE: HSTA Faculty Exhibition
Rails End Gallery & Arts Centre
23 York Street
Haliburton, Ontario, K0M 1S0
June 30 – July 30, 2009
www. railsendgallery.com

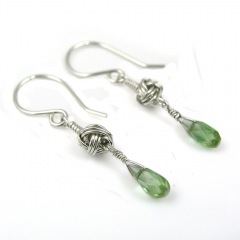
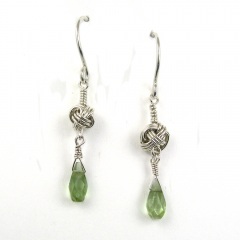
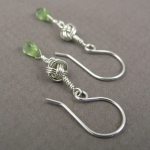
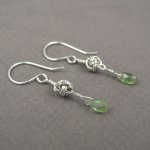
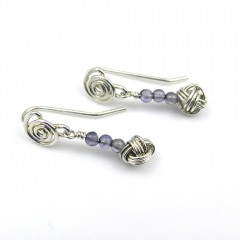
YOJ10-15 Knotted Earrings 3

Knotted Earrings 3 (2010)
Sterling silver, fine silver, tourmaline
Constructed, cold-joined
L 3.7 cm x W 0.5 cm (W 1.45″ x L 0.2″)

Continuing on from last week, since I made several of the Monkey’s Fist knots, I made another pair of earrings!

I’ve been doing some experimenting with photography lately, putting my pieces on a white background instead of the medium gray.  I’m looking for ways to make the images “pop” more – in my recent work I’ve been using a lot of stones that have the same value as the background, and it makes the jewellery look dull.  “Value” in colour terms refers to how light or dark it is.  (To see check the value of your stone, stare at the photo with squinted eyes – if the stone disappears it has the same value as the background.)  In order for a photo to have visual interest, it has to be either lighter or darker than the background, otherwise the eyes see what’s there, but the brain registers “ho hum”.

It’s a bit more work to deal with a white background – inevitably, and even though I have a white balance setting on my camera – the raw photo comes out slightly grey.  Photoshop can adjust the balance it easily, but then I usually still have to do some extra clean up.  It’s a bit tricky to lighten the background enough to get rid of “noise” but not so much that the jewellery bleaches out.

From a print perspective, (putting on my editor hat for a moment), getting photos with white background is a godsend for layout.  I can plunk them down anywhere on a page and build text around them.  Or I can crop and put several images close together – something that isn’t possible when the jewellery is shot on a grey or staged background.   There are no distractions – you look at the jewellery and nothing else.

While they work for print and web, white backgrounds do *not* work well for jury photos.  I had the opportunity to sit in on a jury for a show recently (something I highly recommend BTW, it’s very educational), and I noticed that the photos with white backgrounds were always very jarring.  Backgrounds with a value of medium to dark (but not black) and *absolutely no props* worked best for jury photos.  Prop shots work well for Etsy, but are distracting in jury.

More photos:

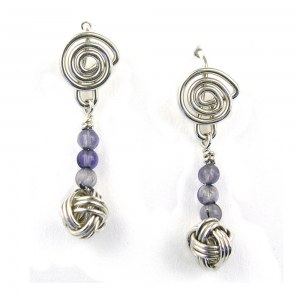
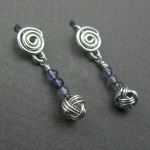
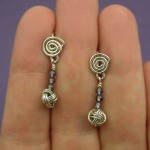
YOJ10-14 Knotted Earrings 2

Knotted Earrings 2 (2010)
Sterling silver, iolite
Constructed, cold-joined
L 2.5 cm x W 0.7 cm (L 0.98″ x W 0.275″)

My life is all about choices:  if I choose to focus on one area of my life, another area gets sacrificed.  For the past few weeks, I’ve had to focus on some group endeavours, and so my work on YOJ projects ground to a halt.  I’m working towards finding balance, but haven’t found it just yet.

For this week’s project, my focus was on making bridal jewellery.  My thoughts were on “something blue” and “tying knots”.

The Monkey’s Fist is a classic macramé knot, usually used as a weight or ornament on the end of a rope.  Tying them in rope is relatively easy.  When I learned it as a child, it was just a matter of sticking a marble between two fingers, and wrapping the rope around the marble and fingers, then around the marble through fingers and then through the loops created by the fingers.  Then the loops were pulled tight.

In wire, the stiffness of the metal, and its tendency to kink makes tying challenging.  There is also the issue of trying to get the proportions right:  thinner gauge wire is more flexible to tie, but the knot becomes very small and fiddly.  I found it impossible to tie wire around a bead without it slipping all over the place.  Pulling the loops tight at the end was also a non-starter, so I had to make the initial wraps as close to round as possible – challenging since without a bead in the centre, the tendency is to wrap ovals.  I ended up creating an invent-a-tool to help.

It took a bit of practice to get consistent results (doesn’t everything?), but I did end up with a satisfying “knot”. To get the “blue” part of the earrings, I decided on adding some pale 2 mm iolites. I would love to try these in a larger gauge of wire, but I think that would really only be possible with fine silver.  Sterling just gets too stiff too fast.

More photos:

Interview with Your Daily Muse News

Shortly before Christmas I was contacted with an interview request by Tina of Your Daily Muse News.  Tina’s blog is a terrific collection of unusual, inspiring and drop dead gorgeous creations that span a wide range of fine craft.  Her blog immediately became one of my regularly visited bookmarks.

While having a look at the blog earlier today, I discovered that our interview was posted!  You can read it here.

I’m thrilled to be included with the plethora of talent Tina has featured on the site!  Thanks Tina!

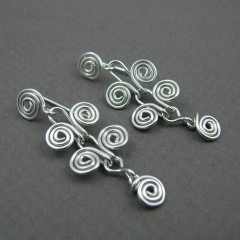
YOJ10-13 Ancient Whispers Earrings

Ancient Whispers Earrings (2010)
Sterling silver
Constructed, cold-joined
L 4.3 cm x W 1.3 cm

It’s been another productive week here in the studio, with two new ring designs (destined for tutorials), some bridal jewelry and this pair of earrings made.

The earrings are the product of some work I’ve been doing on a proposal for a one-day course.  The idea is to teach ancient techniques.  This pattern is assumed to be ancient Egyptian.  It was all but lost to time before being reintroduced in the 1840s by the House of Castellani.   The Castellanis were greatly influenced by jewelry found in excavations of ancient Etruscan sites.  As fervent nationalists, they studied the pieces coming out of the sites, and painstakingly reproduced the jewelry, in what became known as the Italian Archeological Style.  The Museo Nazionale Etrusco di Villa Giulia in Rome has in its collection a “Prehistoric” bracelet, manufactured by Castellani, which today’s wire artists would recognize as a variant of the Egyptian scroll.

The Etruscans had trading relationships with the Syrians, Phoenicians and Greeks, who all traded with the Egyptians, so it’s conceivable that the design traveled from the Nile Basin to Ancient Italy.

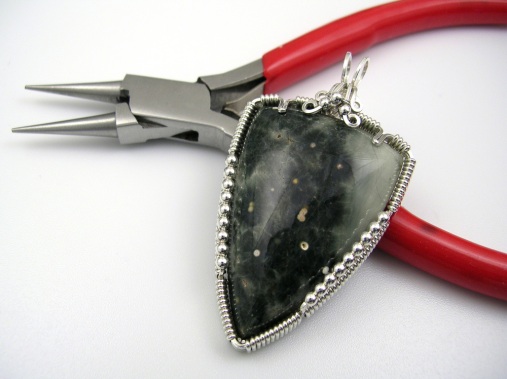
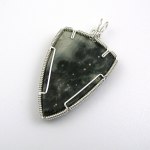
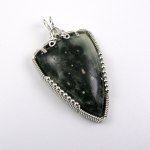
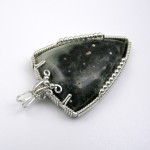
YOJ10-12 Ocean Jasper Pendant

Ocean Jasper Pendant (2010)
Sterling silver, fine silver, ocean jasper
Constructed, cold-joined
L 5.4 cm x W 3.0

I’m in production mode, building up some stock, and that means digging through my stash of stones.  I came across this ocean jasper, which I bought last year from a fellow member of the International Guild of Wire Jewelry Artists.

I’m not normally an ocean jasper fan, but every time I look at this cab, I see celestial clouds and galaxies.  It draws me in, and I can imagine that I’m looking into the vastness of outer space. This is a really special stone.

Generally, my preference when setting is to leave as much of the surface exposed as possible. I also tend to favour the more substantial, heavier bezels achieved by doing binding wrapping all around the stone.  It would have been easiest with a straight prong setting, but I wanted to add the beads to create some visual interest.  They are structural in that they act almost like prongs, holding the stone, but they also add beautiful decoration.

Corners are challenging to get tight, and I’m happy to have managed a secure fit around these.  I don’t have a lot of experience setting stones with points – most of the time the stones I deal with are round, oval or teardrop shaped.

I’m undecided if I should hang this on a viking knit chain, or on a strand of ocean jasper beads. Thoughts anyone?

All in all, I’m very pleased with how this turned out.  Even my husband, who has a decided bias towards using a torch, likes the setting – very high praise indeed!

More photos:

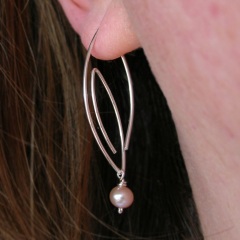
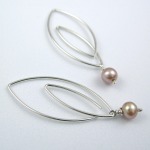
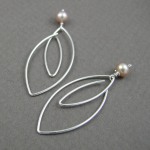
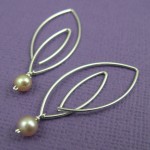
YOJ10-11 Marquise Series: Bridal Earrings

Marquise Series:  Bridal Earrings (Interchangeable) (2010)
Sterling silver, pearl
Constructed, cold-joined
L 4.0 cm x W 1.6 cm (L 1.57″ x W .55″)

I was sitting at my computer on Tuesday night, minding my own business,  when inspiration struck!  It was one of those “bolt out of the blue” ideas that forced me to get up right then, get my pliers & wire and start bending.

*Contented sigh*

I love it when that happens.

This design fulfills a long-standing desire of mine to create a pair of earrings with interchangeable bits.  The pearl drops can be removed and replaced by other drops, or can be left off altogether.  The result is a very versatile earring that can be worn with everything – from dressy to casual.

The sleek styling makes this an elegant earring for a wedding:  With the pearl, it can be worn by the bride, or without, by her bridesmaids.

These earrings are available from my Etsy Shop.

More photos:

YOJ10-10 Ring Week at the Studio

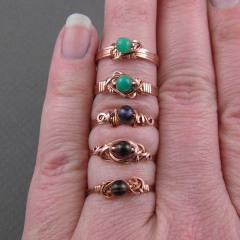
Copper Single Bead Rings (2010)
Copper, iolite, smoky quartz, amazonite
Constructed, cold-joined
Various sizes

It’s ring week here at the studio!

For a long time, I’ve been wanting to develop an original method for constructing a single bead ring, so this week I spent some time playing around with a couple of ideas.  The one I teach in my course at George Brown College is Mavis Llewellyn’s One Bead Ring (published in The Wire Artist Jeweller, September 1999).  According to her daughter Susan, Mavis developed the design back in the late 70s-early 80s as a quick-to-make-project to sell at shows.

Other single bead ring patterns are easier to make (i.e. 3-minute ring), but the shanks (to my eye) are sloppy looking.  In square wire, they often look tortured. If you’re looking for something quick and dirty to sell for $8 and you work “organically”, then Bob’s Your Uncle…

The thing I like most about Mavis’ design is how elegant it looks, especially the shank.  The ones I produced this week haven’t achieved anything resembling elegance or consistency yet, but I’m happy to have made progress.

YOJ10-09 Felt & Crochet Bead Necklace

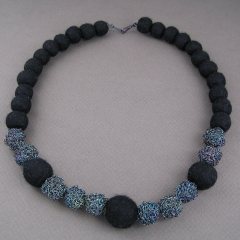
Felt & Crochet Bead Necklace (2010)
Fine silver, merino wool, Beadalon stringing material, crimp beads
Crochet, felted, assembled
L 47.31 cm x 17 mm (largest bead)

I mentioned in my Week 6 post that I was making felted beads, and now I can share the results of that effort.  Initially I was going to pair the felted beads with the crochet beads just as I’d made them, in fine silver white.  Then it occurred to me that over time, the silver is going to tarnish, and the necklace will be difficult to clean without taking it apart.

The solution was to add LOS to the silver.

Liver of sulphur stinks to high heaven, but it creates such interesting effects, especially when a bit of salt is added into the solution!  I love how the colours change, and in this case, how they became mottled in the purple-blue range.

A friend of mine asked me to produce a bunch of pieces for her to use in the fall for a fashion show, so this is going to be one of the things I send her.  It’s not my typical style, but it will work well with the clothing being shown.

More photos: