Tutorial – Sweetheart Ring

Sweetheart Ring - Tutorial Instant Download from wrapturetutorials.com

Sweetheart Ring
Level of Difficulty:  Intermediate

This little ring is very economical in its use of wire, but what a pretty result! Its look is perfect for delicate fingers, but the pattern can be easily adjusted for larger ring sizes and stones. For those who have mastered the basics and are looking to move on a new skill level, this project introduces some precise measuring and calculation.

13 pages, 45 photos, 40 steps, plus design notes

USD $15.00

Tools & Materials You’ll Need:

Tools:
Flat Nose Pliers
Round Nose Pliers
Chain Nose Pliers
Flush Cutting Wire Nippers
Vernier Caliper
Permanent Marker
Measuring Tape/Ruler
Jeweller’s File
Rouge Cloth
Wooden Ring Mandrel
1/4″ (6 mm) Masking Tape

Materials:
16″ (41 cm) 22 ga. (.65 mm) Soft Square wire
1 1/2″ (4 cm) 22 ga. (.75 x .5 mm) Half-hard half round wire
1x 6 mm facetted Cubic Zirconium or other stone

Substitutions:
Substitutions are not recommended for this project.

Available now from my Tutorials Page and in my Artfire Shop.

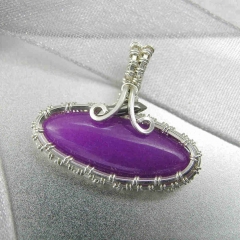
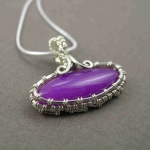
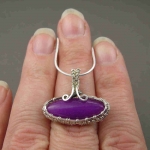
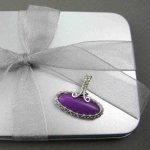
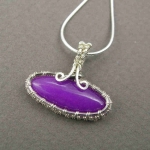
YOJ09-39 Oblong Purple Jade Pendant

Oblong Purple Jade Pendant (2009)
Constructed, cold joined
Sterling silver, fine silver, purple jade (dyed)
L 2.2 cm x W 2.5 cm

Okay, so life fell apart for me two months ago, and I’m just starting to recover.  I have not been making much new jewellery, but I am going to still try to keep up with the YOJ postings.

I got this purple jade cabochon through a Bead Box swap several years ago.  Those Bead Boxes were lots of fun:  the idea was to put in things from your stash that you weren’t using and swap them for beads that other people had put in from their stash.  I was the Bead Box Mama who organized the whole shebang for Bead Box North, which traveled around Canada and the Northern US.  It was a lot of work, but every time the box arrived on my doorstep, it was like Christmas Day!  I managed to keep it going for about three years.

Purple is my favourite colour, and I’m always drawn to it.  For this pendant, I wanted to work with the same sort of weaving I did on the Moonrise pendant, but on this smaller cab.  Well… the cab’s shape proved to be quite a challenge:  getting the wire to fit around the pointed ends was very tricky.  After multiple attempts to get a pendant that hung lengthwise, I gave up and set the stone sideways.  It ends up looking a bit like a genie bottle 🙂

Other views:

Tutorial – Clip-on Earrings

For people who don’t have pierced ears, finding handmade earrings they can wear is a real challenge.  Back when I did shows, I’d occasionally get requests for clip-on findings, and lost sales because I didn’t have them.  Commercial findings were not an option for the types of shows I was doing.

So when, about a year ago, someone posted a message to one of the forums I’m on asking if there was a pattern for clip-ons, I thought “What a great idea!”.  I got out an old pair of my mom’s clip-ons and studied them to figure out a way to make a pair in wire.   And today I’m very pleased to announce the release of a new tutorial – Clip-on Earrings!

Clip-OnEarrings-Main

The Clip-on Earrings tutorial includes two variations:  Variation 1 makes a basic spiral, with a loop for adding a dangle.  Variation 2 forms a base on which you can add your own embellishment, so if you have a favourite bead, or button, you can add it.  Variation 2 also has a loop for adding a dangle.

13 pages, 45 photos and 40 steps
USD $8.00

Level of Difficulty:  Easy

Tools and Materials You’ll need:

Tools:
3-Step Pliers
Flat Nose Pliers
Round Nose Pliers
Flush Cutting Wire Nippers
Permanent Marker
Measuring Tape/Ruler
Jeweller’s File
Rouge Cloth
10 mm Dowel/Knitting Needle (for Variation 2)

Materials:
15″ (38 cm) 20 ga. Hard Round Sterling Silver wire

Substitutions:
20 ga Half Hard Silver wire can be substituted.

Available from my tutorials page and my Etsy Shop.

Tutorial – Art Nouveau Bangle

I’m pleased to announce that my newest tutorial, Art Nouveau Bangle, is now available!

This bangle features lovely flowing curves and Celtic elements that were common in the Art Nouveau period.

The project was a big hit with my students at the Haliburton School of the Arts! Once you have the basic technique down, you can easily adapt the design and let your creativity flow to create your own variations!

16 pages, 103 photos, 110 steps, plus design notes
USD $15.00

Level of Difficulty: Advanced

Tools and Materials you’ll need:

Tools:
Flat Nose Pliers
Round Nose Pliers
Flush Cutting Wire Nippers
Permanent Marker
Measuring Tape/Ruler
Bracelet Mandrel
Penknife
1/4″ dia. Masking Tape
Rouge Cloth

Materials:
96″ (240 cm) 20 ga Soft Square Silver wire
69″ (175 cm) 22 ga Half Round Silver wire
22 x 30 mm cabochon

Substitutions:
22 ga Soft Square Silver wire can be substituted for the 20 ga. wire.

Available from my tutorials page and my Etsy Shop.

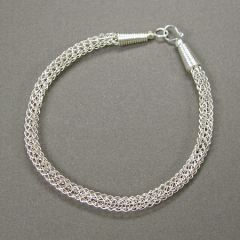
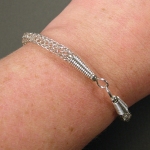
YOJ09-22 Viking Knit Bracelet

Viking Knit Bracelet (2009)
Fine silver, sterling silver
Nalbinding, cold connected
L 20.5 cm x W 0.4 cm

I’m hard at work on the tutorials for my class, so this week’s project is the product of that work.  I’ve been doing a lot of photography, and editing and layout.  I’ve been pretty much eating, sleeping and breathing the project.  The first tutorial is finished, and the second is well in hand.  Four to go… and six weeks until the classes start.

More photos:

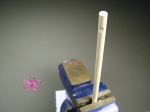
“The Vik-Knit 3000”

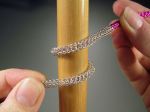
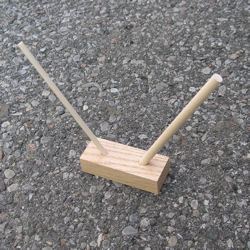
In preparation for my class at the Haliburton School of the Arts this summer, I asked my beloved husband to prepare some tools for the viking knitting segment.  My older son, Thumper, was very keen to help.

Thumper has recently become complete fascinated with machinery.  I’m not sure if this is a reaction to the movie “Wall-E”.  Anyways, he’s been drawing fantasy machines and coming up with all kinds of interesting names for them, most of which end in some denomination of 1000.  “This is a Cheese Grater 2000!”  “This is a Hopping Frog Truck 3000!”.

So, of course, he was very interested in what Daddy was constructing.  It’s just simple dowel holder, which gets clamped to a work surface.  Thumper decided it needed a name.  After asking what it was used for, and being told “viking knitting”, he said “Let’s call it the “Vik-Knit 3000!””

I keep trying to come up with a “Ginsu Knife” type infomercial to go with the name.  “The Vik-Knit 3000 will make your viking knitting a breeze!  Clamp it to the desk and you’re ready to go!  It will practically do the knitting for you!  But wait!  There’s more!  Order the Vik-Knit 3000 now and you’ll get two – count ’em – TWO! different sizes of dowels!”

LOL.  Anyways, it was just too cute not to share.

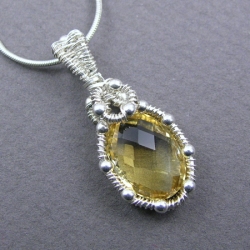
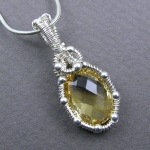
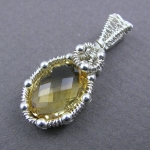
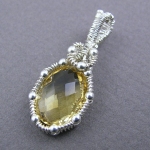
YOJ09-07 Double-sided Citrine Pendant

Double-Sided Citrine Pendant (2009)
Sterling silver, fine silver, citrine
L 3.0 cm x W 1.3 cm
Constructed, woven

I bought this wonderful citrine at the Toronto Gem & Mineral Show many years ago.  I think I bought it when Thumper was still a baby.  Part of the reason I’ve never used it is that despite how beautifully cut it is – double sided cushion cut – I didn’t really know how I wanted to set it.

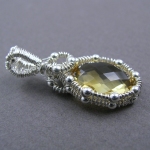
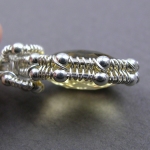
This week, while giving myself a break from the never ending viking knit project, I decided to go digging in my stash and found this beauty again.  I decided to try setting it to show off both sides of the stone.  I’ve discovered that I’ve developed a serious dislike of wrapping with half round wire.  At least, I dislike the 21 ga half round I have.  It’s just too thick for what I want to do.  So, to make a thinner setting, I use 28 ga fine silver.  It’s fiddly to work with, but it allows the stone to take centre stage instead of being overwhelmed by the wire.  Both sides are worked almost identical.  The bezel is basically two pieces of square wire woven with 28 ga wire.  The channel created in the centre of the weaving holds the girdle of the stone.  The 2 mm beads act like prongs to hold the stone in the setting.  It’s visually similar to the pendant I made in Week 4.  I like the way it turned out.

I’m making progress on the viking knit piece – it’s now 3 1/2″ long, but I’m starting to doubt that I will have it finished in time for entry to the competition.  *sigh*  I’ll keep plugging away at it, because it’s really starting to take shape.  At the same time though I need to work on production pieces, hence the citrine pendant.

More photos:

Tutorial – Double Celtic Cross & Scrolls Earrings

.

.

.

.

.

.

.

.

.

At long last, a new tutorial!

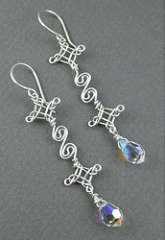
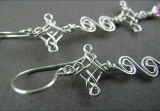
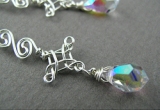
Double Celtic Cross & Scrolls Earrings

I created this design back in 1998, and it’s always been very near and dear to my heart!  For those of you who love all things Celtic, these earrings combine a couple of classic Celtic elements:  crosses and scrolls!

14 pages, 63 photos, 45 steps, plus design notes

USD $10.00

Available now from my Tutorials Page.

Tutorial – QEW Earrings

QEW EarringsQEW Earrings

Inspiration comes from the strangest places! This modern-looking pair of earrings was inspired by an Art Deco-era light standard I spied while driving along the Queen Elizabeth Way, in Toronto – and hence the name, QEW! I can’t remember exactly where it was – somewhere between High Park and the Humber Hump – only a quick glimpse, but it was enough!

9 pages, 26 photos, 22 steps, plus design notes

FREE

Available now from my Tutorials Page.

(Let me know what you think of the new tutorials format.)

Happy New Year!

Tutorial – Undercurrents Earrings

Undercurrents EarringsUndercurrents Earrings

The surface of the ocean shows only the smallest hint of the turbulence underneath the waves! This is a great project for practicing precise measuring and mirror images.

11 pages, 35 photos, 39 steps, plus design notes

USD $5.00

This tutorial was voted “Best Advanced Tutorial” &”Favourite Piece” by the Members of the International Guild of Wire Jewelry Artists, Earring Tutorials Contest 2007. IGWJA decided to put it into the advanced category for the purposes of the contest, but in my opinion, this is an easy project.

(FREE to IGWAJ members, login to the guild’s website to access the tutorials library. Note: IGWAJ version does not include all of the design notes)

Available now from my Tutorials Page.

Tutorial – Micki Ring

Micki RingMicki Ring

This bold, geometric design was inspired by the work of Max Froehlich (1908-1997), a Swiss-born goldsmith who was part of the “Modern” school of jewellery design. With one change, it is possible to make two variations of this ring! In heavier gauges, it makes an appealing men’s ring! The ring is named after Micki Bleily of Parma, ID, for whom it was made as a Secret Santa gift in 2002.

Project instructions contain both variations – 11 pages, 52 photos, 43 steps, plus design notes

USD $5.00

Available now from my Tutorials Page.

Tutorial – Illusion Prong Ring

Illusion Prong RingIllusion Prong Ring
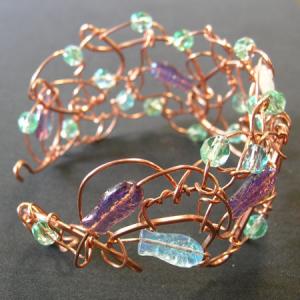
This quick and simple ring creates an illusion prong setting for a 6 mm bead. A modified version of this project was published in “Contemporary Bead and Wire Jewelry” by Suzanne Tourtillott and Nathalie Mornu.

5 pages, 16 photos, 14 steps, plus design notes

USD $5.00

Available now from my Tutorials Page.